Friday, July 29, 2016

Pocket Holes to the Rescue

  This afternoon I came up stairs to get a book. I found that at sometime in the last 24 hours another shelf had broken and fallen to the floor.  Luckily nothing was damaged and the repair solution was easily at hand.


the space where the shelve should be.

the reason the shelf fell down.
  The plastic pins  that hold the shelves fatigue with age and break, especially when the shelves are filled with heavy books.

pocket holes to the rescue
  I went down to the shop and pulled out a piece of scrap 3/4 ply, that had be used at least once before and quickly made a frame with pocket holes. Four passes on the table saw and eight pocket holes drilled,  ten minutes work including the time to put all the books back on the shelf.

shelf repaired, and not likely to fail again.

  When this happens, as it has happened before the broken pin gets left in the hole. The last time I drilled out the broken bit of pin.  Once the pin was removed it was replaced with another pin that will probably fail too.  This time I put a wooden frame in place, the lost space on the shelf is not enough to bother me.


the frame/bracket thing is solid and with a bit of stain,
 it will blend in fine.
   I really like having a shop, a few tools and some sticks of wood laying around.  Otherwise a crashed piece of furniture like this would be such a pain.  I don't know how folks live with out a shop.

cheers, ianw

Tuesday, July 26, 2016

Portable Vise

Recently I found this video on the making of a portable vise.  I watched the video and had the feeling of deja vu, all over again.  It is an easy to make Moxon style vise.


   A while ago I made a vise of very similar  same design.  I don't know if I had seen  this video and copied the idea, or just great minds think alike.  My vise uses almost exactly the same design and clamps.


   My vise is made of oak and I like the holes that are bored in the vise from the video, it will make adjustment easier, I'll going to drill some holes in my vise.  You can see on the left end of my vise string.  I strung both halves of my vise together so that the pieces stay together when not in use.  My shop can be a bit of a mess, much of the time.

 cheers, ianw


Saturday, July 23, 2016

Work Continues

  So we got home last evening and this morning I went into my shop. After spending an hour watering our desert dry back gardens.  The grass is dead but we are trying to keep the flowers looking good.

  Sadly for me the magic elves did not come in while we were away and clean up.
   
   I am using 1/8 inch Baltic Birch plywood for the drawers and the is no real good way to deal with a five foot by five foot piece of sheet stock in my shop. Today I cut off all the strips that I will need and got that sheet out of my way.


  What I did was lay the sheet of plywood on my work table first.  The sheet hangs over on all sides.  To support the plywood sheet I put long boards underneath and clamped them to the table and the sheet stock to the boards.  The anvil is there to help stabilize the wood while I cut it with my Japanese style saw.  I find the thin blade and pull stroke cutting easier to control when cutting very thin material. 

  Once I cut the sides  I made the bottom from 1/4 ply into which I cut shallow rabbets using my making gauge, knife and shoulder plane. I needed those rabbets to give me some more gluing surface to hold the drawer together.


  There is the bottom drawer, without its face of elm.  For of the fussing, fitting, and gluing the 1/8 ply to the 1/4 ply I've decided that the drawer is too flimsy. I will have to add bracing to the corners. Happily all the big pieces of wood are dealt with and I can putter away with small things that are easy to lift.

   Cheers, ianw


Thursday, July 21, 2016

Dixieland tunes for your Woodworking Shop

  Eva and I are on a bit of a road trip into the heart of Michigan, she is taking a course at Delphi Glass and I am wondering around town and relaxing, mostly.  

  I didn't want you all to think I forgot you so here is some great old music to play in your shop while you are working.


  We get home late Friday and I guess I better get back to work.

cheers, ianw

Monday, July 18, 2016

Designing and Building a Modern Bench

  Summer time is here.  I hope that you are sitting out on your deck or under a tree enjoying the fresh air and sunshine.  Here in Ontario we are only four months away for cold and grey and damp, so we are all taking advantage of the fine weather.

  I am in the midst of a week's holiday away from the shop.  My wife and I have been riding our bikes and I have had a couple of really great motorcycles rides too.  What that means is that the shop is getting ignored for a while.  With luck I will spend some time on projects next week, but my five year old grand daughter is coming for a week's visit and she can be distracting.

  Anyway, excuses aside I found a video to share.


   I like that we can see the design process as well as the building process.  It always makes me think when I see a shop with excellent power tools yet see how much hand work still remains to be done to get a quality finished project.

 cheers, ianw

Tuesday, July 12, 2016

Small Shop Tour

  Today I thought I would link you to a small shop tour from the internet.  My shop is almost never organised enough that I would give anyone a detailed tour like our host Matt.


  I think we are always looking for ways to make our shops more effective and our lives more organised. 

  Both General International  and Kreg have metal legs available to make building your own custom bench fast and easy. 

  If your project production has slowed down maybe it is time to do some work on shop organisation.

cheers, ianw

everyone likes summer flowers.


Thursday, July 7, 2016

Hand Made Trim

   I need to make a base next.  I used elm to create the base.  Elm has character and a miserable grain that is stringy and does not lend itself to nice case work.  I knew that but ignored myself. 

box base clamped on
 my mini bench topper.
  Since this is a no fastener project I decided to use my beading tool to add a bead on both the top and front face of my base. I could have cut slots with my router and shaped the piece a bit after the fact. 

   What did I learn? I learned that next time I will choose my wood more carefully.  The front board of the base has a knot on the edge. Were I not beading the edge it wouldn't matter as much. And if this project was for someone else, I would have had to begin again.  Since this is my box, I'll fudge the finish on the front and hide the wee problem. I also learned that I really like working with the beading tool and will use it more in the future.  (it is a bit slow, or at least I am slow using it)


 My work with the beading tool is self taught.  I scratched a shallow bead on all sides (6 beads) and then set the blade for a deeper cut and did all six slots again.  I also found that sometimes the scrapper worked better on a push cut than on the pull.


 The other thing I did but doesn't really show in the photograph was use a hand plane to created the 1/4 inch round over.  I laid it out with my marking gauge.


and planed the corner to the marks with my block plane.


  I have to next decide and make the drawers I am thinking four. One deep, two not so deep and the top drawer very shallow. That is for tomorrow.

cheers ianw


Tuesday, July 5, 2016

Moving on with the jewellery box

  I confess that the workshop has not captured my fullest attention these last couple of weeks. Over the long weekend there was family things and riding and other things to distract me.

  Today after a trip to the market, good food, intense heat . I tackled the next step in the box.  I decided that I would make the entire project relying on glue only, no fasteners, not even tiny 23 gauge pin nails. I very carefully trimmed the two sides so they are square and flat. Today I glued the sides to the top.
squares, no clamps.

  I measured everything and then put glue on the sides and used my many squares to hold the sides up and square counting on gravity to hold the pieces in place.  Once the glue set a bit I added two small corner braces.   

  This project is taking a long time for a couple of reasons.  One I am focused more on family stuff right now than on my wood working hobby. And two, this is a project that's plan is not too firmly formed in my mind.  I want a nice box, it should have at least three drawers, one of which will hold various wrist watches and beyond that the details are hazy.  

  As an example of hazy, it was just yesterday that I decided, no fasteners. Many years ago I made a mantle clock with no fasteners, it was kind of cool and a bit of a challenge too.  Having everything rely on glue slows  down the process too.  I am thinking a hollow base with a hidden compartment, for no real good reason expect I haven't made a box with a secret before. The drawers will be 1/4 plywood with a elm face but I haven't decided if the drawers will be divided into sections or not.  The haziness is only possible because I am so familiar with the customer and his quirks.

  We are in drought conditions but hoping for rain on Thursday.  If you aren't a farmer you are probably enjoying the sunshine. I hope you all had a good holiday weekend, both Canadians and their neighbours to the south.

cheers, ian


Sunday, July 3, 2016

Make - a camera case

  Recently I bought a Nikon S01 camera. 


  It is a very small camera so it is handy to have in my shop. It takes better photos than my phone and so the images should be better in this blog in the future.

  Almost the entire back side of the camera is  viewing screen and to protect that screen you can buy a very nice hard case. In my case the case was going to be half the price of the camera, and I just couldn't undo a really good deal on the camera buy spending that much money on a case.  None the less the viewing screen does need to be protected.
  
  The solution was to make a case.


  I have watched videos on Youtube where people make duct tape cloth, or duct tape leather and that is what I did.
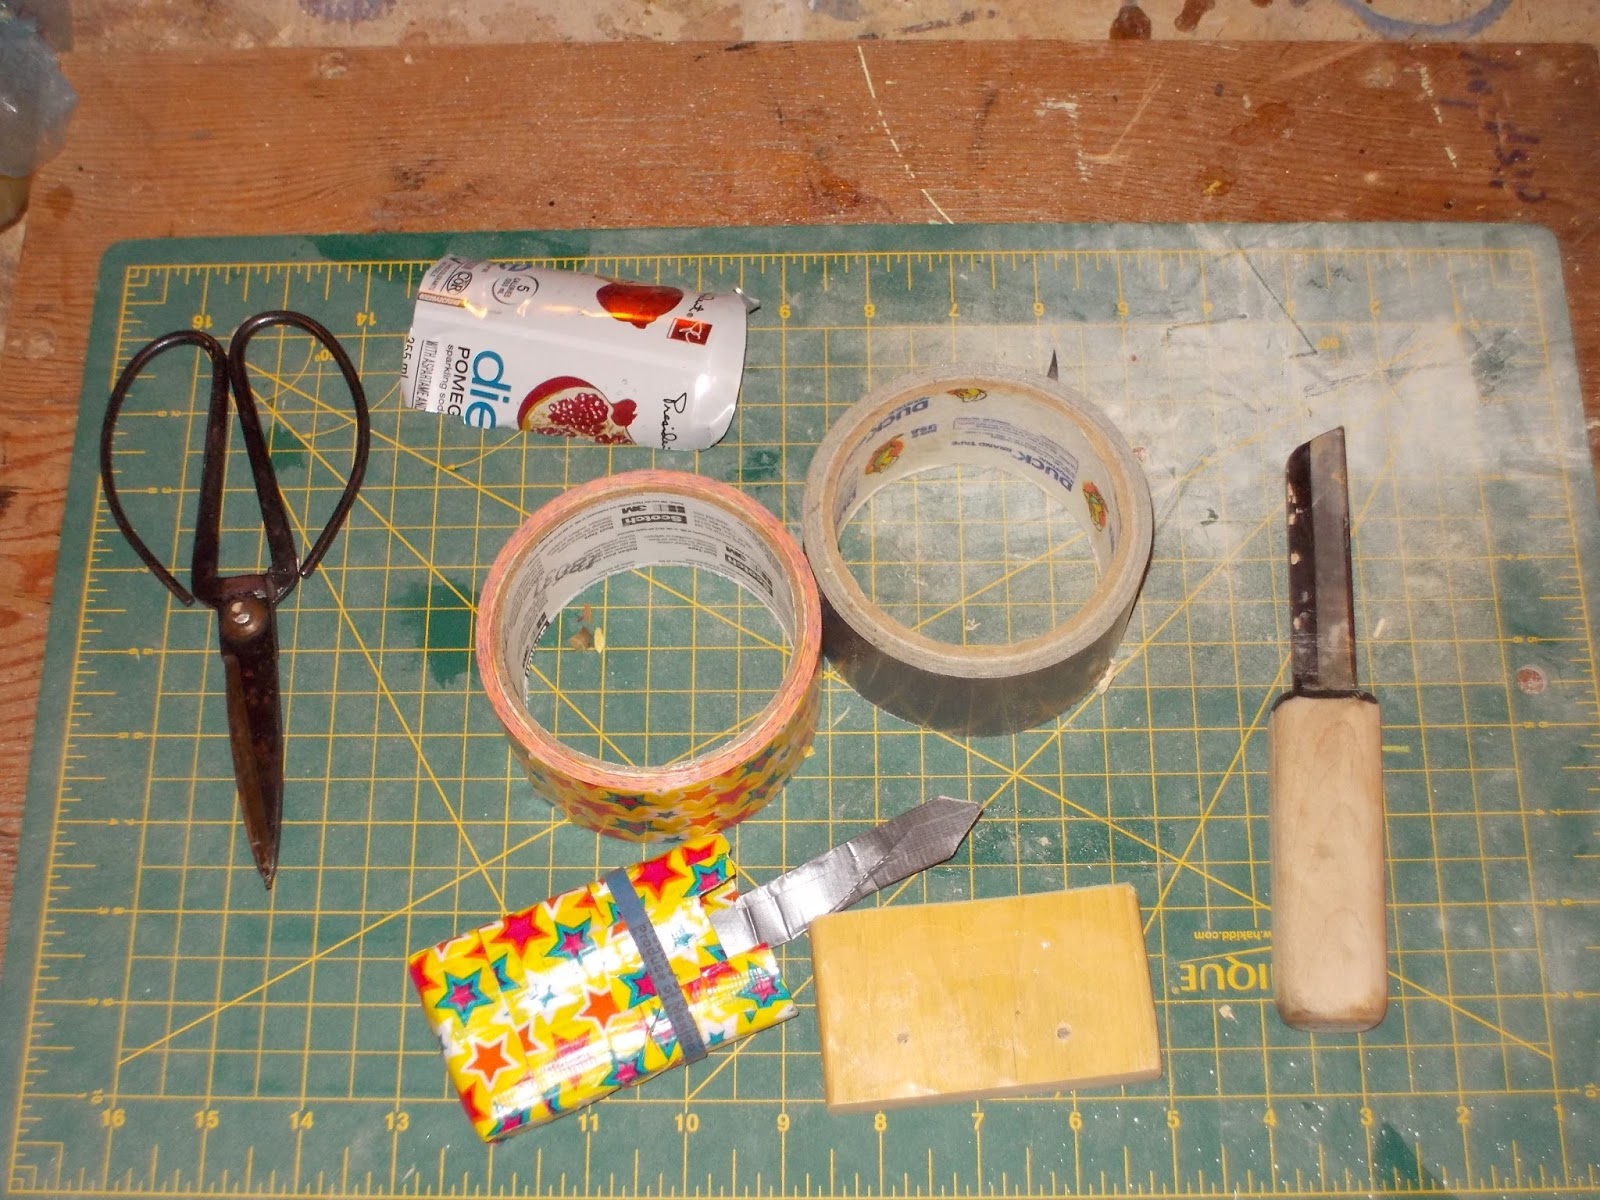
camera case tools
To begin this process I cut out a wooden template slightly larger than the camera.  I also cut up  soda can into two pieces slightly smaller that the camera's large sides.

  I began by wrapping the template in duct tape with the sticky side facing out.  I then laid the soda can sections onto the tape. The tin layer provides protection and structure to the case. 

  Once the tin was in place I put the second layer of tape on.  Needless to say it stuck very well since it was glue surface to glue surface.   The fancy star tape is in my shop drawer because I have grand daughters and they like pretty stuff.  Gray tape works fine for me mostly.

  I also made a strap closure with more duct tape.  

  Making something like this needs no special tools, although the cutting mat is nice to work upon.  The soda can cut easily with the scissors and I used the shop knife to trim straight edges on the tin.  I like making things, especially things that have purpose.

  The panels for the jewel box are sanded and cut to size. I just need to find the time and inclination to assemble the pieces. Currently the weather is too nice and there are too many grand children things I'd rather do.

cheers ianw