Friday, November 28, 2014

Two Christmas Toys - Wooden of course.


  Of course you don`t have to print your plans out from a CAD programme but a printed paper plan is nice to do if you plan to make more than one of the particular toy.


  Build and enjoy.

cheers, ianw

Wednesday, November 26, 2014

Cajons at School

                                               
   Last November 3rd I showed a pile of 30 Cajon kits finished and ready to be delivered to a local school. It was a big job for a small shop space dealing with the sheet stock, and a bit repetitive too. 

  Today I went to the school to see have the kids were getting along putting their kits together.  As with so many school activities the parents financial contributions have been slowish to arrive and so not all the kids have their kits yet.  The drum above belongs to a good little boy that was the first in the class to finish.  All that remains is whatever wild paint job he decides.  He can also really play the cajon.  I opted for 1/8 ply for the front and I feel that contributes to a fine sound.


  You can't imagine the chaos of the class room with about 12 kits in various stages of assembly.  Some of the kids have never held a screw driver or driven a nail, but they are right in there making it happen.  I supplied the kids with clamps for assembly and a hand plane to trim the edges once it is all glued together.

  I've been promised photos of the fully finished and painted Cajons. The sound of the drums is remarkably good so I suggest the cajon as a basic wood working project for you and your kids.

cheers, ian 

Tuesday, November 25, 2014

Garage Finished, Mostly


  I am a day behind my time, for the last while I have been able to post a blog Monday, Wednesday and Friday.  I missed yesterday's blog I had an attack of " I don't feel like it, my tummy hurts."  You would think that you would out grow such issues buy the time you were 6 or 7 years old, but I haven't.

  I have two things to show in this blog. The platform in finished in the garage.  You can see the small freezer sitting on one end and the nose of the car just under the platform.  This a pretty rough carpentry, mostly 2 by 4 and 2 1/2 screws. I braced the legs with angled pieces of wood and instead of toe nailing I used my KREG jig to attached the pieces. Kreg even has a jig just for this time of work, their KJHD Heavy Duty Pocket hole jig. Using the jig makes for stronger and more consistent joints. Note that when driving pocket hole screws, even 2 1/2 screws a drill driver is better than an impact driver.  It takes lots of practice to know when the screw is set and tight with an impact driver, if you aren't careful you will strip the screw and end up with a weak joint.

I still need to make a small step from
the door step to the freezer platform.  A
job for another and warmer time, I think.


 Elm picture frame finished with tung oil. Elm is an under rated wood in my opinion. It can be difficult to work, but the grain gives it tonnes of personality. If you are making a number of picture frames you my want to consider Picture Frame Pliers.

 cheers, ianw


Friday, November 21, 2014

Friday's Jobs

  Many people are filled with grand plans and noble ideals.  I'm not.  Today my great hope was to not to have to put on socks.  I wanted to spend the day wandering about our house and maybe do some work in the wood shop too. 

   One of today's jobs was finish off Kieran's submarine bank.  Kieran drew a plan for me two weeks ago.


  The submarine has two compartments and one side is glued on while the other side is held on with screws. Kieran wanted to be able to get the money out, I didn't want it to be too easy.


  The real job of the day was making a picture frame for a painting by our friend  Rhonda.  I made the frame from elm.  Elm is a wood that has wonderful character, but is stringy and working with it can be a challenge. 

  When I was cutting the rabbets on the back of the frame sections the wood came away in strings and choked the dust collection system on my Jess Em router table

  After I got the elm cut to length I used my KREG Klamp table for assembly.


   The picture frame is finished with tung oil and once it is dry, the glass  cut and the painting installed I will post a picture for you to see the result.

  Here is a link to an instructable making a wooden picture frame using biscuits.


Wednesday, November 19, 2014

Home Made Router Plane


  If you are working in a small shop area there you can make a good argument for a Hand Tool shop. If you search the Internet you can find dozens of sites that feature D.I.Y tools and short cuts for making hand tools.  Paul Sellers  has a you tube channel where he shows some of his projects and in the above video he shows how to use a chisel to make a hand router plane.  If you had to cut many dadoes it is cost effective to buy a router plane, if you occasionally need to clean out hand cut dadoes this shop tip is a way to save money and get the job done.

  Winter seems to have arrived a bit early.  We've had several days with wind chills below zero. I want to remind you to bring your iron and steel tools in out of the garage.  If your tools get warm, when you heat the garage while you work and then cold over night with the heater off your tools will get condensation on them, and then RUST. 

 I think it is easier to have a tool box that you fill with steel tools and bring in at the end of the work day than it is to remember to clean and oil all your tools at the end of the day.  It is also cheaper to move the tools than it is to heat the garage 24/7.


DeWalt ToughSystem Complete Combo Tool Box w/ Cart Kit DWST08212
Dewalt Tough System
     A tool box system like the Dewalt is not cheap,but replacing your auger bits, drill bit, planes, knives and chisels is more trouble and expense in the long run.

  Get out there and build something.

cheers, ianw

newest look for the shop???!!!


Monday, November 17, 2014

Lets Look at our Portable Belt Sanders Again

 
Belt Sander Tips

  The belt sander was a staple in many wood working shops in time gone by.  Generally they were viewed as noisy, dusty and too aggressive, but we used them because they were the only game in town.

  I have two belt sanders that I turn to when I am looking to remove lots of rough wood, or glue. I confess to not having thought about the newer features or considering replacing my old standbys.

  As I watched the video I was taken with the improved quality of the dust collection and I'd never really thought of the advantage you get with variable speed. 


  The video above shows a really good solution for life in a small work shop. A platform like the one in the video adds versatility to your sander at very little cost. 

+++++++++++++++++++++++++++++++++++++++++++++++++++++++++++++++++

  A foot note on today's blog is the work that I am doing in our garage. I am building a 12 foot by 4 foot platform/deck 3 feet hight inside our garage to take advantage of our garage's very high ceiling.


  In the front of our two car garage is a freezer and two sets of off season tires. (tyres).  Once the deck is complete the tires and recycling containers etc will be underneath and the freezer and storage rack will be on top. Effectively we will increase the available storage space in the garage by 48 square feet. Wouldn't everyone like 48 more feet of storage?!

 
   I worked for a couple of hours in the cold building the frame and legs for the deck. This is a job that I should have done earlier in the year. 

  The legs still need to be braced before moving the deck into place and screwing 3/4 inch sheet stock on top.  Working with the 2 x 4 sometimes make me think that I am not a wood worker, but a weaver.  I had pretty good 2x4s, I picked most of them myself and they still have so much internal tension that they twisted as I was working with them.a

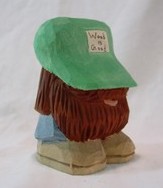
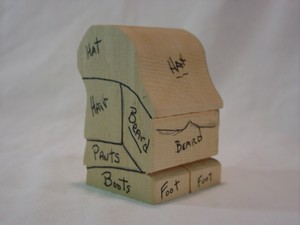
  Once my hands got too cold I came inside and worked on Bufford, he got a shellac coat and I've begun to paint him.  If I get some quiet time over the next couple of evenings he should be done by the end of the week too. 

  I have a couple of days away from the shop, but I hope to be finished the build by Friday and maybe get all the stuff moved on Saturday.    

  If you are where the snow is, shovel carefully.  If are where there is no snow, lucky you.

cheers, ianw 


Friday, November 14, 2014

Bufford - a beginning carving project


   Every now and then I return to a beginner type project as a practise piece.  It is sort of like a golf pro taking time out to work on their swing again.  I don't expect to make any big changes to my method of work because of Bufford, as he didn't take much time to carve his real use is as an exercise in painting.  Painting and finishing are my weakest areas in carving. 


  The lay out for Bufford is pretty easy.  I started out with the standard plan but deviated somewhat.


  I am going for the ZZ Top look. If you are interested in trying your hand at wood carving there are lots of pictures of Bufford on the net and all your really need to get started is a sharp knife and some basswood( or clear pine). Something like this sanding file or needle files will make final shaping quick and easy. 


  I made my guy fairly large.  A larger piece is easier to hold on to while working, if you are going to make a small carving start with a extra long piece of wood. Do most of the heavy carving when you've got a good hand hold available then cut the piece free of the hand hold for fine work and finishing.

  Give carving a try, you never know. And, when Bufford is done drill a hole or two in his head and make him a pencil holder if you can't think of anything else.

cheers, ianw


Wednesday, November 12, 2014

Band Saw Scrap Bag

  Jack Houweling from You tube recently posted a video where he makes a small scrap bin that attaches by rare earth magnets to the table of his band saw.


  Jack's video was an inspiration to me because I seem to always have small bits of wood scattered around the floor by my band saw. The  wood on the floor interferes with moving the saw around the shop by jamming the wheels of my mobile base. 

typical band saw situation.


Instead of a wooden box I tried holding
 a shopping bag on with magnets.
The magnets weren't strong enough through the bag material,
so I attached the hooks that came with the magnets and
 made a modification to the bag.

I glued a strip of wood inside the bag and then drilled holes
through the bag and the wood strip.

  The arrangement with the wood strip supports the bag on the hooks and the hooks make it easy to lift off and empty.

   In the video Jack shows taking the scrap box to his table saw.  My table saw is a contractors saw with an aluminium top.


  I bought these magnets at a local surplus store.  When I bought the ten pack I was pretty sure that I would never find uses for all of the magnets. Now it appears that I will have used all ten magnets up in just a couple of weeks.

cheers, Ian 

Monday, November 10, 2014

Tova's Blocks


  My most recent shop project was completing some blocks to go to my Grand Daughter in Sweden. I make children's blocks from 1 1/4 inch poplar and leave them unfinished.  Poplar is harder than pine and usually has a bit of grain and colour to it.  My Grand Daughter Tova is getting name blocks as well as building blocks.  
  The letters were traced from a stencil I bought at the Dollar Store and then incised using hand carving chisels and a Dremel Tool. Since getting a variable speed Dremel tool I have found dozens of uses for it.  I have found it so useful for carving and craft projects that I don't even put the tool away, it hangs beside my bench all the time.


  I thought I would include the photo sent to me by a buddy.  I don't know where Brian got this picture of the oldest wooden door in England. This door is at Canterbury Cathedral and recently I heard it being talked about on QI, the television show from the BBC hosted by Stephen Fry.

  It is November and time to get working on those Christmas gifts.  Here is a link to a series of photos of past Christmas projects to help inspire you.


Lets turn off the TV and turn on the tools.

cheers, ian


Friday, November 7, 2014

Friday at Home

  Today's blog doesn't have one big over arching theme, because the  last couple of days hasn't featured a major project.

  This morning I delivered the 30 Cajons allowing me to reclaim space in my shop which desperately needs to be swept and vacuumed. 

  While I have been working in my shop my wife has started Christmas baking.  She has made nine different types of cookie, 150 cookies each type.
                                                           
I got involved in a quick repair of Eva's necklace box, some how a grandchild managed to knock the back off of the box last weekend.  No big deal, a job for glue and clamps. (you can never have too many clamps.)
necklace case repaired,
the white back was the bit glued back on,
*********************************************************************************


  One of my favourite wood workers on the Net is Izzy Swan at Think Woodworks. A while ago I watched his quick video, simple holder for woodworking plans.  I was a quick little build that solved a problem for him in his shop.

  I took that idea today and made a couple of changes to the document holder that Mr. Swan made.


 My holder is larger, 12 x 17 inches and has many more holes drilled in the front edge.  My plan is to use this holder as a working surface when I am drawing, painting and colouring with pencil crayon. I have been playing around with "Fine Art" for about a year.  Drawing and painting have proven to be a satisfying pastime for me that is portable, quiet and not too costly.
3 x 5 miniature that came third
at the Rockton World's Fair this past Thanksgiving
  Having a dedicated drawing board means that I can move my work around to chase good light and comfortable seating and as well to not have to put everything away every time I take a break.


 Aside from making the working surface larger and adding more pencil holes I opted not to use clips to hold the paper down, instead I screwed a thin strip of wood down at both ends of the top and slide the paper underneath the wood strip. I felt that this system for holding paper was more versatile than clips.  I recognize that this system will only hold 3 or 4 sheets of paper at a time effectively but I think that will not be an issue.


you can see the strip and screws in this photo
 It is nice to have a wood shop so that these simple tasks can be dealt with quickly and easily.

  It's the weekend, get out there and make something.

  cheers, ianw


Wednesday, November 5, 2014

Bentley Factory Wood Shop

  Yes cars are steel and glass and high technology but when you want your car to look really good, you still need wood.

  Check out the video of the trim shop at Bentley working with walnut veneer.

sorting and matching sheets of veneer.

  My shop is not going to be doing anything as pain staking or as artful as shown in the video.  I have watched the video several times, I love how the final work is done by hand even though they have all the high technology in the world available.

 Having finished the drums I have some basic projects ahead of me and a couple of repairs to do. First, vacuuming, there is saw dust everywhere. Cutting and machining the baltic birch plywood created tonnes of dust, even though all my machines have dust collection. 

  The next round of shop projects will make less dust and much less noise which will be a welcome break from the recent factory like work environment. 

  Since this has turned into a Blog with wood working videos I think I'll share another video that I have watched a few times and maybe even shared here before.

Making wooden tool boxes.


  It seems like a relax, drink and beer and watch some movies kind of blog this time.
   
   So, relax.....


cheer,ian


Monday, November 3, 2014

30 Cajons Later


My drum kits have rabbets instead of finger joints.


 On the 17th of October I wrote about cutting down the plywood for the 30 Cajon kits that I was to make.

 60 sides.
 60 tops/bottoms
 30 fronts
 30 backs.
 120 rabbets
 30 three inch wholes
 15 snares cut in half
 and three hours of wrapping. 
 All that remains is to cut 120 battens to be glued inside the drum to support the thin plywood that makes up the front and back of the cajon.

  This is a job that was not engaging but still required quality control.


 These are the two stacks of bundles that will be delivered to the school at weeks end.  I have to cut 1 x 2 to make the battens for these 30 drums (boxes) and provide the 5/8 #2 screws that will be used to screw the fronts onto the boxes.  The backs are going on with glue and brads.

 This is a task that would have been overwhelming if I didn't have a sliding mitre saw and a router table.

 I cut the sides and the fronts at the same time so that the pieces for each drum would be exactly the same length.  I also cut the top/bottom in pairs so that they would be exactly the same length.  When you are making this many units by hand it is inevitable that there will be slight variation one to the next, but that isn't a problem as the parts are not meant to be inter-changeable. 

  The process of making 30 Cajon drums in a home basement shop was interesting and educational. It taught me that I would not really like to take on another project of this size and type again. 

 Initially I tried to do each operation only once like a factory production line would but that didn't suit my space or disposition. It was dull and meant that there were big piles of pieces stacked on my bench and they seemed to be in the way half the time.  

 By the time I was making the last ten drums I had settled on a system of cutting the front, back and two sides, then drilling the whole in the back with a three inch hole saw bit and cutting the four rabbets.  That way I ended up with a manageable number of piles in my shop.  After I had the first section done I cut the top/bottoms and added them to a four piece package and sanded the rough bits and edges.

  Once I had the ten x six piece bundles done I taped four rubber feet inside the bundle and wrapped the whole thing in stretch wrap.

  Mixing up the procedure turned out to be less boring and easier on my back as I used a variety of postures instead of staying in one position for an extended time.


cheers, ianw