Wednesday, January 29, 2014

Need to Warm Up??

  We seem to be locked into a deep freeze, it as after all Canada, we have just got out of the winter habit over the last few years.  It is so much like winter that the kids are playing hockey on the frozen pond at the end of our street.  Not only that, yesterday a couple of the teen age boys shovelled our side  walk on their way to the pond. Good kids, I have no idea who they are.


Mr Heater Big Buddy F274865 Propane Heater


     If you are freezing in your basement shop, Mr. Heater Big Buddy is an option to consider. It is rated for indoor use.

cheers ianw

Monday, January 27, 2014

Sunny Nook in the front of the house


view facing  north east from the hallway

view facing north west from our galley kitchen


  At the front of our house is an alcove that is famously called a "breakfast nook" on the blue print.  We don't breakfast there but we have made it into a nice little spot that gets a remarkable amount of sun even though it faces north. When I set out to write this blog I was going to talk about how it is more practical sometime to break down and buy from an "Ikea" sort of place and then make adjustments to suit your situation then it is to build from scratch.

   We went out last week and bought the Ikea storage units called Expedit. On Saturday we assembled the pieces and slid them into the nook space.


  I know that Expedit is just boxes and I could have made them in the shop but.... not for anything like the cost that Ikea charged, if my time was worth anything. And while I love wood, the clean and cleanable finish of the melamine is not something that I can do in my shop, so for that reason and the fact that we like the clean lines of the Scandinavian style, Expedit works just fine. We feel that it is furniture that blends in, and is sort of invisible rather than standing out to be seen.

  Having assembled the Expedit and installed the accessory boxes I set about making the unit user friendly.  The boxes are 12 inches deep, great for sweaters and socks, not so great for the random  stuff that collects by the computers at the front door of our house.
  
  I decided that I would make a two smaller boxes to fit inside the cloth accessory box.  That what workshops are for, right?

 
  Then I decided that I didn't what to make a wooden box, it would be heavy, so I recycled the card board in which the Ikea unit was shipped.

   Making the cardboard container was like a shop project.  I had to prepare the material by cutting it to size, just like a wood project.  The layout used my standard shop tools, a large layout square, ruler and pencil, instead of a saw I used my shop knives to cut the cardboard to size.  To make the container more rigid  I made it three layers thick by gluing the layers together with Weldbond glue. I've always thought of Weldbond as the ultimate "white glue".  Needless to say the joints had to be taped since there was not enough smooth bearing surface to glue the edges together like I would with wood.


     The 12 x 13 1/2 x 6 inch box that was glued and taped together sits in the bottom on the cloth box, and on top of it sits another cardboard box. ( 12 x 13 x 4 in)
this is the container in the upper left hand of the third photo. 
  The top box has a handle that I knocked off in the shop from scrap wood  using, a band saw, a wood rasp and two different sanders. Since it have the tools I am like to customize things.  You can see in the top of the photo a three peg rack that holds keys; a bit of scrap wood, three short lengths of dowel and a bit of glue, easy peasy. 

   Now there is a place for all that stuff that hovers around the door, you know keys, note books, shopping bags, wallets, phones etc.  Instead of sitting in a heap on a table by the door it is all safely out of sight in a box/drawer.

   What I discovered as I took the photo to show off the space was something very special:


  In that photo are four things of special significance, two are wood and two are art.

  The art first, deep in the corner is an abstract painting by our daughter-in-law, on the other side of the window are the other two small paintings that compliment the painting behind the palm. Hanging on the wall is an art print of a frog, that I gave Eva for an anniversary gift years ago. The frog is very cool and was created by one of our kid's friends from University so there is a personal connection as well as artistic value.

   The wood; that little brown book case was made for my Mother by her father, at least 60 years ago.  It is a sad little bookcase that was clearly hammered together in a basement workshop with no idea that it would still be around so many years later. The other special piece is the bench that is under the window, my father cut the tree down at our cottage from which the bench is made and shaped and sanded the rough lumber with basic tools to make a bench for my front hallway, about three houses ago. The cottage is gone, as is my Father but the bench will last, like the bookcase to one day be in the hallway of on of my grandchildren's houses.  I love wood.

cheers, ianw

Saturday, January 25, 2014

Wood Show News


   Yesterday I spent the afternoon at the Hamilton Woodworking Show at the Canadian War Plane Heritage Museum.

   I worked at wood shows for several years and have been attending them for a couple of decades and even though I have become a bit jaded I still enjoy checking out the shows.

  I saw some of the old crowd still hawking their wares and even a couple of new faces.  I think shows are a good place to get a feel for what things cost, wood especially as there are always three or four companies at the show specializing in lumber sales.

  I also go to the shows to see the latest incarnation of well known tools.  The new Kreg K5 ticks all the boxes and....costs the same as the Kreg Jigs I was selling 10 years ago.  I have jigs from previous generations, and I think the K5 has gathered together the strong points for all the previous models.


Kreg Jig K5 Pocket Hole Jig Kit
  Mark Eaton, Kreg's sales rep and product demonstrator will be in Leamington for the Tool Expo next weekend.  It is worth getting the low down on the new pocket hole jig, if you are thinking about redoing that tired old kitchen or bathroom, the jig is the tool for cabinets and Mark is the guy to explain it to you.

  Since I was there on the opening day not all the wood carving had been placed out for us to see, however I got to see a piece that just made my jaw drop.

 This carved panel is 8 feet long.  The work is amazing and I can't even guess how long it took to carve it.
detail of the panel.
I wouldn't have the nerve to embark on a project of this size. Kudos to whoever did the carving.


jump into wood working,

cheers, ianw


Friday, January 24, 2014

Wood Working Weekends

  This is the first of two good weekends for wood workers in Southern Ontario.
  Beginning today, in fact just a few hours is the Hamilton Woodworking Show at John C. Munro Airport. 

 Banner Image for the Hamilton Wood Show event

    Like the ads say there is going to be a tonne of good stuff there.  I have reached a point in my wood working that I have all the big machines that I can use but am always looking for that little thing that  is new and different.  Often at the shows I find deals on consumables, there are sand paper sellers, people with wheels and hardware and always a booth of two with interesting sticks of wood.

  Next weekend for those of you closer to the border is the Tool Expo at Leamington Home Hardware.  All the big tool companies will be there as well as some smaller operators and local craftsmen.  If the drive from Windsor or Detroit is to daunting a prospect for this weekend, thetoolstore.ca has you covered on the next weekend.

Tool Expo

  cheers, Ian W


Wednesday, January 22, 2014

Latest Shop Activities

 Sometimes shop time seems to be filled with a bunch of small things, some of which take up a bunch of time.  

  For example:

    If you are a Freemason you know exactly what this is, and if you are not, it is exactly what it looks like.  The operative word here is exactly.  Rather than just knock out something that is symbolic I went to significant lengths  to have it accurate and therefore a real working tool.


  The inches are marked by pieces of 1/8 brass stock set into the length of the gauge.  I can't decide if I want to put a hinge in the middle or not.  Often times these things are hinged but the real gauge was not because a hinge can compromise accuracy.  I cut all those 1/8 inch slots on my sliding mitre saw (My Bosch saw is not a new model but is still an accurate quality tool.) after careful layout and marking. This is an occasion when I used a marking knife rather than just a pencil. 

   Another little project that has been floating around, and isn't really finished yet is:


     A wee walnut box for a wrist watch.  I mitred the corners on the aforementioned mitre saw with the jig I talked about Sept 28/2013 and then edge glued three pieces of the narrow board together to make the lid.  Why did I have the long thin piece of walnut?  I must have picked it up cheap at a wood show, once upon a time.  

    Sometimes when I don't feel like taking on a big project, or when my back is aching just a little too much I wonder into the shop and putter away my time with little bits and pieces. Sometimes I find a hunk on wood and then decided what to make it into, sort of the workshop equivalent of "clean out the fridge soup".  It is getting to be time to make a plan and work on a larger piece again, I just don't know what it is going to be yet. (we did see, today,  a nice table design that would be worth borrowing )


Photo: A rookery of rockhopper penguins
a bonus penguin

Tuesday, January 21, 2014

Cool New Tool

 The Rockwell Bench Jaw is a follow up to their successful JawHorse .  I have not bought a Jaw Horse because I don't have any excess floor space upon which it can sit. The Bench Jaw is a different story and one that will get my serious consideration.


Rockwell BenchJaw Hands-Free Bench Vise RK9006


  Like the JawHorse you are able to operate this tool hands free.  I don't know about you but a couple of times a month I find myself one hand short when I am trying to set something in my vise and get it level or square.

   Clamping a work piece into place so that it can be drilled or sanded can sometimes be a pain, especially if the work piece is small or an odd ball shape.  While I have a traditional carpenters vise,
I can certainly see an application for a tool like the Bench Jaw.


Friday, January 17, 2014

Shooting, Board that is.

  For the most part I work with power tools but occasionally I turn to a hand tools. Usually I use hand tools when there are small parts upon which to be worked.  Many of my kids toys and small boxes are made from pieces too small for me to comfortably hold for cutting on my sliding mitre saw, or to joint or plane with my machines.  Over the course of the last few years I have acquired some fine quality planes and hand saws that make these small jobs safe and enjoyable.

   Recently I bought the shooting sander from Lee Valley and yesterday I got around to making the shooting board to go with the sander.
 
sanding shooting box, orange because I am out of red spray paint.


  Usually the jigs I make for my shop are painted red but orange will achieve the same purpose.  I made the jig from a 1/2 plywood base and a 1/2 platform with trim used for the rail and cross piece. Initially I was a bit sceptical about the effectiveness of the sander and so did not dedicate quality materials to this jig.


  After I assembled the jig and put Minwax Paste Wax on the contact surface I put it to work.  


   Initially I found that if I trimmed the edge with my block plane I could then sand the edge very smooth and square on narrow boards. Smooth usually is also unintentionally rounded, using the shooting board, plane and sander will make it easier to keep the edges straight and square. 

    As with so many tools a shooting sander, and for that matter a shooting plane can be made in your shop but sometimes I am not interested in making tools, just using them.

   Eventually I will remake the shooting board from Baltic birch plywood but for now I am pleased with the result and with what the tool will do.


Wednesday, January 15, 2014

Hammer Time

When I say it is hammer time, I don't mean this: U Can't touch this.


  I mean it is hammer time, like this:


   These are three hammers from my shop.  The one on the left is a Warrington style cabinet makers hammer. I bought that hammer 30 years ago and it has followed me around and served me faithfully. This hammer taught me two lessons; one; good tools are so worth the money and two; if you were to be look very closely there is a chunk split out of the end of the hammer where I tried to use it for something other than that which is was designed to do.  The chuck had never been repaired because I like it to remind me to use the proper tool and not to be a dummy.

  The middle hammer is a cheap tack hammer (?) that is very small and light and that was purchased in a dollar store to go into my Grandson's tool box.  Over Christmas he tried to use that hammer, it is of no use what so ever to him.  The hammer is light but since it has so little mass, it needs serious swing speed, not the correct combination of variables for a small, inexperienced hand.

  The hammer on the left:


  is the surprise for this week. 

   I promised Kieran that he would get a tool box, with real tools for his birthday and my first swing was a miss. So...I went looking for a hammer with mass and that was manageable. There it is, a pocket hammer or a condo hammer, a hammer for the bottom drawer in an apartment kitchen for doing those little jobs that you can't do with the heel of a shoe.  Amazingly, it is a good hammer design, since it has an 8 oz. head it has some heft to and and so it handles like a small carvers mallet.  I used the pocket  hammer to drive in the 1 1/2 inch dowels on the bath room rack repair and it was perfect for the job. 

    I certainly wouldn't go out and buy myself a pocket hammer. I've got lots of hammers and mallets of various sizes, my answer to the pocket hammer is a 6 oz. hammer on a shorter than average handle that was my Grandmother's junk drawer hammer. 

   Consider a small hammer, it has it uses. 


Monday, January 13, 2014

Rack in the Bathroom


  Shortly after we moved into our new house (5+ years ago) we both realized that our master bathroom is larger than my first apartment.  We decided to make use of the space by my building a rack which sits over one of the heat vents in the bathroom.


    As you can see this is a pocket hole project.  Where I used the self taping pocket hole screws as designed the project worked fine.


  Where is used the screws and allowed them to be exposed to the air and damp, they begin to rust. (not surprizingly)  I decided to get on this little job and replace those rusting screws.  I had two options.


  Or: remove the screws, drill out the holes and replace them with wood dowel.


  I opted for using dowels as you can see.  I found that I had 1/4 inch dowelling and I didn't have any of the stainless steel screws.  This job wasn't big enough to warrant ordering special fastening hardware, If there were more repairs necessary, or if quality of finish had been more critical then I would have ordered the screws.

  FYI- stainless steel screws are weather resistant etc., but sometimes their sheer strength is lower than quality hardened screws.  You need to adjust the torque on your driver or you will twist the heads off your screws.

cheers,


Thursday, January 9, 2014

Cold-Lets talk about it.

  I expect that many of my readers are from warm parts of the world and so they need not read on.  This blog is about a hidden danger (almost hidden) danger connected to being a garage workshop guy.

 Recently many of us looked out the window and saw this...


  and since it was the Christmas holidays we shovelled some snow and settled into our workshops to play with our new tools and maybe knock off a couple of projects that had been hanging around.

  Now that my shop is in the basement it is easy to just slip down stairs and putter around for an hour or so.  In our previous house half my shop tools were in our unheated garage.  I thought it was an okay arrangement because the garage door was insulated and I had a pretty good little heater.

Heater, Mr. Heater Propane Top Heater 05532930


  I would fire the heater up in the morning before breakfast, aim it at a medal locker in the work area and in an hour or so the frost was off the pumpkin and I could run my table saw, planer and other mess creating tools.  If I had a couple of days free to work I could get the garage sweater and bare hands comfortable for work.  

   Another reason I liked that  heater was that didn't tie up any of the limited electrical outlets in the garage either.  Re-wiring the garage to get more power was in the plan, it just turned out to be a better idea to move and start from scratch than do all the things that we wanted in the old house.

  The cautionary part of the tale is this:

  Once the garage gets cold enough that you need a heater you run the serious risk of condensation collecting on your tools.  I guess a couple of days of activity filled the air in the garage with moisture which settled on the tools as they cooled down.  Once I went back to work in the spring I found rust on many of my tools.(planes and chisels).  It was a huge amount of work cleaning them up.

  Once I realized that this could happen I didn't leave any quality tools in the garage and had no more trouble.  Just beware.

cheers, ianw


Jumping into the New Year.


Tuesday, January 7, 2014

Am I just Cheap ? or....?

  A post ago I talked about using my shop to repair a snow shovel.  A couple of people that know me well thought they heard echoes of my father and grandfather in my belief that fixing things is a good idea, ( and maybe my being a bit cheap).  Where do our attitudes come from if not home, so...I hope that I can influence the Grand kids to repair and reuse not just throw away.

  Here is my latest cheapskate fix.


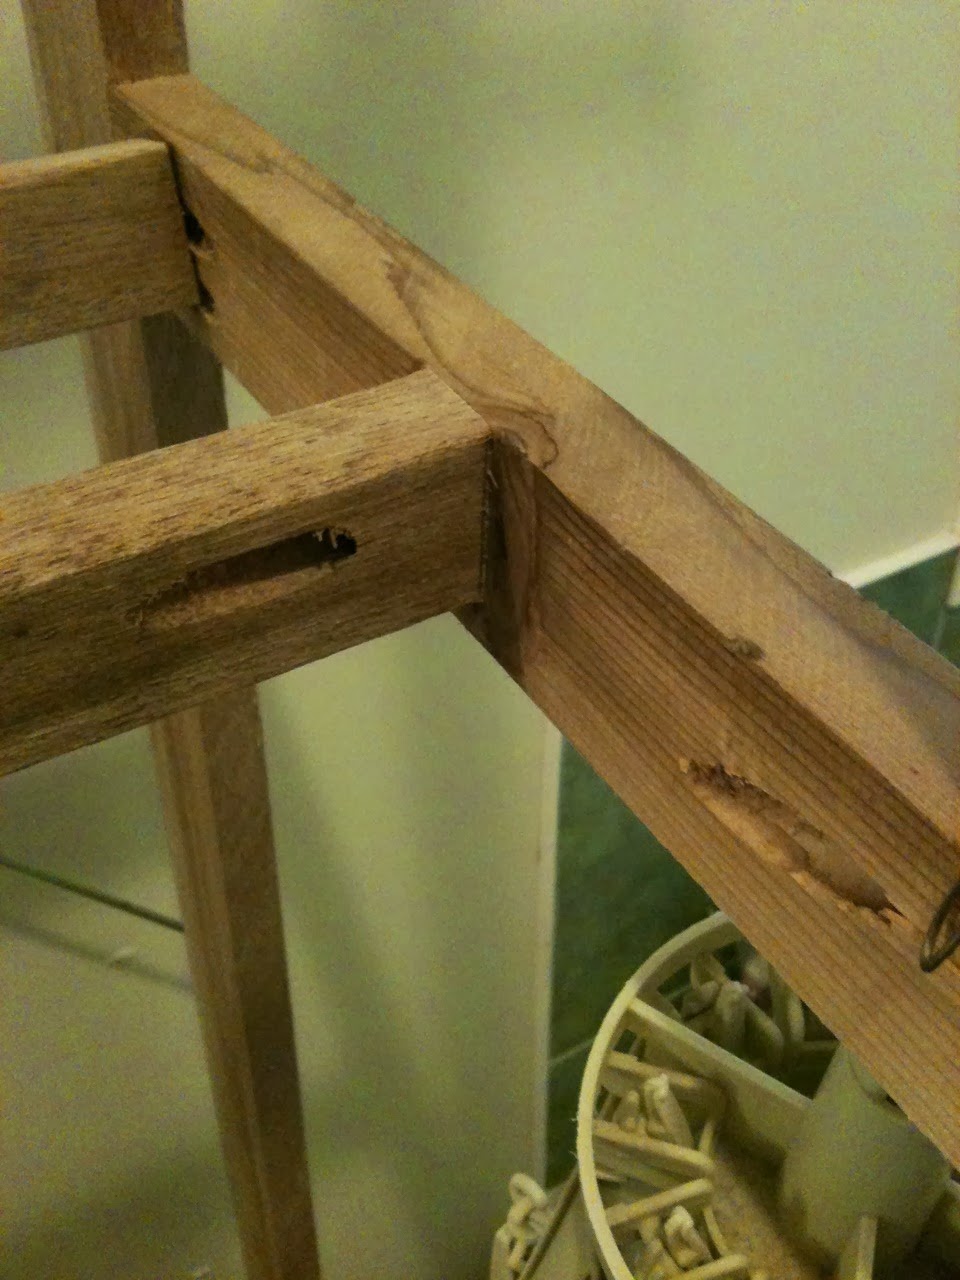
     In the basement is a coat rack that I made sometime ago and it has four hooks on in for hats and gardening clothes. 

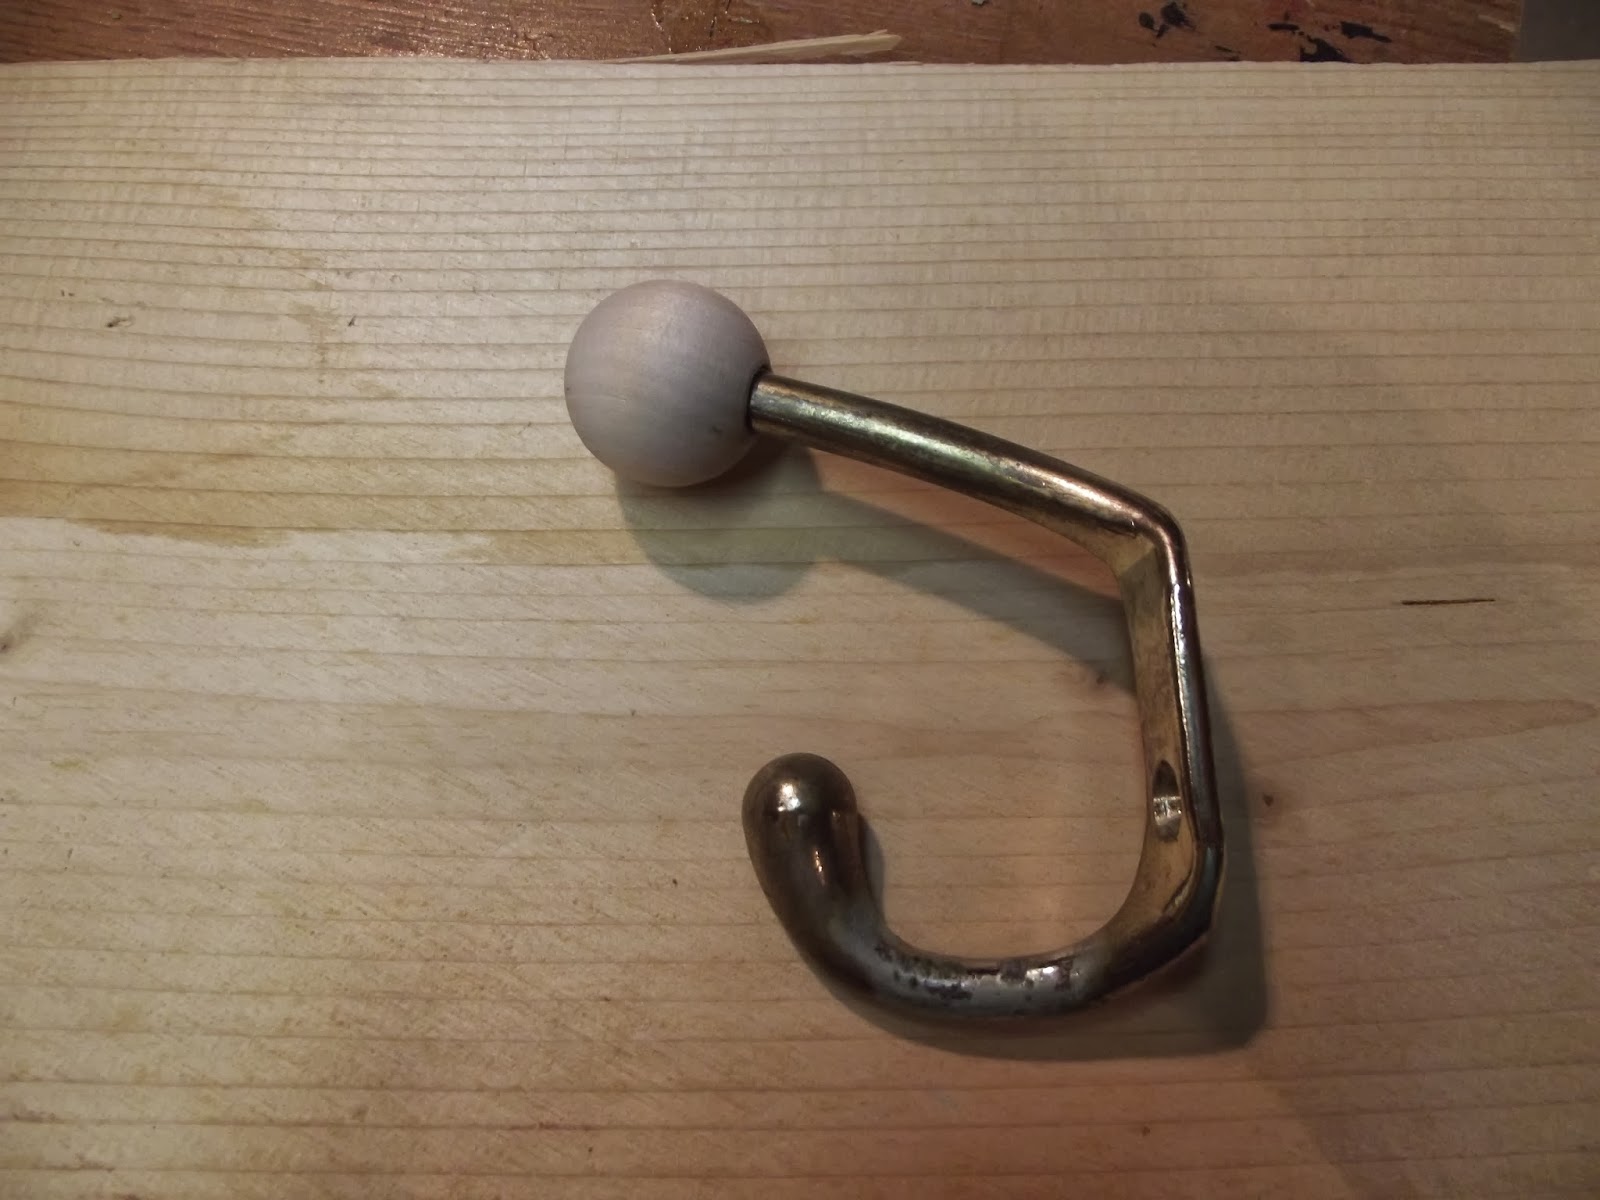
  Last summer the rack got knocked over and the white metal hook broke off.  I thought about grinding the end round and leaving it on the rack but I decided against it.  I could also have thrown it out but,  instead:


   I rummaged around in a box of "loose and lonely" wooden bits and pieces and found a wooden ball.  Why did I have a wooden ball you ask, " because a craft store was selling a bag of lost and lonely bits and pieces off cheap one day years ago and I knew that I would use all the odds and ends in toys and projects over the coming years."  I was right.  I drilled a hole, dripped in some super glue and voilà, problem solved.  

  I am working at my desk, a home made trestle table upon which stands a raised section so that I can stand to type. Flanking my computer is a dovetail box I made to hold reading glasses and pen. In the room are wooden book cases, plant stands and toys.  

    One of the toys was a favourite of my wife's children and their younger cousins.  


  Little Lion has new wheels and a new push bar and my Mother painted a new face for this generation. 


  Before I had much of a shop I was content to modify pre-manufactured goods. The tv and stereo are modified Ivar from Ikea, I made the doors and matching end table.


  The Dragon Box was a joint project of my parents.  My father over engineered a box from pine boards and my Mother did the decoration. The box was for blankets, now it is full of toys, but it is still used and will last at least two life times.  My father is gone now, but I have tools and projects of his that will be with me for my lifetime and the next generation too.

  I guess my thinking is that good stuff is worth fixing and you can't fix or build without tools.

   Buying good tools and learning to use them is money well spent, so maybe I am not just a cheap skate.

cheers, ianw


Jan. 31 and Feb 1 2014


Thursday, January 2, 2014

2014, Happy New Year

   Happy New Year to all your folks out in Internet Land.  I hope that you had an enjoyable New Year's Eve, Eva and I did and equally we hope that you are looking forward to a healthy and prosperous 2014.

  2013 was a bit of a tough year for me with my extended back pain issues.  The back is not cured, but at least it is understood now and should be controllable.  


     The view out our window on New Year's Day was similar to the above photo, there was lots of snow and as we were up north away from our house in the city, the snow was white and crisp and undisturbed, a chilling beauty that is best admired from inside.

   All this snow has been tricky for my back but I've managed Okay so far.  On several occasions I have had help with shovelling.


   Kieran is 4 1/2 and 1/3  of my wonderful grandchildren, and the oldest.  One day over the holidays I went out to shovel snow and he came to help me.  We shovelled for nearly an hour and he did not stop to play, he worked steadily the whole time.  

  K's shovel was one of my last projects for the year.  The handle comes from a cheap plastic children's shovel where the blade had fatigued and broken.  Being the cheap skate that I am I decided to keep the handle (a good length) and put a new scrapper blade on it.

   I decided to fix the shovel for a couple of reasons.

1. I hate plastic mostly, and wanted to show the kids that wood was good.

 And mainly I want the kids to grow up considering the idea that things can be repaired, not just thrown away.

  It would have been quicker and easier to go to the $ store and get another shovel that would have lasted a season or two and then been thrown away because it to was broken.  I want Kieran, Clara and Tova Elise to learn that the easiest way is not always the best way and that a repaired item can often be as good as  a new one. 

  I don't see any honour is battling along with inadequate  tools, but I do see honour is caring for and repairing things if they will still do their jobs.