Showing posts with label marking tools. Show all posts

Thursday, July 7, 2016

Hand Made Trim

   I need to make a base next.  I used elm to create the base.  Elm has character and a miserable grain that is stringy and does not lend itself to nice case work.  I knew that but ignored myself. 

box base clamped on
 my mini bench topper.
  Since this is a no fastener project I decided to use my beading tool to add a bead on both the top and front face of my base. I could have cut slots with my router and shaped the piece a bit after the fact. 

   What did I learn? I learned that next time I will choose my wood more carefully.  The front board of the base has a knot on the edge. Were I not beading the edge it wouldn't matter as much. And if this project was for someone else, I would have had to begin again.  Since this is my box, I'll fudge the finish on the front and hide the wee problem. I also learned that I really like working with the beading tool and will use it more in the future.  (it is a bit slow, or at least I am slow using it)

 My work with the beading tool is self taught.  I scratched a shallow bead on all sides (6 beads) and then set the blade for a deeper cut and did all six slots again.  I also found that sometimes the scrapper worked better on a push cut than on the pull.


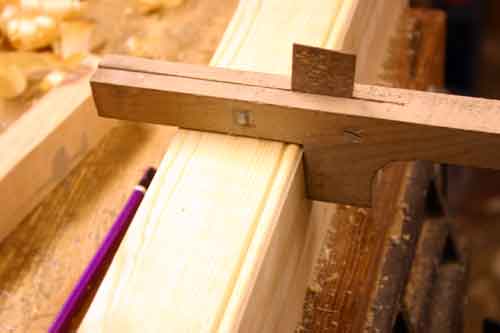
 The other thing I did but doesn't really show in the photograph was use a hand plane to created the 1/4 inch round over.  I laid it out with my marking gauge.


and planed the corner to the marks with my block plane.


  I have to next decide and make the drawers I am thinking four. One deep, two not so deep and the top drawer very shallow. That is for tomorrow.

cheers ianw


Saturday, March 19, 2016

Two Videos from Two Points of View

I have shown various little projects in my shop lately. For this blog I decided to share two long(ish) videos from two shops with different philosophies. Today's blog is like those 'compare and contrast' questions you used to get on exams years ago.

 The first video is from Chop with Chris, an old school hand tool wood worker.

building a carving bench
  I admire everything about Chris's bench and am very impressed by the quality of the video and the method of work.  The video is worth watching all the way through.

  The second video I am sharing is from Jay Bates.  I have shared videos from Jay before. His work is excellent and the product values on his videos is also very high. Jay works with power tools instead of all by hand. I admire both wood workers and believe both methods to be authentic and sincere, and would love to be as competent as either one.

two ways to make a mallet  
 Jay's work is professional and high quality. In his video he shows a hybrid method of wood working involving hand and power tools. Personally I lean toward the hybrid style of wood work.

  Regardless of how you work wood you need to have reliable measuring and marking tools. AND....don't forget to maintain your tools and to check their accuracy regularly, wear and tear can effect tape measure tips and one fall to the floor can knock a square off 90 degrees. 

 I hope you enjoy and find these short videos useful.

cheers, Ian W