Sunday, September 30, 2018

Two Weeks Later

 So what have I been up to, anyway.  This time I've not been away on holiday nor particularly laid up with my arthritic back,  I have been busy doing  those little things that would be so much more trouble without  shop space and some tools.


 The other day I put up another motion sensitive light, this time under the front porch overhang.  What is the best way to drill two holes into brick? A hammer drill and carbide drill bit.  I don't think a house hold should be without a hammer drill and bits. I have drilled dozens of holes in bricks and blocks for shelves, lights and all sorts of other stuff.  It also helps to have a proper five foot step ladder when doing this sort of job.


  Here is another goofy little project.  I call it grey leather, double thickness duct tape. In this case I put wooden ends into the "leather" pouch.  I made this to hold my various 'card' wallets together in my bag, or glove box, or where ever.  It was really nice to have work space and a very sharp knife to make this thing.  To make it slightly ridged I put several narrow pieces of veneer between the layers of duct tape. 


  Yesterday Kieran made a robot in the shop, one that shoots a torpedo .  Last time K was here he began using the jig saw, this time he got to paint using a "rattle can".  The paint job he achieved with the spray can was many times better than he has ever achieved with a brush.  Many of the bits and pieces are glued on using a hot glue gun, while there are holes drilled for the bolts.  K used the cordless drill with the key less chuck and drill bits to make holes of various sizes.  


  Wet season is coming.  I replaced a couple of broken dowels on my boot dryer, I made mine but there are several to choose from at thetoolstore.ca . Last year I bought the multi hole one for the grand kids. We don't get our boots wet much anymore, so two spots are enough.

JiLi Nolor, Mitt'n Boot Super Dryer, MB100


  Here are a two repairs for 10,000 Villages.  I had a bird with a broken neck and a lady with a broken arm.  This time neither repair will be invisible but when I am done the repair shouldn't to too obvious.  The bird fell and broke its neck because the base was way off level, I've wedged it and it glued the broken neck, I hope it finds a nice quiet home somewhere.


  These are my finished carvings for entry in the Rockton Worlds Fair next weekend. Lots of finish sanding and two coats of spray vanish. I hope they show well at the fair.

  There have been pictures to frame and walls to repair (we moved a bunch of pictures so had lots of holes to fill) as well as getting out in the lovely fall weather because you know it won't last.  Busy, busy and mostly loving it.

  cheers, ianw 
Image result for fall colours


Tuesday, September 18, 2018

Two Kinds of Carving

  Aside from working on the long, long chair rail I have been spending some time finishing a relief carving that I began a while ago.  The carving part is finished, it is the sanding and finishing part that I am doing now.  It seems that final sanding is going to take nearly as long as the initial carving.

  Basswood is the preferred carving wood in this part of the country although butternut is also poplar although getting very rare.
  

  Chip carving is an old folk art style of carving, to put ornaments on to common objects.  The piece I just finished will become the carved top of an art box of some type.  I don't have a plan yet.


  The great thing about chip carving is it takes one tool, a chip carving knife.  I drew my own design last evening and then cut out the chips.  Spray varnish was created for chip carvers.  


a Moor small Chip Carving Knife.

  I am spending time  carving again because I foresee a time without large shop machines.  Carving will keep me playing with wood, and improving my skills without big machines with there mess and noise.  

  Give it a try.

cheers, ianw 
Image result for hand carved


Thursday, September 13, 2018

Chair Rail Carving

The chair rail for our living room/ dining room first section was done and installed a while ago.  Today I spent a couple of hours working on the big section.


  This section of the rail is 7 ft. 4 inches long. Initially I was sanding and putting finishing touches to the relief carving.  After a while I needed to stretch my back and so turned the rail on edge.  I have put a chamfered profile on the top of the rail to make dusting easier.  You can see that I improvised the clamping with hand screw clamps  there are then clamped to the work table and table saw table.  I have four pairs of hand screws in four sizes.  This clamp is a must in a shop in my opinion.

  You can see some of the detail of the relief carving


  and the clamps up close.  I spent about two hours on this today so expect that this will take another 5 or 6 hours to get ready for painting.  It is a bit of a back breaker unfortunately.  I have a detail sander that helps me sand the larger areas but in the end it is job for needle tiles and small sanding blocks. 

 It will look good when it is done.

cheers, ianw


Tuesday, September 11, 2018

Picture Frame

 Working backward, the needle point finished and framed.


  The frame is about 20 inches by 14 inches and 2 inches wide, cedar with two coats of shellac and one of varnish. I cut the mitered corners and used my KREG Klamp Table to glue the frame together.  Once the glue set (over night) I drilled each corner and drove a 1/8 dowel two inches in to reinforce the joint.  The dowel is not invisible.  Once the wood is sanded and finished the tiny spot of contrasting wood is unobtrusive. 


  Making picture frames and small boxes sometimes requires the joining edges to be more refined then they come off the saw so a Shooting Board is the hand tool solution.  Traditionally a shooting board is used with a plane, mine also works as a sanding jig.  The block in the channel is dead square and has sand paper glued to its face.

  Making this frame of soft wood I needed to refine the 45 Degree faces. I didn't have a  fixture for this shooting/sanding board so I improvised, yesterday.

An example using an off cut.

  The head of my combination square gave me the support and angle that I needed to finish sand the angled faces. Today I made a fixture to have on hand next time.

I see I have to make a new board pretty soon,
 this one is getting well used.


there is a dado cut into the
 underside for stability.
  Now I can sand or plane both 90 Degree and 45 Degree ends on this shooting board.


  The jigs in my shop are red (or orange). I see I have to make a new board pretty soon, this one is get well used.

  cheers, ianw


Saturday, September 8, 2018

Current Projects and Jobs

  Yesterday I spent some time in my shop cleaning floors and discarding bits of wood.  By the time I was done my back was done too.  I seem to be in a sore back cycle again.

  Today I spend time on several small things.

  One, I sharpened my adze


  I bought this adze a year ago and hadn't got around to sharpening it.  Once sharp, it is going to be very useful when making spoons etc.

  I did a pocket hole project, stretchers for Eva's cross stitch. Now I have to make the frame.


  I used the Kreg micro jig.  It is great for 5/8 and 1/2 inch wood.


The front side.

I spent some time sanding a walking stick.


  I picked up this stick while walking on a trail last summer and it has been sitting around awaiting attention. I am going to fit a rubber foot and use some leather string to decorate it, then...give it away I guess.

  I've glued up some scrap that I will round out, fit a bottom and top.  This will hold a cardboard tea container, wood has more style.


  I kept the cut outs and am using them to make a couple of pulleys to haul bicycles up to the ceiling in our garage.


  I been thinking of making some pulleys for a while.  I will refine my method and then I'll have wooden pulleys and tackle to give away.

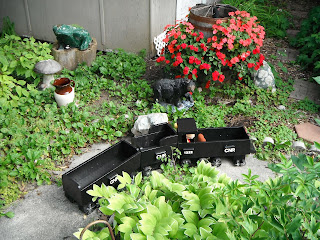
  Also, remember the train I made for my Brother.


cheers ianw


Thursday, September 6, 2018

Jigs at Work

  I nearly always work alone in my shop and so jigs, clamps and props are an important part of my tool kit. This latest project showed how useful my shop aids are.


  My lap top computer had been getting slower and the keyboard has always been a pain and so once again my son-in-law came though with second hand tech, that is great for me. On my desk I have returned to a computer with a big box and a really good big screen and it connects to a pretty good sound system too. All I need to do is get used to 'Windows' again.

  Anyway I made the stand on which the screen sits in my shop.  Once again I turned to the scrap bin for the materials. The stand's height is designed for perfect viewing and it is wide enough for the mouse and keyboard to slide underneath to get out the way.  


  The is nothing special about this computer stand but it did show the use of two different shop jigs.


  Here I using my right angle jigs to hold the sides in place while the glue dries. If the wood had been thicker I could have used pocket holes and the KREG right angle clamp. I will using my KREG clamp on my next project. Since the wood was thin I used my jigs with clamps and left it overnight to dry.


  I cut four small brackets to support the side and put one long rib under the middle to keep the stand from sagging.

   The other jigs I used were  3/4 inch bench dogs.


To keep the dog from falling though
I cut two slots, and drilled a hole in the center.
Drilling the hole kept the dowel from splitting when I drove
in the #10 screw.


  The heads of the dogs splay out just enough to keep them from falling through, making then handy when combined with the dog holes drilled in the work surface.

  The last thing I wanted to share was from the last blog. When I cut the guide blocks I held them in my Bessey Vise.


  This little vise clamps onto my bench and is very useful for holding small objects.  
  
  I am continuing to discard un-necessary things from my working space and am happily working away on more small things.

  cheers,ianw


Monday, September 3, 2018

Labour Day 2018

 Hey, one and all.  It is very warm, very very humid and wonderfully quiet here today.  After the last two weeks of Grandchildren, and family weddings peace has returned.  I am drinking coffee, listening to "Kind of Blue" and already sweating while typing this.

  Once the children headed home yesterday I spend a couple of hours in the coolness of my down stairs shop.  My work area has been an ever evolving thing, and this last project (bean bag game boards) drew my attention to something that  seems obvious, now.

  
a current project on the three raised work jigs


  A few years ago I made the two I-beams to help with assembly and glue ups. Also a few years ago I salvaged half of a work mate top as a mini work bench.  Since I did not have a unified Work Bench Theory in place the mini-bench and the I-beams where not the same height .  One of the things I did yesterday was cut the mini-bench height down. I am moving toward the "Unified Work Bench Theory", I am considering consultation with Dr. Sheldon Cooper as he will shortly out of work.

  I made an anti-racking solution for clamping the mini-bench to my work table.

anti-racking solution hanging close
at hand.


solution installed.
  Having the spacer readily at hand makes clamping more efficient.  

  The combination of mini-bench and I-beams provides many different clamping solutions now that they are the same height.

  The other thing I did yesterday was customise guide blocks for my 12 inch band saw.  Several years I added a second band  saw to my shop.  Now I have a 14 inch King band saw with a 5/8 x 3 tppi ripping blade and a 12 inch Delta with a 1/4 inch turning blade. Since the Delta is older I could not get 'cool blocks' in the right size to replace the nasty metal blade guides.  I decided to buy  over  size guide blocks and cut them down to size.

  
left side the original metal guide block.


  The difference in size is significant.  My first thought was to sand/grind the extra mass off. Sanding presented two problems: it was slow ( I hate waiting), also it was difficult to hold onto the block without risking finger tips.  I tried a variety of pliers and clamps and finally found a rasp removed material fairly quickly, but not quickly enough to suit me.
  
   Finally I settled on cutting the block to size.
    

   Since I had no firm idea of what  'cool blocks'  are made I did not what to risk a good saw blade.  In a drawer I have a fine toothed Japanese saw, which is missing teeth in several places. (it hit a nail biting experience, early in its life) but the remaining teeth are still good.  This saw became my sacrificial lamb if it knocked out more teeth, oh well.  I still don't know of what material 'cool blocks' are made, but it cuts with a fine toothed Japanese saw pretty well. I was able to cut sections off the block and then was able to hand sand the remainder off to get a good fit


  The lower set of blocks look fine for now but I  have parts to replace them when necessary.

  As it is Labour Day I am not planning to labour.

cheers ianw