Tuesday, February 21, 2023

Bunny Sized Cello

  My grand daughter began playing cello at school last September, and has made wonderful progress.  In just a few short months she is playing recognizable little tunes and seems to be enjoying her experience.  She also has a favourite stuffed toy that travels with her all the time.  The bunnie was her mother's in fact, and so is wise and well-travelled.

  As an Opa, I am sometimes inclined to flights of fancy for the grandkids. This time:


a bunny sized cello complete with bow.

  It turned out to be a bigger project than I originally thought.  I though I would go into the shop one evening and emerge shortly with a cello.  There turned out to be more shaping, sanding, gluing and staining than I had accounted for.


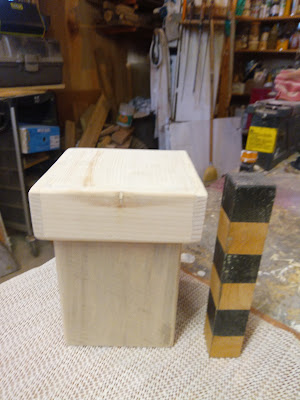
  I only had a plan in my head for this cello. I had never made one before so I cut out the body from soft wood and the neck from hard wood following a general idea more than a plan.  Initially I thought of making the cello hollow but decided not to make my life that complicated. This bunny sized cello is a toy, not a replica or model. 


  Before I glued the neck on I carved 'F' holes in the body and used dark stain to make then look more realistic.  I also cut slots into the head stock and made a bridge for the strings.


  Poor planning meant there was only room for three stings instead of four and the tuning pegs are pretty ugly, and don't work.  The bow has stretched string instead of horse hair. The pin on the bottom is a long bolt and the strings are stretchy string and the bridge is glued in place.  Not very cello like but it is for a bunny.

  It seemed to be well recieved by  Grand daughter and her bunny so it was worth it totally. 

cheers ianw


Tuesday, February 14, 2023

Tea Box- Mitre Glueing

  I was puttering around in my shop the other day.  The weather has been unpredictable and there isn't really a big project on the horizon, until March or April.  So what did I do?  I did what I have done thousands of times before.  I made a box. Making boxes is a foundational skill in wood working, and that skill does not develop without practise. 

 I didn't have a  specific need in mind but there is always a use for a  tea box. It could also store coffee, cookies, or candy.


   I have collected bits of skid wood over the last couple of years and  I selected a non-descript board for this project.  Since the box was to have mitred corners I trimmed both edges of the board on the table saw with the blade tilted to 45 degrees.  My table saw is a contractor's saw, it has served me well for over 20 years and with care it will still cut accurate angles. 
  
  Once I had all the wood prepped for the sides, I used the tape and glue method for putting the box together.  I cut a bottom piece and glued it in to close the one end, then tried to figure out a lid. This works but doesn't look good, it is  top heavy and awkward.  I have since had another idea  and I will try it one of these days.


  For the time being I just trimmed the lid and rounded its corners.  The interesting bit of the project is the finishing.  I traced the letters onto the wood after sanding it very smooth.  When wood burning, the wood needs to be very, very smooth. 400 grit or better.  After burning the letters in I lightly tinted them with red dye. 

  After the dye was totally dry, I lightly stained the box and gave it two coats of spray varnish to protect it from finger marks.

  It is nice to have a shop in which to putter.


cheers ianw


Sunday, February 5, 2023

Long Spoon

   The most recent thing out of the shop is another long  spoon.  I have made a couple of these long handled spoons in the past.  The spoon is 18 inches long and perfect for mixing large pots of chilli, stock or stewed fruit.

 In some ways these spoons are a speciality item for the kitchen.  After all it is not often we make four gallons of chilli.


First I laid it out, and cut the rough shape with a band saw.  (a jig saw would have done the job too,

    This spoon started out as a piece of oak trim from a local farm house.  A few years ago I was contacted by a friend who had a friend that was over hauling a big ol' farm house.  I was able to go and get a station wagon full of mixed oak trim.  Some of the trim had been painted, some was splintery and good for fire wood and some was really nice.  The stain and/varnish sanded off easily and so the wood has been used for lots of things in many places.
 
  This long spoon is a lovely piece of that white oak  trim. Since the wood was a milled board this spoon is a machine made effort.  As a milled board  there is no advantage to working the wood with hand tools, there isn't much chance to work with the grain. 


    The wood showed a really nice grain and was as hard as stone to shape.  I used a belt sander and a Dremel tool with various bits to do much of the work.  Ultimately the final sanding was done by hand, 80,120,180 grit sandpaper and card scrappers providing  the final result. 

  I gave the spoon a quick coat of Hemp Oil and it is ready for the soup.


  I paid attention this time, it took about 2 hours of hands on time to complete this spoon.  If I were making several at once I am sure that I could cut the time, perhaps in half, I don't know.  If you go to a craft fair and someone is selling a nice spoon, made from nice wood it should easily cost $25.00 or more, I would expect that much for this spoon and I got the wood for free.  

  I was easy to make this spoon.  All it took was tools, time and experience.  Please buy wisely and support your   local  crafts people.


cheers ianw


ps. check out at years worth of spoons  

https://www.dailyscandinavian.com/365-daily-norwegian-wooden-spoons/