My local grand children dragged me out of bed this morning and we filled the living room with empty boxes and paper. And incidentally lots of gifts. The kids got Lego, Meccano, arts and crafts kits galore.
With luck the next generation will grow up makers.
Merry Christmas everyone,
talk with you more tomorrow.
ianw and family.

Monday, December 25, 2017
Tuesday, December 19, 2017
String Class, & Quick Gifts
My Swedish grand daughters arrived late last and this morning the 5 year old decided we should do some projects in the workshop. My experience with my Grandson is everything is a boat. With Tova it is all about musical instruments. She plays ukulele and violin and wanted me to make violins for her to give to her cousins.
I cut the pieces out on the band saw and Tova did the painting. These will probably end up as tree ornaments.
 |
| 10 inch cello and 2- 5 inch violins. |
As always Opa does most of the finish sanding and I put on the strings but I don't touch up her paint.
Two quick projects that can be used for last minute gifts:
I am working on a couple more little things for Christmas.
cheers, ianw
Monday, December 18, 2017
The Bunk is Done,
Later today the Swedish family arrive and the little girls get to sleep in their own beds. I completed their bunks on Saturday but was too tired, and busy to write the blog then. Yesterday was filled with church music and house cleaning so now the blog.
I have not taken a bunch of photos of me measuring and cutting boards, that makes for better video than written blog.
I do have a few photos to show the unique features of these bunk beds and why I needed to build them rather than buy them.


I have not taken a bunch of photos of me measuring and cutting boards, that makes for better video than written blog.
I do have a few photos to show the unique features of these bunk beds and why I needed to build them rather than buy them.

You can see the bunk bed is in our guest room that already has a queen sized bed in it, so floor space is in short supply. These beds are narrow, the mattresses are only 30 inches wide and 72 inches long. The mattresses are plenty big enough for two little girls and will be big enough for a few years of use. By the time they are too big for this bed they won't want to sleep with their parents anyway. The narrow mattresses meant that the bunk bed had to be a custom size. Also the bottom bunk is a bit higher off the floor than usual, so the youngest can see Mom and Dad in bed easily. You can also see that the bottom bunk is high enough that suitcases will fit there out of the way.


I built the two end sections and the mattress platforms in my shop in the basement and then moved the four sections into the room ( two floors up) and begin screwing the pieces together. There were many trips up and down the stairs measuring and cutting etc. Since the bed is a narrow and a bit tall I wanted it to be very sturdy and stable. My heart would break if something I built lead to a grand kids getting hurt so this is over engineered.( my heart breaks when any thing bad happens to any kids, relations or strangers.) The long side braces made the beds perfectly solid but I added four steel angle brackets under the upper platform to eliminate all possible wiggle.
The basic plan is for this bed to be used for a couple of years and then taken apart, so it is held together with screws alone. The ladder is held on with three screws that can be taken out and the ladder put up out of the way when the beds aren't in use.

Another feature, borrowed freely from IKEA. The top back rail is affixed with a nylon loop to the wall. I made these beds so that two fun little girls could both climb on the same side and the bed can not fall over.
When you look at this project you see a labour of love. I want the little girls to have their own beds at Oma and Opa's house in the same way that their cousins have their beds down stairs. I feel very strongly that all people need to know there are places that theirs and where will always belong.
cheers, and Merry Christmas
Ianw
Friday, December 15, 2017
Back from the South and Working on Christmas and snow
We had a wonderful time in Mexico with our two oldest Grandchildren last week. I took the week off, though there was some interesting wood related things to see at the Marina El Cid in Porto Morales. I will share some photos another time.
It is time to talk about work shop tools and an obvious trick that took me years to learn.
First, snow, snow is falling and I've had to run my snow blower for four days in a row.


It is time to talk about work shop tools and an obvious trick that took me years to learn.
First, snow, snow is falling and I've had to run my snow blower for four days in a row.

My Second Favourite Honda
Needless to say my Honda Silver Wing is my favourite Honda but in this season the blower trumps the Maxi-Scooter.
The other two important pieces of snow removal equipment are of interest to the 'mature' house holder. For those of you from warmer climates the biggest aggravation of snow removal is when the snow plough comes by and fills in the end of your driveway with wet heavy snow/slush/sandy crud. For years I struggled to break my way through the deposit until I had a small brain storm. (before having a small heart attack).
In my previous house I had a garden with sandy soil that was very easy to work by hand. At that time I bought a large heavy hoe.
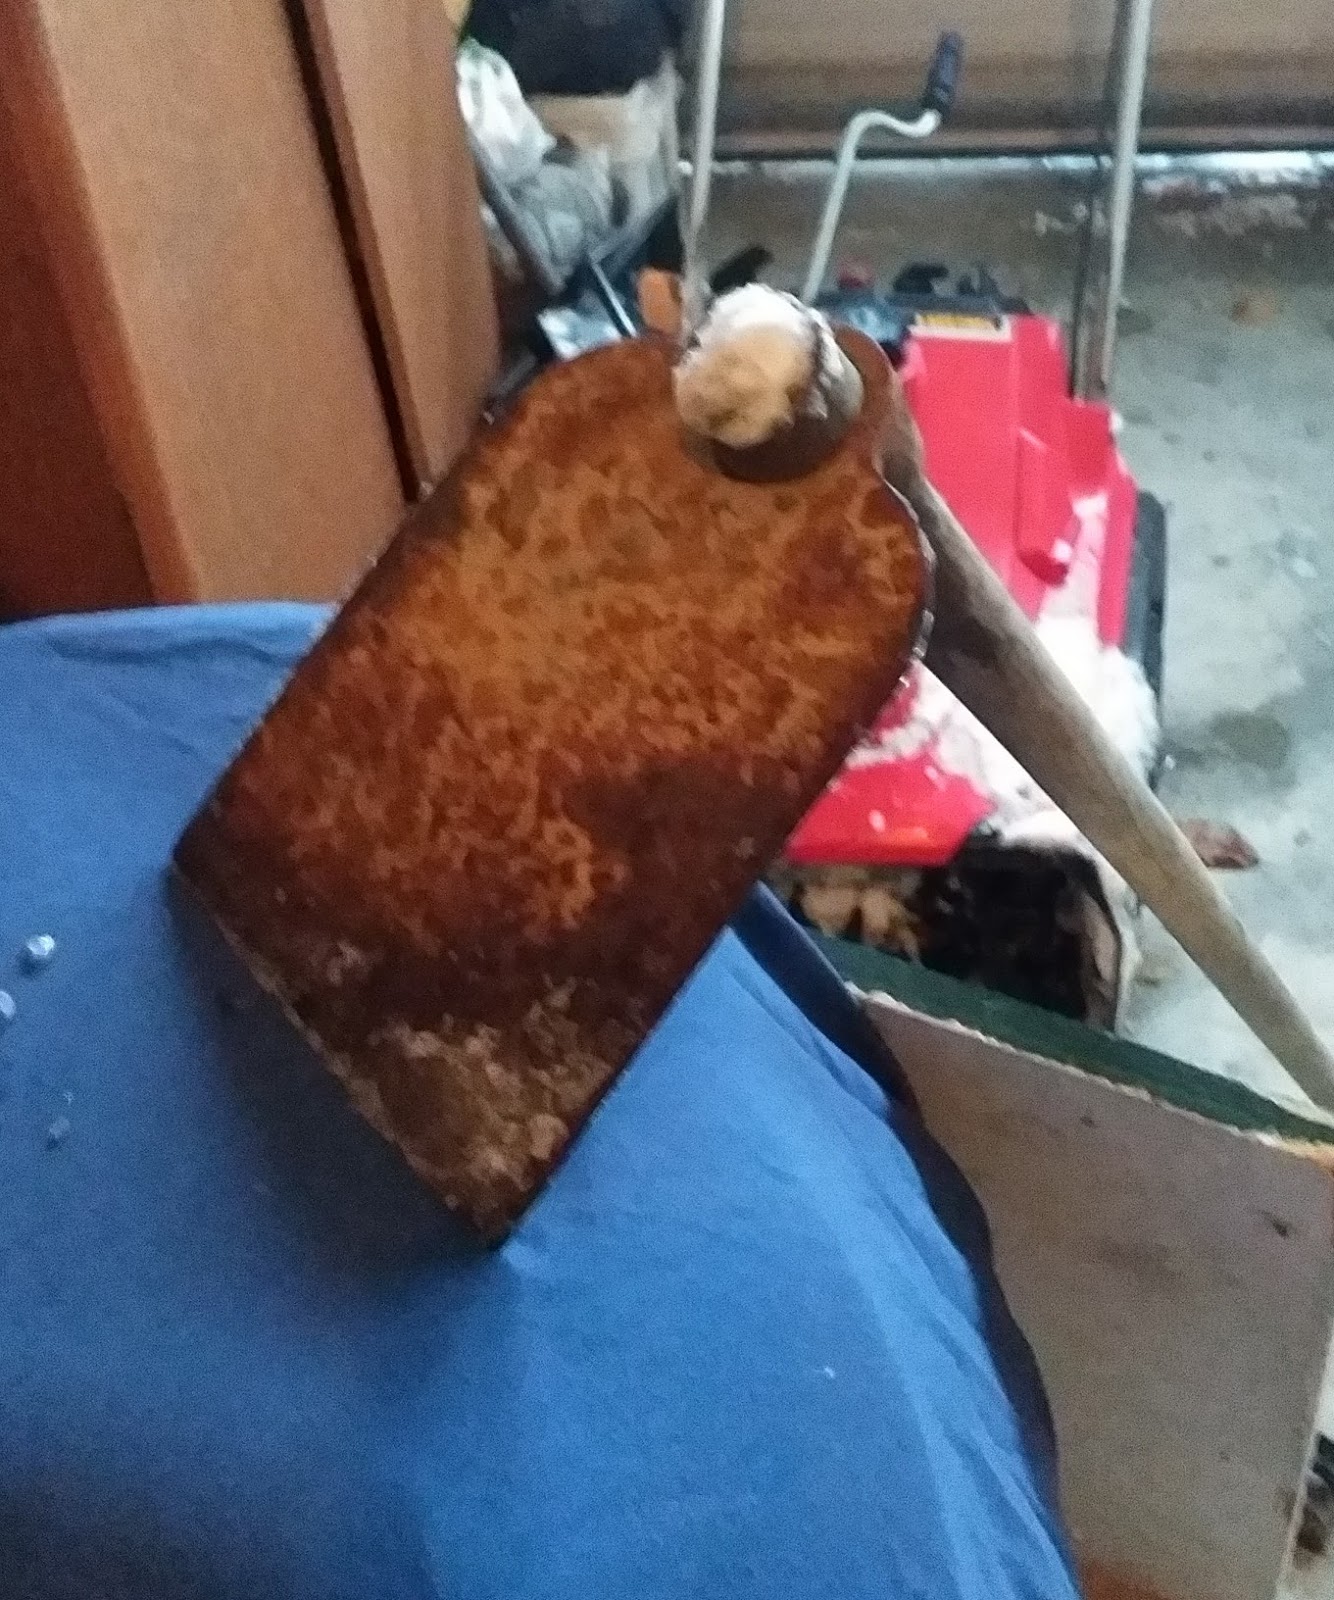
The hoe had no use in our new house with its small flower gardens until I was battling the frozen snow left by the plough. I use this hoe to hack the heavy snow into bite size pieces and have the blower toss the debris out of the way.
or
If the snow is too nasty and clumped for the blower I use a garden shovel and treat the mess just like sand or gravel.

It seems obvious now but when I think of the times I struggled with a snow shovel, (too wide and awkward ) before I just went back to the proper tooll for shovelling heavy dense materials.
When I post this blog I will be heading out to run the blower through the newly fallen snow while it is light and easy to move.
cheers, ianw
Saturday, December 2, 2017
Bunk Bed
I worked steadily for the last couple of days on the custom sized bunk beds. These beds are designed to have head boards at opposite ends. I used 2 x 4 for the legs and 1/2 inch plywood for the head board and cross pieces.

The platforms for the mattresses are 6 ft. by 30 inches.
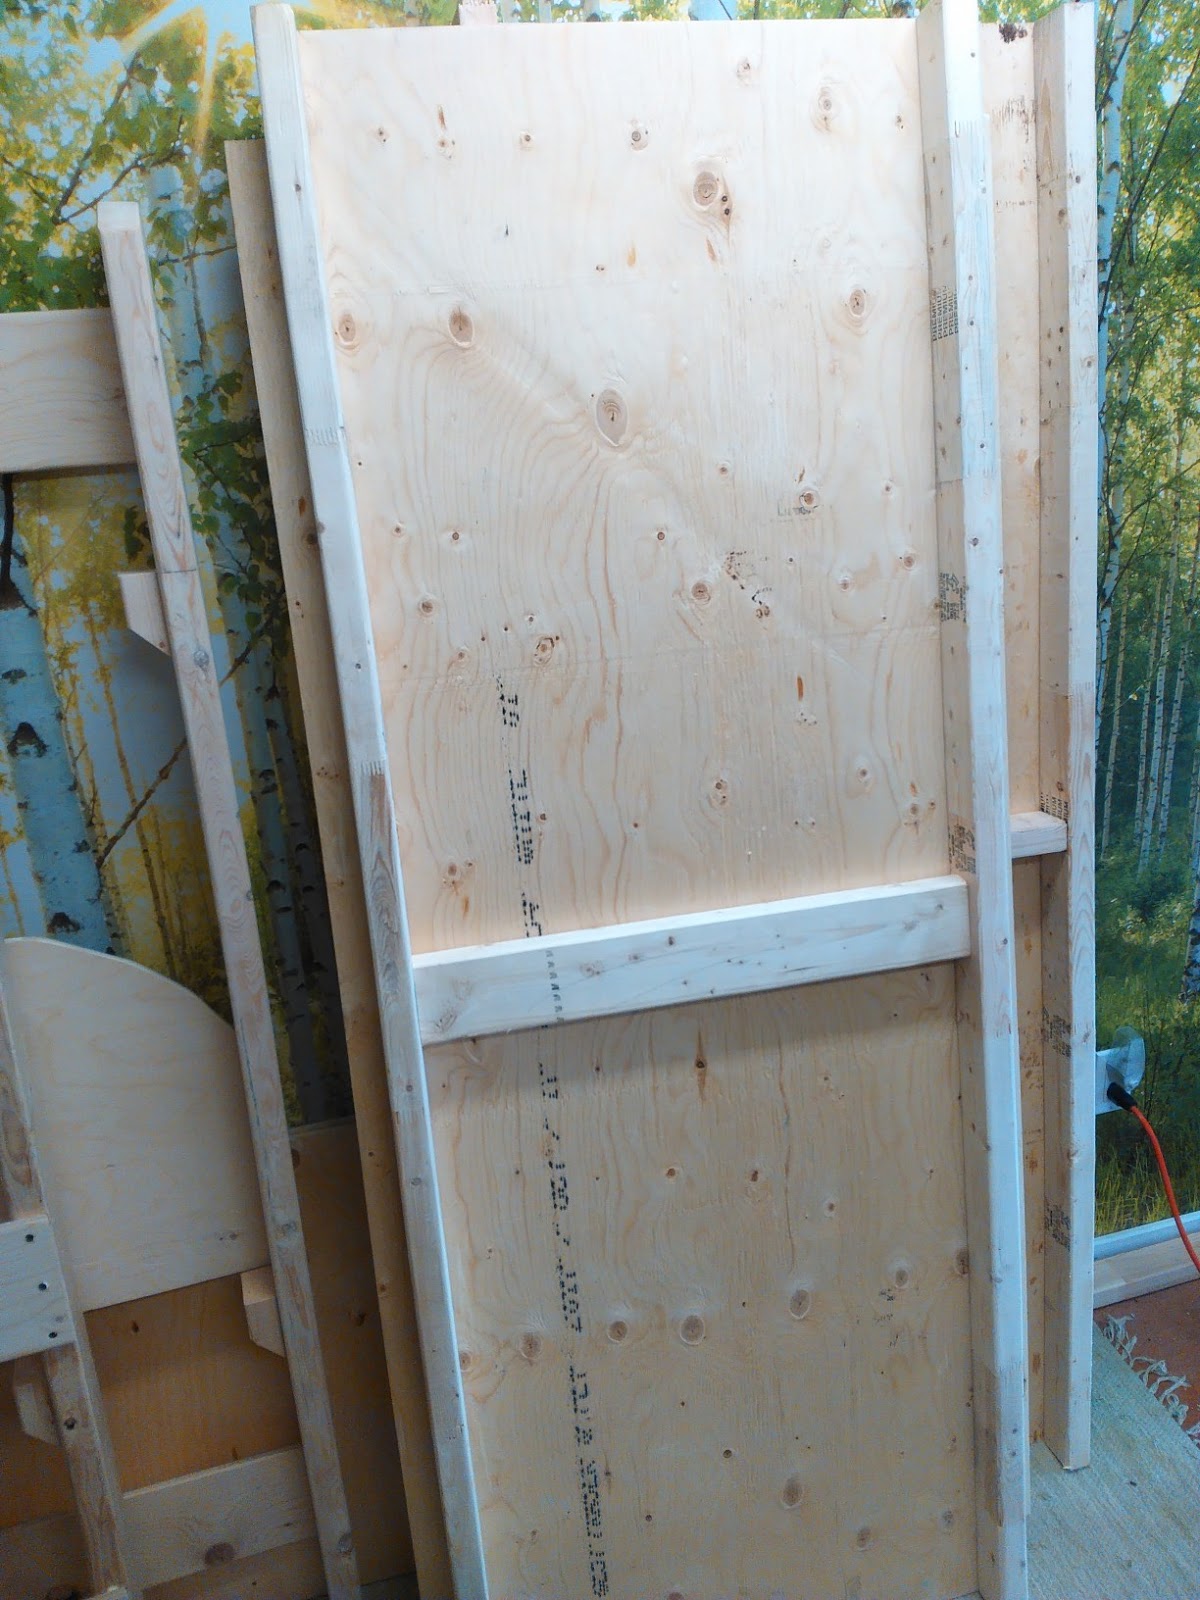
These left over pieces will be the lateral bed rails.

I have these pieces sanded and sealed and ready to be assembled up stairs in the guest room. It was an awkward job that is almost too big for my small shop space.
To make this bunk bed I used a jig saw, a circular saw with cross cut jig, routers and router tables and just about every sander I own.
There will be a friendly place for the girls to sleep when they get here for Christmas.
cheers, ianw
Wednesday, November 29, 2017
What's Happening in the Shop
We have had a couple of unusually mild days so there has been some work in the yard but Monday was a long....day in my wood shop.
I didn't make anything, but I cleaned and vacuumed and crawled around on the floor and took machines apart and vacuumed out the insides and collected and cut up a bunch of bits and pieces for fire wood.


I didn't make anything, but I cleaned and vacuumed and crawled around on the floor and took machines apart and vacuumed out the insides and collected and cut up a bunch of bits and pieces for fire wood.

This is a rare sight. My small bench cleaned up completely. You can see the KREG clamp plates on the front of the bench and in the back ground you can see a KREG clamping plate that you use with a KKS 1140 Bench clamp. I used the bench clamp with plate much more before I got a clamping table .
At this moment, laying on the floor and my work table are the pieces for a bunk bed that I am making before Christmas holiday.


This will be turned into a bunk bed custom made to fit into our guest bedroom for our Swedish family at Christmas time. I never slept in a bunk bed in my life but...the grand kids love it.
The one thing I did do that wasn't shop cleaning was re-paint Captain. Kieran out grew all his Thomas Tank Engine toys but Captain has stayed around floating in our pond. I have nostalgia for Captain, K and I made him in the shop.

I'll put Captain back in the pond next spring and the frogs can sit on his deck in the sun all over again.
Occasionally battle must be waged and cleaning must be done. As my wife said, all time in the shop is good time, so even cleaning is okay.
Friday, November 24, 2017
Sanding, Sanding, Sanding......and a Distraction
The wooden chest is hauled from the garage to the basement and set up on my low saw benches for the next stage. That of sanding, sanding,sanding. The paint was mostly burned off with the torch.


The orbital sander took care of much of the remaining paint and scorch marks.

I decided to keep the molding intact, that means hand sanding the trim as well as all the edges, 60 Grit paper cuts through the paint fairly easily. After all the paint is sanded away I will have to re-sand the box with 120 and 180 grit before using shellac to seal the wood.
Since there remains a couple of hours of hand sanding and finishing ahead of me. While I am working I like to listen to music and the tablet provides me with tunes. I decided my tablet needed a stand to keep it handy.


I saw the idea on Pinterest and chose to use a piece of leather for the hinge. The whole project took only a few minutes. I used contact cement to attach the leather to the wooden forms.
It was a quick little project that was a nice distraction from sanding. I have spent enough time hand sanding that my fingers are weary. I will paint the stand later.
cheers, ianw
Sunday, November 19, 2017
Roadside Rescue
Last week Eva and I picked up two items being cleared from a local house. We have a glider rocker in excellent shape that needs the upholstery cleaned or replaced. The other item is a home made solid wood front hall storage bench. Very similar to the one in the following photograph:


The item we picked up is in really good shape...except is was painted a glossy brown and clearly had been left in the basement ignored for a long time.
I wiped away the years of dust and decided to strip off the paint.

Heat stripping paint is definitely a job to be done in the fresh air and not the basement workshop. I began the process with my electric heat gun and found it a slow process. It has been cold here lately and the ambient temperature in the garage meant that the little gun couldn't warm the paint enough.

My solution was to switch to burning the paint off with my BernzOmatic propane torch. It was quick, but a bit stinky.
I worked away in the garage for about an hour and scrapped off this much paint. (about a litre or U.S. quart)

Just to see what results await me, I sanded one corner of the chest where the paint had been burned off.

It will take some fussy sanding to get the inner corners looking good but I will give the box a coat of stain and a couple of coats of shellac, then try to find it a good home.
cheers, ianw
Friday, November 17, 2017
If you got them, Use them-tools that is....
Two weeks ago my wife slipped on a rock, fell and broke her right wrist. NOT a good day. After all the fussing was over she has a cast on her arm that limits the use of her right hand. Can you tie a show lace one handed? Can you tie a shoe lace one handed with you non-dominate hand? Nay, me neither.


There is one of two sets of lace toggles that I made for Eva today. All she has to do is slide the laces tight and push the toggle down. No fancy finger work needed. Toggle making can be high art, think Netsuke from Japan, mine aren't. But it might be fun to carve a version of Netsuke.
Anyway I nipped down to my work shop to make toggles for Eva, I had done this before. When I have available tools, I avail myself of them.....all.
To make four little wooden toggles I first found a bit of dowel in a box where I keep these little bits of wood. Then I drilled the holes on my massive drill press. Holding the dowel in a drill press vise.( a worthwhile investment) After the holes were drilled I used my cordless drill and a counter sink bit to clean up the hole and make feeding the shoe lace easier. Lastly I sanded the toggles after cutting them loose with a Japanese style handsaw. Had I had a hand drill and a pocket knife I could have made the toggles just as effectively, but not as quickly. I do love having a work shop with all the tools.
Another drill press job was finishing the Quarto men.

Two sets, travel size.
The day wasn't a work shop day really, it was a clean up the garage and put the motorcycle to sleep for the winter day. With all the bicycles hanging from the ceiling, and the motorcycle stowed into the corner there is room for my wife's car to get in out the the snow and ice. (maybe there won't be any snow and ice this year.)
Here is a link to my Pinterest page showing a whole bunch of stuff to make for kids.
Maybe there is an idea you can use.
cheers, ianw
P.S. "The Hare with the Amber Eyes" by Edmund De Waal, is a book of history connected with a collection of Netsuke. I really enjoyed reading it.
Wednesday, November 15, 2017
Production, worth while but not exciting
A while ago I made a project inspired by Wood Working for Mere Mortals, a quarto game. Recently I was asked to make two more of the travel sized games. So that is what I am doing currently. Cutting up little pieces of one inch wood and dowel. That is not really something to inspire a legion of followers so I found a video to share with you folks.

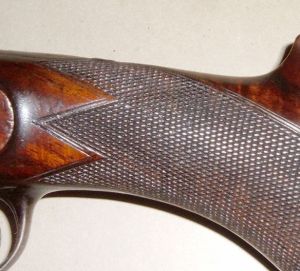
I have always admired the carved gun stocks. I suspected it required a special set of tools, which I discovered were not blindingly expensive. What is needed is a personal disposition focused on careful and detailed work. (that can't be bought at any price.) I don't think I have the focus or attention to do checkering well, but I would love to try.
I am working toward Christmas gifts, mostly I am in the planning stages. It is hard to think of Christmas looking out the window at cold, raining, dark and bleak. Anyhow, one must carry on.
Check out the video, even if you don't like guns you can admire the wood working skills.
cheers, ianw
Sunday, November 12, 2017
Home Again, Home Again
We have been away for a couple of weeks enjoying a few days in Horsham England on our way to Lanzarote Spain.
We got back four days ago and given jet lag and all the other things that await you ( a fall cold too) on your return I didn't get back into the shop until yesterday. I decided on a quick little project that recycled a piece of wood from a dresser that I picked up off the street a while ago. The inspiration was two more pieced of furniture we picked up on Saturday morning.


We got back four days ago and given jet lag and all the other things that await you ( a fall cold too) on your return I didn't get back into the shop until yesterday. I decided on a quick little project that recycled a piece of wood from a dresser that I picked up off the street a while ago. The inspiration was two more pieced of furniture we picked up on Saturday morning.

I took a chest of drawers apart and this is the last drawer front left. Obviously it has been ignored and was laying in a corner until this project came along.

You can see the trim that was nailed onto the front. This piece is solid hard wood, though not one piece. I worked around the nail homes to make my project.
 |
| all the pieces |
This is a project that is quick and easy if you do things in the correct order.
First I ripped the board to width and then used my router table and round over bit to shape the smallest piece, before cutting it off the board. I then rounded over the end and cut the middle sized piece, last I rounded over both ends of the longest piece.

The little foot goes at one end. In this case I glued it into place.

The three pieces go together to make a nice little portable bookend. Actually it doesn't need to be glued together at all, but I didn't want the little foot to get lost.
To make this a more personal item I did some wood burning. After I burned the initials, I stained them with transparent water colour paint. It just just a hit of colour to the burned portion.

This is a quick project that can be personalized or customized in tonnes of ways.
cheers, ianw
p.s. it is nice to travel, but it is nice to get back home too.
Horsham, UK. high street.
 |
| a beach on Lanzarote |
Thursday, October 19, 2017
A Spatula, A Sander and A Fish

A while ago I collected three pieces of fire wood in the garage planning to make some more spoons. Today I split the wood into eight pieces, a couple are destined to be big deep spoons and I plan to make a couple of long handed spreaders to reach to the bottom of deep jam jars. The rest of the pieces will get turned into something, sometime.
You can see I have a spatula roughed out from that batch of fire wood. Between the push knife and the small hatchet I was able to rough out the general shape quickly.
Once I got the shape established I turned to modern noisy tools this time. Hand work is nice, but mine is a hybrid shop. My 36 inch belt sander really brings things into shape in a hurry. This sander was very good value for the money, I've run it for hundreds of hours over its life time with me. Several years ago I had to replace the drive belt but otherwise it has been a solid performer.
After using the big belt sander with 60 grit paper I moved to my random orbital sanders. Those sanders will generally help in the final shaping of a spoon. I have four sanders, with different grits mounted. That way I am not tearing the sanding pads off all the time and the hook and loop system lasts longer.

The finished spatula, is sanded to 320 grit and finished with hemp oil . I do my final sanded by hand using a contour sander or my own devising.
 |
| old fashioned black board eraser |

The firm felt supports the sand paper without there being a hard edge that might scratch the work at the final sanding stages.
I am also working on a colourful shop projects.

We are going to see our Grand daughters next week and I am taking the four year old a board game. It is an easy counting game and the 'men' will be small wooden fish. Games for kids are tricky. If they like the game they want to play it all the time, which drives you crazy. If they don't like it, they never play it and you feel rejected.
cheers, ianw
Saturday, October 14, 2017
Another Storage Solution
Every now and then the chaos overwhelms me.


Over the years I have acquired many pairs of suspenders, too many to keep straight on a hanger. My solution was a purpose built hanger.

I originally planned to make a horizontal hanger, but decided on a vertical one instead.

I searched in my workshop junk drawer and found a big hook that I used to hang a bicycle and screwed it into the top of the hanger. Yes, it is over kill but for things like this I use what is at hand.
The actual wooden part is cut from a 2 x 3. I do like to make these quick easy projects from softwood lumber. It is quick and easy to sand and/or plane things smooth.
If I were a video maker I could have turned this little exercise into a production with close ups and slow motion. After all to make this simple thing I used a band saw, random orbital sander, many clamps, block plane, square, and drill.
When I look around our home it is filled with wood stuff. Where many people go to the local "Dollar" store and buy a plastic something to serve their need I make the something. I grew up making stuff, and encourage everyone to make "stuff". This little hanger is a perfect example.
A person in a small home, or apartment needs very few tools to actually make basic things. I believe that a cordless drill and decent set of drill bit is a necessity. An okay drill costs about $125.00, less if you look for a sale, a sander is $50.00, less on sale. A mid-range combination square can be had reasonably and you can buy your wood mostly pre-cut at the big box store. If you look around there are community centres that have public wood shops with big machines and expertise for cheap.
It seems that we are trying to regain our economic sovereignty. If you are going to appreciate domestic products we need to make some things for our selves too.
cheers, ianw
Thursday, October 12, 2017
More Small Projects
We just had our Thanksgiving Weekend in Canada, and as it should be it was filled with family and a fall fair. This year the weather was spectacularly un-seasonable, we can enjoy climate change for a while, then it going to get us good.
One of the latest 'small' jobs I've done was a repair for 10,000 Villages. One of the cast metal statues that they sell fell on the floor in the store and its arm broke off. Needless to say I did not re-cast the statue, I used epoxy to attach the arm and then got creative in how I hid the repair.


 |
| Rockton Fair from the air. Rockton Ontario, Canada |

The left arm was broken off at the elbow,

You can see that I gave the repair a decorative wrap with coloured wire to hide the joint. To make the decoration believable I put a wrap on each elbow. Today I returned it to the store and the manager was pleased with my work. I don't know if the sale price will be discounted but even so it is better than written off totally.
The other little project was inspired by the visit of my grand kids on the weekend. My Grandson is getting pretty good at drawing trains and machines so I made him a drawing book, and one made one for his sister too. She is younger but artistic too.

I made two sketch books one for C and one for K.
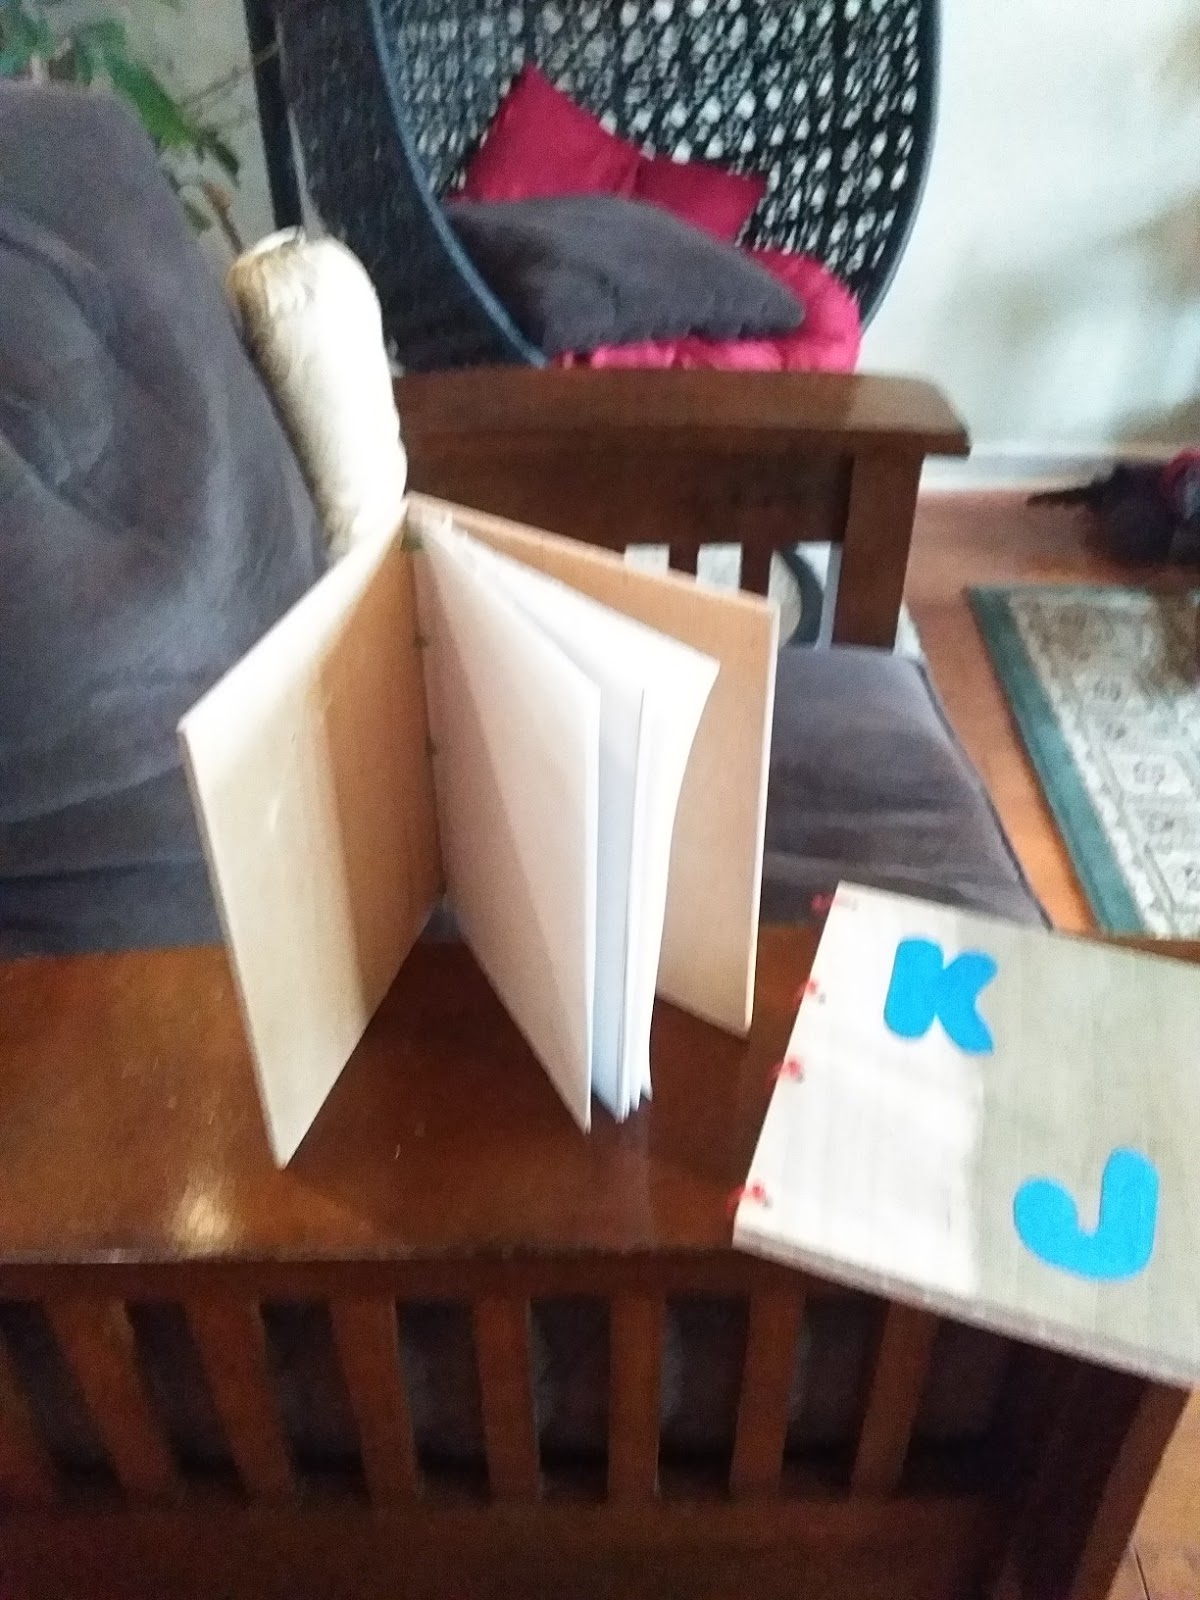
This is a simple project as long as you have the tools and the skills. The first step was to fold and bind the pages. I started out with three large sketch pad pages, folded the paper in four and then bound three sections together to give each book twelve pages. Binding books is easiest if you have a fine sharp awl, wax thread, large needle and a bone folder. Once I had the booklets bound I trimmed the edges, (very sharp utility Knife) and then cut some 1/8 plywood for the front and back. I clamped the pages between the covers drilled and counter sunk four holes through the covers and pages.
You can see that I used zip ties to connect the sections. Once the books were assembled I took them up stairs and painted initials on the outside cover. To control paint successfully you need decent paint and decent brushes, and a bit of practise. (more tools and skills). After painting the letters onto the book covers I took the books apart and sealed the front and back with shellac.
When I went to the shop my first thought was water based sealer instead of shellac. Water based sealers are all the rage and are better for your brushes and the environment.

However, I have some experience with finishing wood projects and so....did not fall into the trap. The initials were painted on with water based poster paints. Water based sealer would have softened and probably smeared the paint. Shellac on the other hand doesn't react with water based finishes, the result is good sealing and no smearing. The covers are hanging in my shop drying currently. I will add a couple more coats of shellac and then some wax to make an easy but tough finish.
There is no way to know if they will draw in their books or ever use them at all, but I still like to make things for kids, just in case.
cheers Ian W
Subscribe to:
Posts (Atom)