Tuesday, March 31, 2015

Another Basic Blog -- Plyers or Pliers


  Those are the five sets of plyers that I have on a rack within easy reach in my shop and use frequently.

  Upper left are Linesmens plyers. I actually bought those plyers when I was working for the power company with the line crew. I use these plyers to cut and to crush and to hold on to things I am grinding or heating or hammering.  They are my "go to" tool.

 Moving right are needle nose plyers.  I have three sets of these, both larger and smaller.  Most of time I use these plyers to hold small brads to save my fingers when hammering or when I am doing electrical stuff.( my chubby fingers can't get into the small places in power tools and light fixtures.)

 Next Slip Joint plyers. I try to avoid plumbing, but when you have to do it, you have to have slip joint plyers.  More often mine get used to take the lid off glue or shellac bottles.

  Bottom left are End Cutters. They are my most expensive set of plyers but I use reclaimed wood part of the time and so I am cutting off nails or staples fairly regularly.  I also find that I can use these plyers to pull out fasteners by gripping and gently rocking on the jaws.

  Cutting plyers are the only way to go when dealing with wire. I also use mine to cut cord sometimes, they are a bit specialized but they really do their job better than any other plyers would.

  This is in no way the definitive list of plyers, all of the above come in various sizes and then there are dozens of other specialty plyers for specific tasks.  I have a small tool box with various other plyers stored away under my bench but these five cover 98% or what I do in my shop.

  At the risk of sounding like a broken record. When you buy plyers for your shop buy quality. If you buy quality the tools will last for years, and years, I bought my linesman's plyers in 1979 and I used them today.

  I hope that basics help.  I'm home now and will be able to get back into the shop and make a few small things.

cheers, ianw
print out and colour for yourself!


Monday, March 30, 2015

Chisels....

  There has been a small interruption in the flow of blogs.  I was relaxing for the last couple of days with my kids in Gavle and we've had a couple of travelling days. Yesterday we had a run through the airport experience like you see in movies but we did get to our plane on time.  As an aside KLM stuffs you in like a sardine but had pretty good in flight movies and better than average food.

  For this blog I thought I would gather together some videos sharing information about chisels..
  
  Woodworking chisels come in a variety of styles, there are butt chisels, and mitre chisels and paring chisels and pattern makers chisels and off set chisels and skew chisels and cranked neck chisels, bevel edge chisels and I'm sure my list is not complete.

  Chris Schwarz wrote an article for fine woodworking a while ago, and I posted it at the time but thought it worth a re-post, called The Theory of Chisel Monogamy 


Footprint, 1/2'' Bevel Edge Wood Chisel


  What Mr. Schwarz is talking about is the wood working version of the K.I.S.S. theory.  Keep it Simple, Sonny is one version and the other is Keep It Super Sharp.  A small number of chisel means less maintenance time and a chisel has to be sharp, very sharp some would say Scary Sharp.

  Now for some of the educational, back to basic videos. 

How to use a wood working chisel

  
Paring plugs Flush

    I am not comfortable claiming to know the best route to wood chisel happiness, but I am confident in recommending the final destination.  A small number of very sharp chisels makes life in the shop easier and more productive. As for the gospel of sharpening, I do not suggest any particular sect, I strongly suggest that you pick a method, practise with it until your tools are sharp and stick with it.  Spend more time working and less time sharpening.

 cheers, ianw


Wednesday, March 25, 2015

Pilot Holes, and Gavle boats.

  Last time it was a blog about selecting table saw blades, today, drilling pilot holes. As the attached questions and answers say, pilot holes are a good idea. When you break the head off a screw there is often no real way to undo your misfortune.


PWE150322_QAfull

Q. I think pre-drilling screw holes is a real drag, so I rarely do it. Most screws seem to work fine without all that bother. Why are you always advocating pre-drilling?
A. Call us old fashioned, but when you’re working in solid wood, we believe you’ll get the most effective and longest-lasting fastening power from screws when you drill correctly sized clearance and pilot holes.
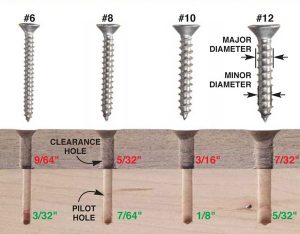
  First, drill a pilot hole through both boards. Pilot holes guarantee that your screw won’t break off and your wood won’t crack. For most hard woods, the pilot hole should be at least as large as the screw’s minor diameter. If the screw has deep threads, or the wood is very hard, the pilot hole should be another 1/64-in. larger than the minor diameter. For softer woods, the pilot hole can be 1/64-in. smaller.
Skipping the pilot hole, or drilling one too small, can create hairline cracks in solid wood and MDF. Visible cracks are obviously bad,but other cracks that are too small to see can eventually widen and cause the joint to fail.
Second, enlarge the pilot hole in the top board to make a clearance hole. This larger hole allows the screw to pull the two boards together. The clearance hole should be at least as large as the major diameter of the screw. Skipping the clearance-hole step often results in a small gap between the two boards you’re joining together. Glue won’t effectively bridge a gap larger than the thickness of a piece of paper.
   We are staying in Gavle Sweden this week and today we walked along the river toward the Baltic Sea. The boating season hasn't started yet but I did see two wooden skiffs. 
18 foot lapstrake planked skiff. An old sweetie still
at work.

this boat's deck looked rough but the hull planks
appeared sound, and the transom was solid too.

  This is the slightly larger, racier sister, a bit neglected and needing some TLC on the upper deck. 

 I took this photograph to show the shape of the planks.  They are tapered toward both ends, and all the planks on one side are different. It would have been educational to see this wooden boat built.

cheers, ianw

Monday, March 23, 2015

How to Select Table Saw Blades


    I am still hanging out in Sweden having a great time visiting my family.  There are few things as pleasing as hugs from a 2 year old granddaughter. 

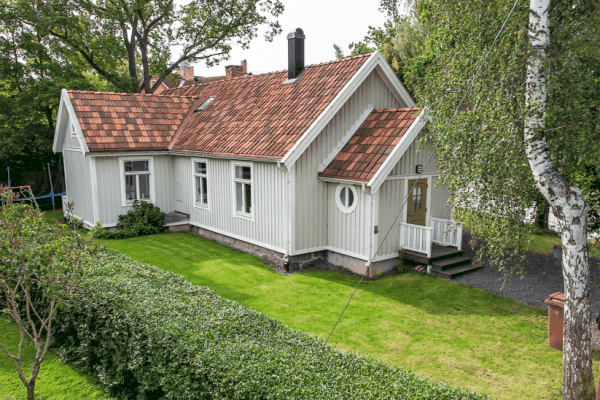
  As I was looking for content today I was walking around town and admiring the lovely homes, many of which are wood and thinking, 'what to blog about while away from my shop'.
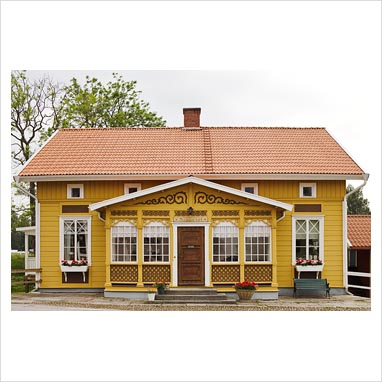
This yellow is a very common colour for a home in Sweden,
its call Swedish Gold.


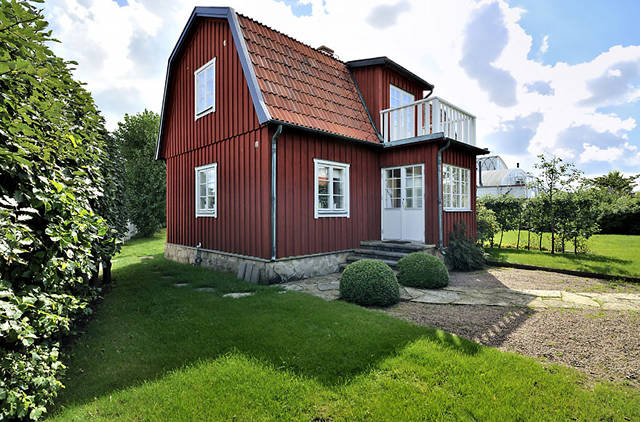
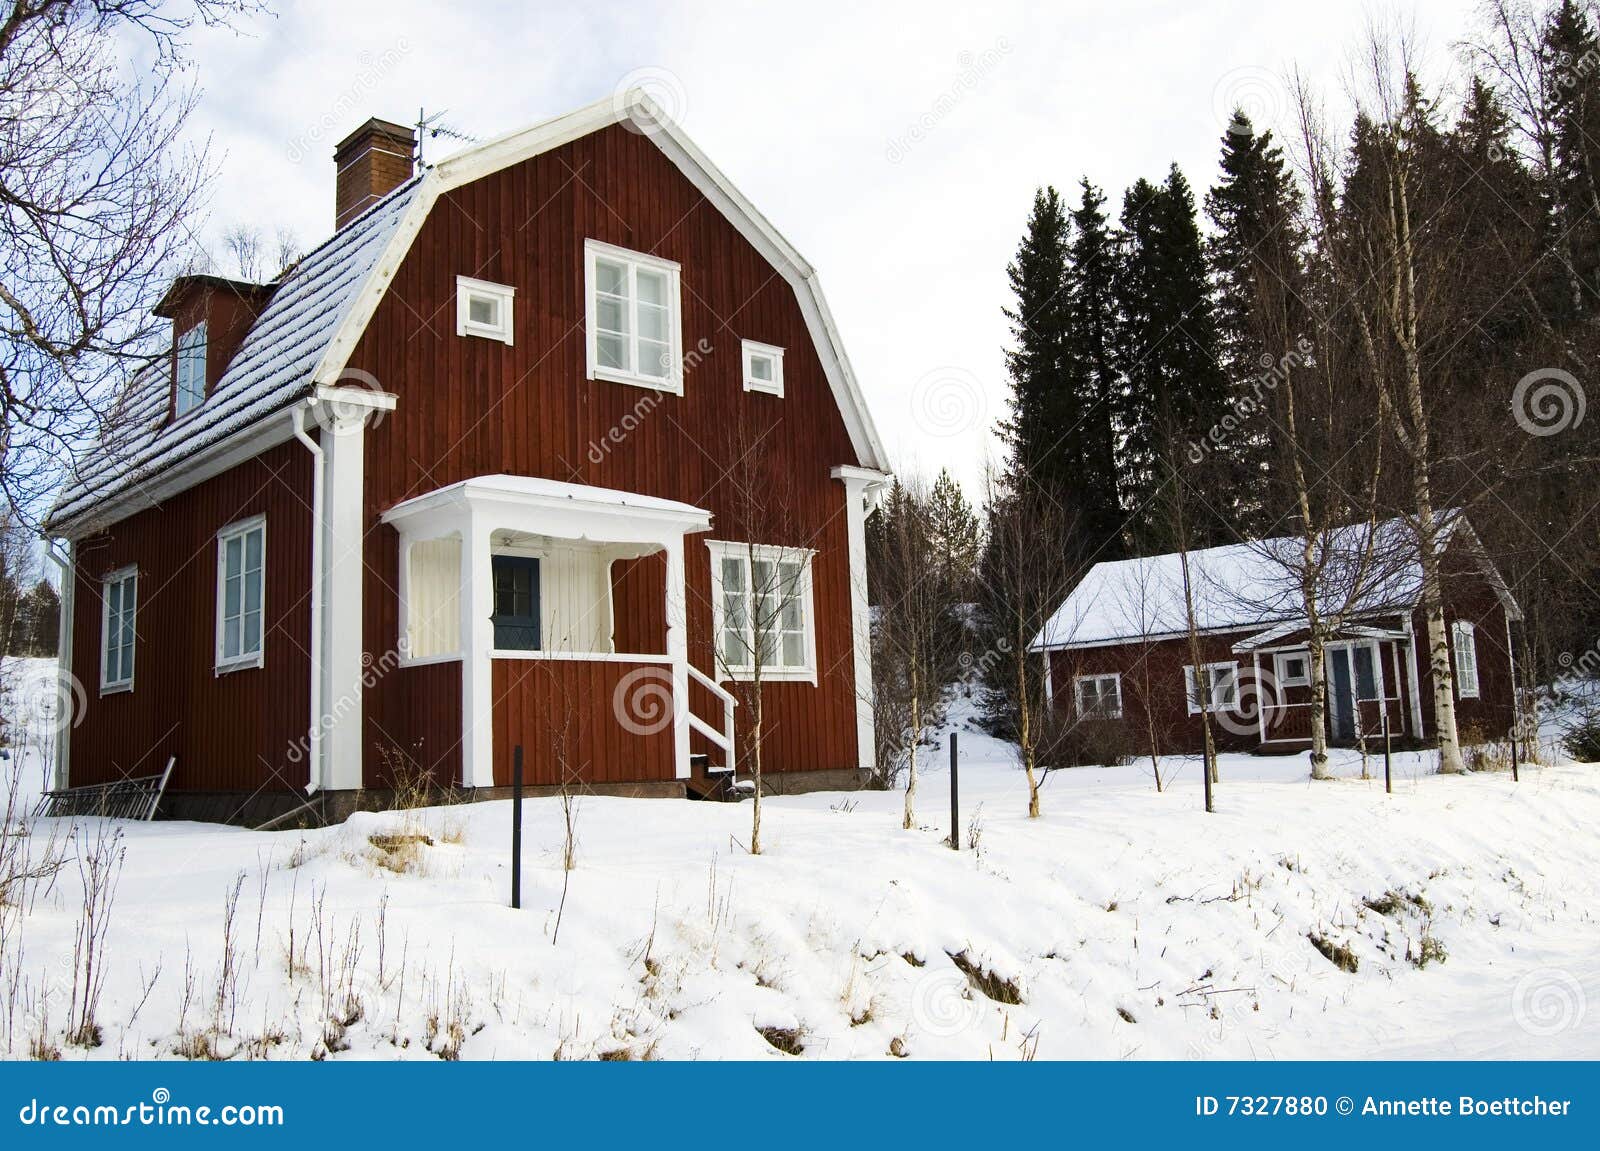
The Barn Style roof line is very popular,
it is roomy and efficient.
  I decided that this time away from my shop would be a good time to post a couple of videos that are sort of 'back to basics'.  It is important to remember that not all readers are expert. 
  
   This video talks about the types of saw blades that you can put on your table saw.  And the presenter states early something that I really want to say again, buy a really good blade, a poor blade handicaps a good saw.  The best comparison I can make is, if you buy a fast car, it needs good tires, one cheap component can ruin an entire system.


     How to Select Table Saw Blades


     Cheers, ianw 


Saturday, March 21, 2015

One Day in Uppsala Cathedral


   Last Thursday we went to see the Uppsala Domkyrka, whether a person is religious or not, you can't help but me moved by the beauty of this historic building.  Even though a cathedral's shell is stone it's heart is wood.


   This portable organ has one manual(keyboard) and four stops as well a foot pedals.  There is one rank of wooden pipes.


  Unhappily I wasn't able to hear the organ played this time.  

 The cathedral's grand entrance is a double set of vast wooden doors.  The dark wooden doors are strapped with iron and are the outside doors that protect the second set of doors from the elements. (and the hordes?)


  There are of course about a hundred wooden pews. The ancient carpenter was not neglected when the church was giving out work.

  Sweden is a country with a long history of lumbering, wood working and making fine edge tools. 


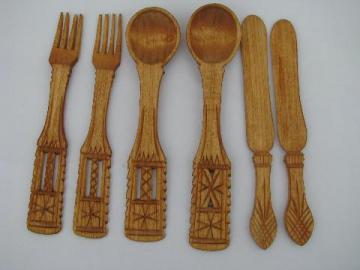
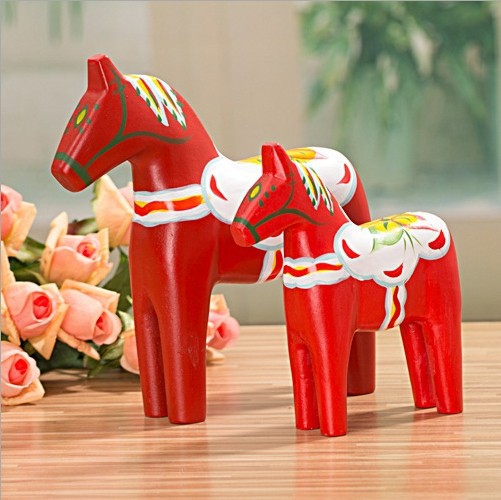
    A typical Swedish carving is the Dalarna Horse or wooden spoon. Swedish carving is often done with very few tools.  In fact this horse can be carved using a new blade in a utility knife.  A utility knife is a good starting place for a carver because you don't need to learn how to sharpen you knife, you can concentrate on your carving technique. 

  Friday was a travelling day, as we rode the train north and the landscape looked like Muskoka Ontario, rocks trees and water. I love it.


 cheers, Ian W.


Wednesday, March 18, 2015

Hello from Sweden.

  For the next two weeks I will be blogging from Sweden. This week Eva and I are staying in Uppsala, Sweden's fourth largest city and oldest University town.  Today's blog features a video I picked up this evening as we are relaxing from a busy day visiting the cathedral and a couple of museums.  I'll have some photos of neat wooden doors and floors for a later blog.

  Today's video is Matthias Wandel building tool holders for the wall in front of the his bench.


   Check out the system he uses for sizing the holders, I love it when the best method is the simplest.

  If you are planning to build a wall holder you should use that as a chance review your screwdrivers and maybe get some quality replacements, that set you got as a prize for buying gas each week probably should be demoted to paint can openers. Just saying, I am old enough to remember when service stations gave out gifts to encourage your business.

  Uppsala is nice, clean, pleasant and civilized. I am a big fan.
Uppsala Cathedral seem from the River Fryis


Saturday, March 14, 2015

Saturday March 14th 2014


  I can't think of a clever title for this blog.  After 621 blogs I hope you will forget a small case of writers block. Aside from lacking an interesting title I to have two videos and some photos to share.

  Last November I blogged about making 30 Cajons for a local school. Yesterday some photos arrived of the Cajons finished and decorated by the kids.  I have been sent a bunch of photos, and to be fair I have to show them all.


 Well done kids.  I hope that you have hours of banging and pounding and making music.

 The first video I wanted to share was a short article  by Chris Schwarz.  "Why I love Spade Bits", is certainly going to make me rethink the spade bit. I especially like the idea of re-sizing the bits slightly. As with every other product, things seem to be more expensive in Canada, but spade bits are still reasonably priced, and there are always cheaper brands available.

 The second video is a router table video. The video shows components being made for another project but what I wanted to show off was the use of the auxiliary fence and the push block. Even though the wood workers in the video are using a very good router table system, the Kreg table, they realize that a couple of specialized jigs can make the job even easier.

 cheers  Ianw

ps. we are getting ready for a trip to Sweden, soon you will be hearing from an international correspondent. 
  Think spring, it is just around the corner, maybe, although our snow is melting, finally and that is a good sign. 
 

Thursday, March 12, 2015

Thursday' Project - continuing the Spring Cleaning Theme.


    On the wall above my sliding mitre saw is a shelf unit that I built four or five years ago.  The unit began life as a prototype for my Grandson's room.  Lucky it was a prototype made from mixed materials because once done it turned out to be the wrong size and shape after all.  Being ever thrifty I brought it home and nailed it to wall in my shop after adding a couple more shelves. The whole thing is a saw dust covered mess most of the time, and not very well organized at the best of time.


  This afternoon I went down to my shop and invested a couple of hours making and organizing.


  After I cleaned off the shelve unit and made a plan I built a small set of shelves using 1/2 inch and 1/8 Baltic birch plywood. The plywood is off cuts from the Great Cajon kit build, I never throw away a piece of wood that maybe useful one day. (that is part of the reason my shop is a bit untidy).

 I cut the dados with my 10 inch Bosch sliding mitre saw. The saw blade was not 1/8 thick so I had to cut tiny rabbets on the edge of each shelf board.

   
  To cut the rabbets I used my 1/2 shoulder plane.  I held a piece of 1/2 plywood slightly back from the edge of the 1/8 plywood as a fence when planning the thinner wood. It only took a couple of passes of the plane to thin the board to make it fit.

  The final result after glueing and nailing was a purpose built self.

 Once I sorted, consolidated and tossed some stuff from the big shelf unit I put the new small shelves in place.  The drills stand up, the bit and pieces have proper homes and it will be easier to vacuum in the future.


  I have a couple of other sets of shelves that could use this attention too.

 cheers, Ianw

Tuesday, March 10, 2015

The Weirdest Work Shop Project Yet!

  Lets face facts, if you have a workshop you will eventually end up making some oddball things.  There will be school projects for your kids, or a crazy lawn ornament, or some kind of arts/crafts what not for your mother-in-law. 

  Today's project, on my new bench, using my new vises, in my recently semi-organized shop wins the prize for the weirdest thing I've ever made.  Today's project did not use much material, in fact it was all plywood from my off cut bin, and I didn't even try to use 'fancy pants' joints. This project, will be a short term thing in our house, once the kitten grows up a bit more we  hope we'll not need this object any longer.

  Speaking of down and dirty joints. I put this project together with nails and screws and I used my electric brad nailer to drive the 1/2 inch brads. I brought my brad nailer years ago to help with small trim jobs in soft wood.  It drives brads up to 5/8 inch just fine and I've avoided jobs that needed longer brads, so it's been a good fit for me. I suggest you check out electric if you are doing small D.I.Y things and don't want to get into the cost of air tools and the on going maintenance associated with them. I would certainly get a 23 gauge pin nailer if I were doing lots of projects like this one on a regular basis.


  This particular project has been inspired by a need created by our lively new kitten.  Jr. Kat is almost a living cartoon cat. He climbs on top of everything and anyone.  He has all sorts of toys that he bats around the house at all hours of the day and night and he tears paper to small bits, including our wall paper in three conspicuous places. ( It looks like wainscotting is going to have to be put in the hallway because of him)


  If you watch the Simon's Cat video you will see his cat do what our kitten does.  Jr. Kat pulls the bathroom tissue roll down, or chews the edges to bits.

  What did I have to make?  A cat resistant toilet paper roll holder!!!


 If you didn't know what this was you might think it was some sort of wooden toy for a kid to play with in a sand box, a plough or a digger maybe.

 Sadly real life is not so exotic.


  This toilet paper holder will attach with zip ties to a rattan shelf unit by the throne and keep its contents safe from attack and within easy reach.


 The roll holder looks slightly over engineered but to be certified cat resistant requires meeting certain internationally agreed standards. Not only that those new mega toilet rolls are pretty big around when they are new. 


  This is Jr. Kat, having just packed himself into my wife's suitcase. He is a cute as a bug's ear and as much aggravation as having a bug in your ear.

cheers, Ian W

Saturday, March 7, 2015

Work Bench Up Grade

  I have been thinking and talking about up-grading my small work bench for at least a year.  The small bench in my shop is 24 x 48 inches with a couple of shelves underneath it. This small bench has been rebuilt at least twice, always from left overs and so it is always a bit wobbly and slightly out of square.

 The last time I replaced the top I used MDF and a piece not quite large enough and one edge was a bit ragged since the MDF sheet had be broken before I salvaged it. The result was as you would expect.


  After spending a few hours in the shop today, this is the bench now. I used a new piece of construction grade 3/4 inch plywood for the top.  It is actually large enough, and I used part of the off cut for the back board too.  I screwed the top down with self taping screws that are seated will below the surface and put the back board on with KREG pocket holes. Also I put a solid wood face on the bench, the first decent wood that has been used on the bench yet.( though it is still recycled from another project)

  The thing that motivated me to up grade (repair) the bench was my getting back into wood carving. I really like to have a small manageable space to work on small projects where I can leave them out and not have them in the way. Having two work stations means that I can have two projects on the go at a time, one large and one small. This suits the way I seem to work.
    
    The other motivator was finally getting the KREG Clamp Vises for the front of my bench.
product


You can see in the back corner
I also have a heavy duty bench clamp system,
the KKS-KLBKSYS. Another excellent bench clamp.

  I put two Clamp Vises on the front of the bench.  As yet I've not drilled the 3/4 holes for the supplied bench dogs, I'll drill holes where I need them, when I need them, that way I'll be sure the holes are in the right place.


  Here you see that the KREG Clamp Vise will my small Bessey Vise so that I will have excellent clamping and access for drilling and sawing when working on small carvings or other small projects. The Clamp Vise will also hold my Moxon style vise when I need to use it.

  Once I took the drawers out and dragged the bench into the middle of the floor, I took a hour or so to square up the body of the bench and made sure all the pieces were tightly screwed together.  Now it is pretty sturdy and should be a very good work space for carving, painting and other small projects.

  Just a foot note, I was told that the Kreg Clamp Vise was being discontinued so don't wait too long to buy one. 

   If I ever get things cleaned up I'll load a short video or some photos of my work space now that I'm happier with it.

cheers, ianw

Thursday, March 5, 2015

An Odd Coincidence


 Even though we in Ontario set a record for the coldest February and I was just told that we set a record for being colder than the arctic for February, we have had some bright beautiful days. On those days it was nice to look out the window at the forest behind our house and look forward to the coming season.  We have done extensive work in our back yard since moving into this house and so the coming spring and summer should be glorious. So my thoughts turned to bird houses and bee hotels.

  Oddly enough Popular Woodworking posted a blog on bird houses. All that information about hole size and box size are talked about and there is even a preview of a video on bird house building.


 Last fall I published this photo of bird houses made by a local fellow and sold once a year at the Locke St. Festival.

  I have been thinking it is time for Kieran, Clara and I to make a couple more bird houses to put up in our back yard early this spring.

  It just seemed funny that bird houses seem to be on peoples minds just now.

  My next big project will be a small but heavy work bench.  I recently picked up two Clamp Vises by KREG  which I am going to put on the front of my bench at either end to act as a face vises for both ends of a board instead of having to make a deadman (lumber support).  The bench is going to be small, about 2 feet by 4 feet and I plan to weight the base down with sand or stones to make the bench very stable.

  I am gathering together materials at this point and the Clamp Vises are almost the last ingredient.  I'll keep you posted.

cheers, ianw 


Tuesday, March 3, 2015

Finished Bench


   I began this bench project over a week ago.  Once I got the old varnish sanded off the bench seat it sat on my work bench, in the way while I figured out what to do about the legs.


  I had several ideas, all of which I rejected after careful consideration. Benches are basic seating, there is no need to be "clever" about the legs, and the bracing underneath the table wasn't actually in the way as much as I imagined. 

  The bench seat is ash and few people can tell the difference I opted for oak for the legs. Only the most trained eye is going to see much difference and since the seat is probably almost 100 years old the patina was not going to be matched very well anyway.


  I used KREG pocket holes and one small bracket to hold each leg in place. By the time the pocket hole screws are driven into solid, close grained ash the legs are firmly attached.  

  After I attached the legs I put on three coats of MinWax water based oil modified clear finish.  For this situation the water based product should suit my needs it was easy to apply and easy to clean up. I guess time will tell how the finish stands up to real life.

  Between each coat of finish I rubbed the bench down with 220 sand paper and wiped the dust off with a tack cloth before applying the next coat.  The water based Poly dried very quickly so I was able to apply two complete coats in one afternoon.

  Once the Poly was totally dry I rubbed it down gently  with a plastic pot scrubber and put on a coat of paste wax. The wax smells nice and gives the work a warm glow, as well as a bit more water proofing.

  The last thing was felt feet. Since the bench's oak legs are sitting on our hardwood floor I figured protection was needed or there would be scratches and scuffs in no time.

  Now we have more seating space for those big family times.