Saturday, June 28, 2014

Small Job, lots of Clamps, love those long reach clamps

  My Grandson is big enough that he is drawing pictures for me now and since the fridge is not immediately in front of my desk we decided that I need a bulletin board.  The board will be a place for me to pin boat pictures, and other incidental office paperwork.


  This is another project made from the parts bin left overs. When we were finishing sections of the basement we bought several pieces of 1/8 inch Meranti (lauan). The Meranti is pretty much old style door skin, not bad to work with although a bit porous. The piece I started was part of a partition wall and is now a left over.  You can see the corner that was nibbled off to make this project. One thing that I like about 1/8 Meranti is that it can be cut; carefully with a sharp blade in a utility knife.  I find it easier to lay the wood out on the floor and cut it with a knife than to try and cut it on my contractor size table saw.


  First I cut a piece of Meranti 22 by 16 inches and sprayed it white. Then I used some 1 by 3/8 elm off cuts for the frame.

The frame will help keep the plywood flat and when finished with orange shellac it adds a nice finished look.  I also plan to set some small rare earth magnets into the lower frame.

Kreg clamps used for the long reaches. 


  After I mitred the corners and glued the frame on I noticed that I had one piece of trim left and a couple of clamps.  I only need the long reach clamps a few times a year but they have more than paid for themselves over time. 

  It might not be art, but it is a style.

cheers, Ian 

Penguin Wallpapers

Last one into the pool is an over dressed flightless bird!!!


Thursday, June 26, 2014

Bench Hooks - various sizes and shapes

The bench hook is one of those things that you need if you are planning to do hand woodworking. The hook holds the wood and tool shapes it.


  These bench hooks are modelled on ones I saw Roy Underhill making on this YouTube video.

   I made the hooks a year or so ago and have used them regularly. They are useful for longer boards but a bit awkward for smaller stuff.

  To work on toys and craft projects I made another type of bench hook. It is small and part of my made and use mini bench top.


  I use this small saw and bench for trimming mouldings, making toys and carvings. I also clamp things to this bench/holder for sanding and filing.

  The other day I was looking at Japanese woodworking videos and had an "aha" moment.  The Japanese wood worker uses pull stoke saws and a bench hook designed for that purpose. Their saws cut on the pull stroke and so the stop block is on the front edge not the far edge of their bench hook. If you Google bench hook you will only get push saw style hooks.  I guess you would have to Google Bench Hook, in Japanese to see a photo of what I saw in the videos.

  What got me thinking about this was talking about the pull saw in a previous blog.  I put my thinking cap on my pointy head and came up with a solution for a bench hooks in a mixed shop like mine.

  I have two excellent saws for fine cross cutting and so I made the bench hook extra long and put the stop block in the middle.
This way I can use which ever saw takes my fancy and not have to have two different jigs. 


The new Bench Hook is long enough that with the cleat on the underside tight against the bench the is enough length to clamp the corner down solidly.


  I bought the pull saw 15 years ago before there was such a broad selection of good European push cut saw available to the hobbyist. Now I have more really good saws than I have hands to work them. Just because I have new tools doesn't mean that I will get rid of my old tools, not unless the quality gap is too wide, in the case of the saws, there is no gap. They are both great saws.


Tuesday, June 24, 2014

Copper Topped Box


  Recently I found a YouTube video that showed the making of a small wooden box with a decorative addition to its lid.
copper top box
 The video shows the entire process.  A cross cut sled is used to cut the corners at 45 degrees.  As well the top is cut from the box with the table saw.  

One way to cut the top off the box is shown in this video.  The woodworker cuts the top off in one pass by raising the blade until it  nearly cuts through, leaving only a thin section of wood, to be cut away with a hand saw.

  At the glue up stage there are some interesting comments on the nature of modern glue.  If you are old enough you remember carpenter's glue, it was sort of yellow and kind of sticky and not water proof at all.  Weldbond and the like are notable improvements over the glues of 30 years ago.  I agree with the video, you don't need tonnes of glue, just enough for good coverage.
  
  I picked up a tip for gluing end grain a while ago.  Before you glue end grain put a thin coating of glue on the wood and let it dry a bit. The first coat helps to seal the grain and prevent the glue meant for holding the joint from being sucked into the wood grain before it can do its job.  I haven't done scientific testing on this method but it does appeal to my common sense. 

I think I would make the copper plate before I made the box just to be sure.  

It is my hope to get back into my shop and working in a couple of days.  The yard has taken up much of my mobile time lately.  But is is worth it.

cheers, ian

cheers, 

Friday, June 20, 2014

Design and Development

 I often see a project on the net or in a magazine, file it away as a book mark or tear the photo out and keep it in a folder and come back to it later.

 Recently I saw a note pad holder project, on the net, but I don't remember where, apologies to the other wood worker for not giving his basic design credit.

 This is a small project that I made from looking at a video so I didn't begin with measured drawings, just a general size and shape. As I have matured I have discovered that the wealth of my acquired experience means that the data management department in my brain sometimes becomes overwhelmed with the vast quantity of data for which it is responsible.  The manifestation of this state of being overwhelmed, is the appearance that I have forgotten.  We do not forget things, it is our data management department failing to correctly file, or retrieve the given information. The information is there, just not available at all times.  Proof of my thesis is the fact that I can remember the item days later, when it is not useful.(sadly)

  To deal with this problem of data management I write myself notes.  I generally carry a small note book and pen with me and in my shop I have a place where I write down a list of supplies that need to be renewed, or note a plan/pattern that needs to be researched for a coming project.

  The small project I is a note pad holder.  The original  plan appeared to be sized to fit a purchased note pad. I changed the design so I could re-use paper.  My holder is sized to use one third of a 8.5x10in sheet of paper.


Opus One
4in. by 12 in.

 Here is the prototype. I followed the design ideas from the net and used clear plastic to hold the marbles in place.  The marbles allow you to slide the papers in but provide friction to keep the papers in.  As I worked on this version of the project I made a couple of decisions.

1. I didn't have plexiglass of the correct thickness. I had a piece used to make a router base so It was much thicker than was needed.

2.I decided I wanted the piece to be wider than this version, and not as long.

  Even though I decided I didn't like the details I finished the project off with a bit of Milk Paint . It became a practise project for using milk paint as much as a wood working project.


  Opus Two:
4.5 by 10 in

  In Opus Two I used wood skewers to trap the marbles rather than plexiglass and drilled the hole on top large enough for a screw head to fit as well as tie a pencil to the holder. 

  The wood skewers are very nearly 1/8 inch and knocking them through a dowel plate sized then easily.  I sanded the pieces before assembly and put it all together with glue .  It is actually not as twisted as it appears in this photo, I guess it is just wonky perspective in the photo. (I was lazy and used my phone for the photo rather than a real camera)


 There is the pad hanging on the wall near the door, awaiting data.

 I like Opus Two's design enough that I think I will make a couple of more to give away.  Lots of my friends are experiencing data management issues.

cheers, ianw


Thursday, June 19, 2014

Woodworking Vise

  We all agree that if you are going to do quality wood working you need to have time, talent, and good tools.  There are dozens of books and web sites discussing work benches and nearly as many dealing with vises, clamps and hold downs. In my case buying and learning how to use clamps and vises made for a noticeable improvement in the final quality of my work.

  To go along with the various discussions relating to vises the Moxon Vise is discussed at length.  Last April I wrote a blog for another site about my version of the Moxon (face ) vise.


  I found my vise to be practical and useful for my needs. As I was surfing around this morning I found another woodworker's take on the Moxon Vise.  His motivation seemed much like mine, he wanted the utility of the vise without the ultra hype and high cost.

Make an Inexpensive Sliding Moxon Vise
  You can see that on my vise I used Bessey Clamps and Mr. Bates used pipe clamps. I enjoyed is video, and it shows why I don't make videos, my shop is never, ever that clean and neat.  I can only guess that Mr. Bates is a much more organised and professional woodworker than I.

  A footnote project is the box I made for the kids house.  The box is made to sit on a low wall beside their stairway.


  The ledge collected loose bits and pieces (keys, phones etc.) as you went down the hallway to the kitchen. With the box in place, less stuff falls down the stairs. 

Monday, June 16, 2014

A Lesson on Using PVC Pipe for your shop


Sometimes I see something that makes me think,'why didn't I think of that?'.  It is sore of a eureka moment.

  The video of a guy making a knife sheath out of while PVC plumbing pipe was one such light bulb moment.


  The fellow that made the video showed how easy it is to form the pipe and the very limited number of tools that you need to get the job done.

  The only tool that may be missing from the average tool box is the heat gun, otherwise I'm sure that we all have Dremel tools and various saws. There are other heat sources of course, I just don't know how popular heating PVC would be in the kitchen..

  When I saw this video I was looking for a quick way to make a sheath for a small knife I recently made but as I thought about things I now see this method as useful for a couple of other tools too.

   We all have a bunch of files and rasps, and they shouldn't bang around in a drawer or tool box unprotected.  It will be dead easy to heat up and form a piece of PVC pipe into a case/sheath. With protection the files/rasps will stay sharp longer and won't skin my knuckles when I reach into my travelling tool box

  Another tool that could use a quick and easy sheath is my 3/4 inch knock around wood chisel that moves from job to job.  

  I have a mix and match set of lathe tools for which I have been thinking of making a storage box. I don't have a station in my shop dedicated to lathe work and so my chisels, face plates and other accessories live in a drawer most of the time. Now, using this method, a bit of pipe, some heat forming and all the edges will be protected. With custom fitted sheaths the tools won't need a fitted box, any old tool box will do. 

  As much an' all as I like making tools and accessories for my shop, if I can do it quickly and get on with my other projects so much the better.

cheers, ianw


Thursday, June 12, 2014

Thursday Evening in the shop

This Thursday has been a fairly quiet day, I spent some time wandering about the neighbourhood and made a trip to the library.That was really the high adventure of the day.  The balance of the day was spend reading, enjoying the fantastic summer like afternoon and puttering around in my shop.  

This afternoon I spent some time breaking down some more of the found wood.   


I cut the drawers up and sawed some more of the tree branches to length and sealed their ends.

At supper time decided to have a beer with my meat and cheese, and so....no more machines in the shop.(other than vacuum cleaners that is)  There was enough saw dust and bark about that it was high time I got going on a serious clean up. Do you turn up the tunes when you are cleaning in your shop?  I certainly do. This evening it was the Eastman Wind Ensemble conducted by Fred Fennell. In the 1980's took a course in band conducting from Fred Fennell at the University of Calgary.  It is inspiring to learn from a world class individual. As a small bragging point he thought I had good control when conducting Morton Gould's Ballade for Band; for a young conductor in the presence of a musical legend control does not come easily, panic is your natural state of mind.

As I worked away in my shop I listened to band music, thought of the great teachers with whom I studied and thought of how different my life's direction had gone. 

My shop is great, I have tonnes of tools and enough wood to keep going for years. As long as I take it easy on my back and work safely I should be wood working for a long time to come.

  I did do a bit of wood working before turning to cleaning up. It was painting and gluing type tasks, not sharp tool and whirring blade tasks.

Recently I was playing with my lathe and made this "egg".  It made for a good 'handie' (like shelfie, in your hand) and then sat around with no purpose.  As a wood junkie, I did not throw it away and today it found a purpose.


Believe it or not I found this umbrella beside the road while riding my bike around the neighbourhood.  It turned out that the canopy was fine but the handle had broken off.  So,because I hate to see things thrown away that can be fixed I brought this lame umbrella home intending to put a handle on it.(been there done that)

Drilling a hole in the centre of the egg/handle is easy when you have the tools.  I used my drill press and a wood hand screw clamp to get a straight square hole.
                                        I hold the piece between the screws to get a solid, none slip grip on it and sometimes then clamp the carpenter's hand screw to the table of the drill press.

Once I got the handle drilled I needed to glue the umbrella into the handle and that is where two part epoxy is the only tool for the job. Two part epoxy has good gap filling characteristics and is water proof once dry.

LePage® Epoxy Steel Syringe

  I also painted a little toy for Clara. Not a bad day's fiddling in the work shop.


Don't ignore those little wooden kits from the $ Store, some of them are just plain fun. ( I of course kept a pattern)

cheers ianw


Tuesday, June 10, 2014

Box Repair for 10,000 Villages

 10,000 Villages is one of my charities and the great thing about this charity is I donate skills, workshop skills instead of money.

  The most recent challenge is a box with a top that doesn't close properly. 

this is a similar box to the one that I am repairing.
  When I picked the box up yesterday I thought is was going to be an easy fix.  I would just plane a bit of wood away and the lid would slide into place,...I am an optimist.

 Closer examination showed that the hinges had been inset too deep and so the joint was sprung. Not a big deal, until I looked at the hinges. 

  You guessed it, the hinges where attached with nails, not screws. How do you get it apart with out destroying the box trying to pull out the nails? How do you do it?  You drill the nails out using your drill press, patience and slow drill speed.


General International 75-030 M1 14'' Bench Top Drill Press

    I have a floor model drill press but almost never need the capacity that it provides, a bench mounted drill press with a half dozen speeds and a good chuck is all most people need. I have floor space and also got a good deal on my drill press at a wood show years ago.  A drill press is one of those tools that immediately improves the quality of work you produce in your shop.

light weight clamps.


   Once I got the nails drilled out on the body of the box I cut a couple of small pieces of soft wood to glue into the spaces cut in the box for the hinges.  Once the glue has set I will trim the wood, drill holes, (using the drill press) and use small screws to attach the hinges again.  With a bit of stain the box should be as good as new.

cheers, ianw


Sunday, June 8, 2014

Jig Saw Project

    I was at my Mother's house last week and when I went upstairs I noticed a woodworking project for years and years ago.


you can see the none-shrinking wood filler that I put in the voids in the plywood.  Now I wouldn't use plywood, but this was long before I had a table saw, or clamps or skills.

   This laundry hamper has been in the upstairs hallway since the early 70's and the replacement lid was made by me in the very early 1980's.  It was probably one of my earliest jig saw projects.  I took the broken lid off and used it as a template and cut the top out of 3/4 plywood.  I remember staining it and telling a friend of mine from school that it was zebra wood. 
   This plywood project is also interesting to me because the edge of the plywood was veneered.   I remember buying a roll of veneer and going out of my mind putting it on with masking tape.  However, I must have been successful as the top is still there and the edge is still hidden.


Makita, 3.7A VS Orbital Jig Saw w/ Case
Makita 3.7 amp VS. Orbital Jig Saw

  This is actually the jig saw that I have in my shop and while I turn to the band saw often times, I would not be without my little jig saw.  I wrote a blog in April 2012 saying that a jig saw was an important and useful tool for an "Apartment Tool Kit" but it is also useful for any wood shop. If push came to shove the band saw could go and I would keep my jig saw.

 I have another little project to share.


  I really think that every wood shop should have a wood burning pen in  drawer some place. Mine is a  pen with one tip and don't pretend to be an artist, but the burned lines add a bit of eye appeal to simple projects.  In this case there isn't any paint or ink that would last on a fingernail brush, but burned lines will be fine.  

  As you skills improve you may not be able to build furniture because of lack of space or cash.  I believe that if you can't build large complicated things in your shop you should, keep building small projects and add to them with burning, carving or some other technique. Remember much of the shop time is good for the soul as much as anything else.

cheers, ianw 


Friday, June 6, 2014

Wood Junkie

  My friend Ron occasionally looks around my shop and on one of his recent visits he labeled me a "wood Junkie".  I do have a quite a bit of wood in my wood rack, and behind the house and in the garage and in piles about the shop.  Lately I have collected green wood from fallen trees that will be used for turning projects once it dries.

  As a thrifty wood worker I am always on the look out for free sources of material for my shop.  Lately there are sites that talk about projects that use pallet/skid wood.  That wood is usually available for free on construction sites and around factories.  There are at least three that I can think of that put the skids out near the road and encourage people to take them away.

  There is another source of wood that you might not think about as you are driving around.  It is not uncommon for people to put old furniture out for garbage day pickup, or put furniture out with a sign "free".   Older furniture often has drawers made from pine or poplar covered by veneer. As a younger and naive wood worker I used to think I was picking up a walnut dresser, only to discover that the walnut was very thin. Newer furniture is sometimes made from birch strips edge glued, not pretty but solid.  I've found enough worth while wood that I keep stopping to check, after all if the wood is crap I don't have to take it.

 
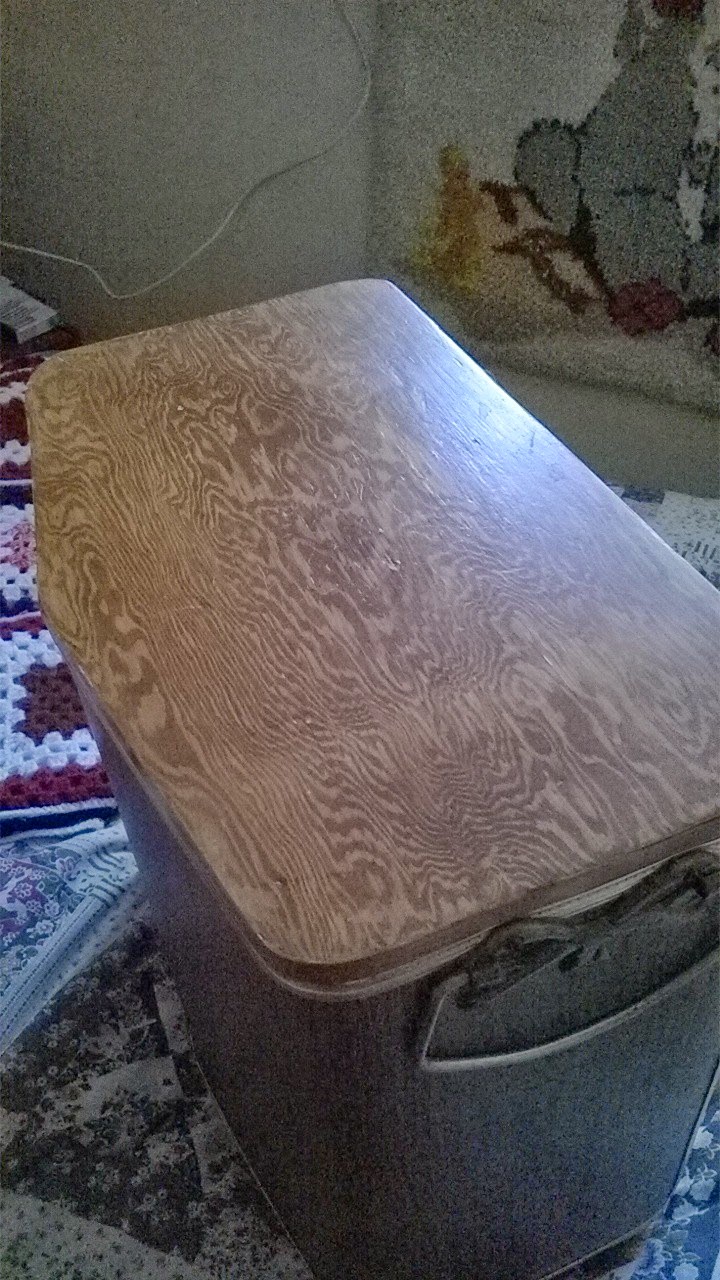
  Here are  five drawers that I picked up on the side of the road yesterday. These drawers have hard wood fronts and sides with quality 3/8 plywood backs.  The thing that really attracted my attention was the bottoms of the drawers.  All five drawers had the 1/8 in plywood floor in good shape.  I use the thin plywood for bottoms in boxes and totes.  Since the thin plywood is consumed in small projects it doesn't matter if the pieces don't start out door sized.  Since the bottoms are nearly always stained, painted or covered somehow it doesn't matter if it is new wood.  The hardwood fronts have holes drilled for hardware but will still be fine for making jigs and other shop fixtures.


When the knobs are removed and the pieces broken down I have five sheets of thin plywood and an assortment of 1/2 inch and 3/8 inch pieces of wood.  I will eventually turn most of this wood into small boxes and bins for tea, toys etc. (box 6 sides, bin 5 sides.)

  I have a bin filled with a broad selection of drawer pulls and other hardware that I have salvaged over time too.  If you have been out looking to buy hardware lately you know how costly hardware can be and these pulls actually look fairly nice.

   The tools that I use for salvaging wood are very basic but there are two that I wouldn't be without.  One is needle nose pliers, and the other are Linesmen Pliers.  The needle nose enable me to dig around and get hold of headless brads and staples and the linesmen pliers have the grip and the grunt to put them out, or cut the off.  I try not to use the needle nosed pliers for cutting or prying, and so mine have lasted for years without the tips getting out of alignment.


cheers, ianw

Thursday, June 5, 2014

Shop Work, but not Woodwork

  If you know enough people, and ask around amongst them you will find all sorts of things laying around, looking for a new home. A friend of mine has many leftovers from his days raising two kids, and several of their old toys have found new life with Kieran and Clara. The latest is this Follow Along Bike, seen here all cleaned up and ready to go.


 The bike came to me pretty dirty and covered in surface rust. My shop is mostly a woodworking shop but as a home owner and an Opa I sometimes find myself working with metal, leather or plastic. Whatever the project I really like to have the right tool for the job.  

  If you are building up a small home shop there are a couple of tools that I strongly recommend you add to your general tool box.

Stanley FatMax 10'' Adjustable Ratcheting Wrench 95-796
FAT MAX 110 inch Adjustable Wrench
 I know that serious mechanics hate adjustable wrenches, but for my purposes I have three wrenches, an 8, a 10 and a 12 inch. These save me from having to imagine whether the nuts and bolts are imperial or metric and since I almost never work on a big mechanical project these three are my go to wrenches. 


Forney 1-1/2'' Shanked Brass Wire Wheel End Brush 60003
  Another group of tools that get lots of use are my wire brushes.  I was able to clean off nearly all of the surface rust on the bike with out driving myself crazy trying to do it by hand. There was some work with polishing compound and 000 steel wool, but not much, thank goodness.

3/4'' Shanked Brass Wire End Brush 60001
brass wire brush

 I used a brush like this to sneak into the spots around the spokes and so clean up the rims to almost shiny new. 

   The workshop is certainly a favourite place to be but if you've been following along you have seen that our garden gets attention in its season too.


This is a photo from our garden yesterday.  That bee was so stuffed with pollen that it didn't care how close I got with my phone to take its picture.

 Get out and enjoy the nice weather, we sure waited for it for along time.

cheers, ianw 


Monday, June 2, 2014

Kreg Jig

pocket hole jig

  A bunch of years ago I demonstrated the Kreg Pocket Hole Jig at wood shows in Canada and had a sort of nastelgia moment when I saw this video on You Tube.  In fact there used to be a You Tube video of my demonstrating the jig at the Hamilton Wood Show.  I think I had a slicker presentation, but it was my job and I can't even guess how many times I used the jig and the face clamp to make butt joints. 

   I started down the pocket hole road making flower boxes and window boxes at our previous house.  Some of those boxes moved with us and our still out on the back deck filled with geraniums as I type this.

  Pocket Hole joints  are often treated as second class citizens, or dismissed at low grade wood working.  Just because as system works well and without over complication doesn't mean that it is second class.  If you are looking to build boxes, or cabinets or most sorts of sturdy carpentry a pocket hole joint is well worth your consideration.

  Kregtool.com  not only lists all the Kreg products but also has a section with plans and ideas that bear investigation by beginning wood workers.

cheers, ianw