Showing posts with label dado blades. Show all posts

Sunday, January 31, 2021

Two Projects

  I have been working in my shop but not posting this week.  I changed my camera with the hope of not only taking better pictures but of making it easier for me to get the photos into the blog. Everything has a learning curve.  The curve is steeper when there are actually technical problems.  The port on my camera in which I plugged the connecting cable does not work. That was the last thing that I imaged was the problem. After consultation with my friend Clive, the camera guy, problem resolved.  Think it will take better pictures, I will get so moving the pictures around will become easier.

   Small Bench

  This is the top of a small bench 10 x 16 inches.  The bulk of the top is a drawer front reclaimed from the side of the road.  I trimmed the piece with elm. I did the glue up in two stages, sides and ends. (mostly because I am not in any hurry. Less so now that there are further restrictions on causal travel.)


  Using poplar again with a 1 inch tenon on each leg.  I rounded but did not fully round the legs on the lathe, it gives a semi hand shaped look.  Sort of tapered, sort of eight sided.


  The 12 Degree Jig again came into use.  I love it when a tool naturally fits into the work shop.


  This time I cut four blocks and glued them onto the bottom of the bench, after drilling the 12 Degree holes.  Once the blocks were firmly glued I stuck the legs into place and....LET GLUE DRY.  Four diver's weights held everything in place. (I think the diver's weights are 6 and 8 pounds.)


  Box

    The next project developed because I looked under my bathroom sink. Unless you want to find yourself a job that needs to be done on you knees, don't look under the sink.  Anyway having made that error I dragged all the stuff out that had accumulated under the sink in the last 12 years.  There were many, many bottles and jars that had a little bit of something in them.  You know, hand soap, shaving soap, mouth wash, shampoo bottles that weren't totally  empty and were awaiting the time when they were poured into one bottle. That time came, possibly this is a natural 12 year cycle. Anyway, once I amalgamated all the potions together I went from having many bottles, to just a few.

    This pine box was also under the sink, filled with....you know.  I decided that though this was a personal project, from years ago it was time to rebuild it.  This box was too large, the wood too thick and therefore too heavy.   


   I took it apart and then used my Dado Stack to reduce the thickness of the long sides.


   Setting up a dado stack is something of a pain....but nothing works as well for ploughing wide grooves and removing material.  I seldom use my Dado blades but every shop should have a set, even if you only use them once a year. 

I have had four Irwin Quick clamps forever, 
that type of one hand clamp makes shop life better. 

  Ultimately I cut about three inches off the length of the box, used the dado blades to reduce the thickness of the sides by 2/3 and am gluing the ends inside rather than out board as the last time.  This means that I have  storage box for under the sink that is not too awkward to retrieve with one hand, even when filled with bottles and jars.

  All that remains is sanding and finishing.  

  Cheers ianw

a post card sized painting.
the other thing I'm doing with my 
indoor time this winter.


Wednesday, June 6, 2018

Organizing, still, it may take a long time.

  One of the many advantages of having a serious shop space easily at hand is the making of custom solutions to everyday problems.  

  The problem was the tangle of wire by my Wife's computer.  The are three modem related bits of equipment, all requiring their own transformer/adaptor. As well there is the charging station for our phones, and Eva's computer.


  For a while all this related spaghetti has been corralled into a shoe box, more or less. This sort of mess makes it difficult to vacuum with out un-plugging something and messing up the internet or phones.  The other issue is the wasted floor space in our small entry area.  Since we have been making a serious effort on our annul spring cleaning (once a decade) this tangle has become a priority.

  I will show you the solution to this mess.  

isn't that just so much better!!
    I added a narrow shelf to the small bookcase and cut some holes through the back, creating a special shelf for the three modem related gadgets.  The famous lizard now has its own place of honour up off the floor and out of the way.  Best of all, that box on the lower shelf contains the surge protected power bar into which all the other gear is plugged.

all five things plugged in, yet hidden.
  I wanted to use the surge protected power bar, 'cause I am old school.  The other reason I didn't just plug everything into the wall behind the book case is that occasionally we need to re-boot our router by turning off the power.  This way all that needs to happen is to open the lid and turn the power bar off for a few seconds.  Everything re-sets at once, easy-peasy. 

  Since I have a basement work shop with lots of tools and too many bits of wood I was able to make the box to fit exactly on the bottom shelf, exactly, not just close because that was what was available at the store. Also we have a nice little wooden box on our wooden bookcase, not a plastic thing, all the way from China. The shelf is  cut to size and stained from materials at hand.

  Making the box was interesting.  I set out to make a box with mitred corners like the last one but ended up with wood of two different thicknesses so opted for dados on the corners.  Cutting the dados could have been done on the table saw, or the router table. I have dado blades for my saw and lots of different router bits.  However I opted for the quickest and easiest  way to cut four small dados.  I used my sliding mitres saw.  I have done this many times when I needed just a few small dados cut.  I raise the blade and put a spacer against the fence to enable to raised blade to cut fully across the board.  Making the set up time short makes up for the multiple passes needed to clear the dado completely.
   
    This box is the last of the wood from the dresser.  I made the entire box with glue and my lead gravity clamps. This project took a couple of evenings because I wasn't in a hurry.  I cut the box out and glued it together and used the drying time to work on the long chair rail and a couple of other small things. Having several  things on the go at once doesn't bother me, much.  I have found that different projects move me around the shop, which is good for my back.  If I stay in one position too long,  carving, or painting or whatever my back complains loudly.

  Once the glue set on the sides I glued on an over sized top and bottom.  When that  glue dried completely I used hand saws to cut the top and bottom to size which I then planed and sanded before finishing.  I have been listening to audio books and podcasts lately and working with hand tools is quieter and more relaxing while I listen.

  If you are like me, part of the reason you work in wood is for the "Zen" sort of relaxation that  it can bring.  One of my meditation projects is tool handles.


  I buy all my files/rasps un-handled and most of my chisels that way as well.  While glue or vanish was drying I made a handle for this small file.  It began as a piece of 3/4 inch hardwood dowel into which I drilled a small through hole.  I then widen the hole so the shoulders of the file would seat firmly into the wood.  While things dried I listened to music or a books and shaped the handle with my wicked sharp shop knife.  ( I have the carbon steel version that cost $6.50 Cdn in Sweden).  I get as much satisfaction for hand shaping a handle for one of my tools as basic as it seems as I do making many of my projects.  I also love whittling with a really good knife, even if all I am doing is make small sticks, smaller.

  Carrying on woodworking.

cheers, ianw


Monday, September 19, 2016

music stand

 Last week I returned to playing clarinet in our local community concert band. I stopped playing in bands about eight years ago for a variety of reasons, mostly because it wasn't much fun.  I am hoping playing will be fun again.

 When I gathered my gear up I discovered that I could not find my wire music stand, it could be anywhere.  I may have given it away or left it in a church some place or......I don't know, abducted my aliens!. Not a real issue, I hate those flimsy, folding wire music stands anyway.

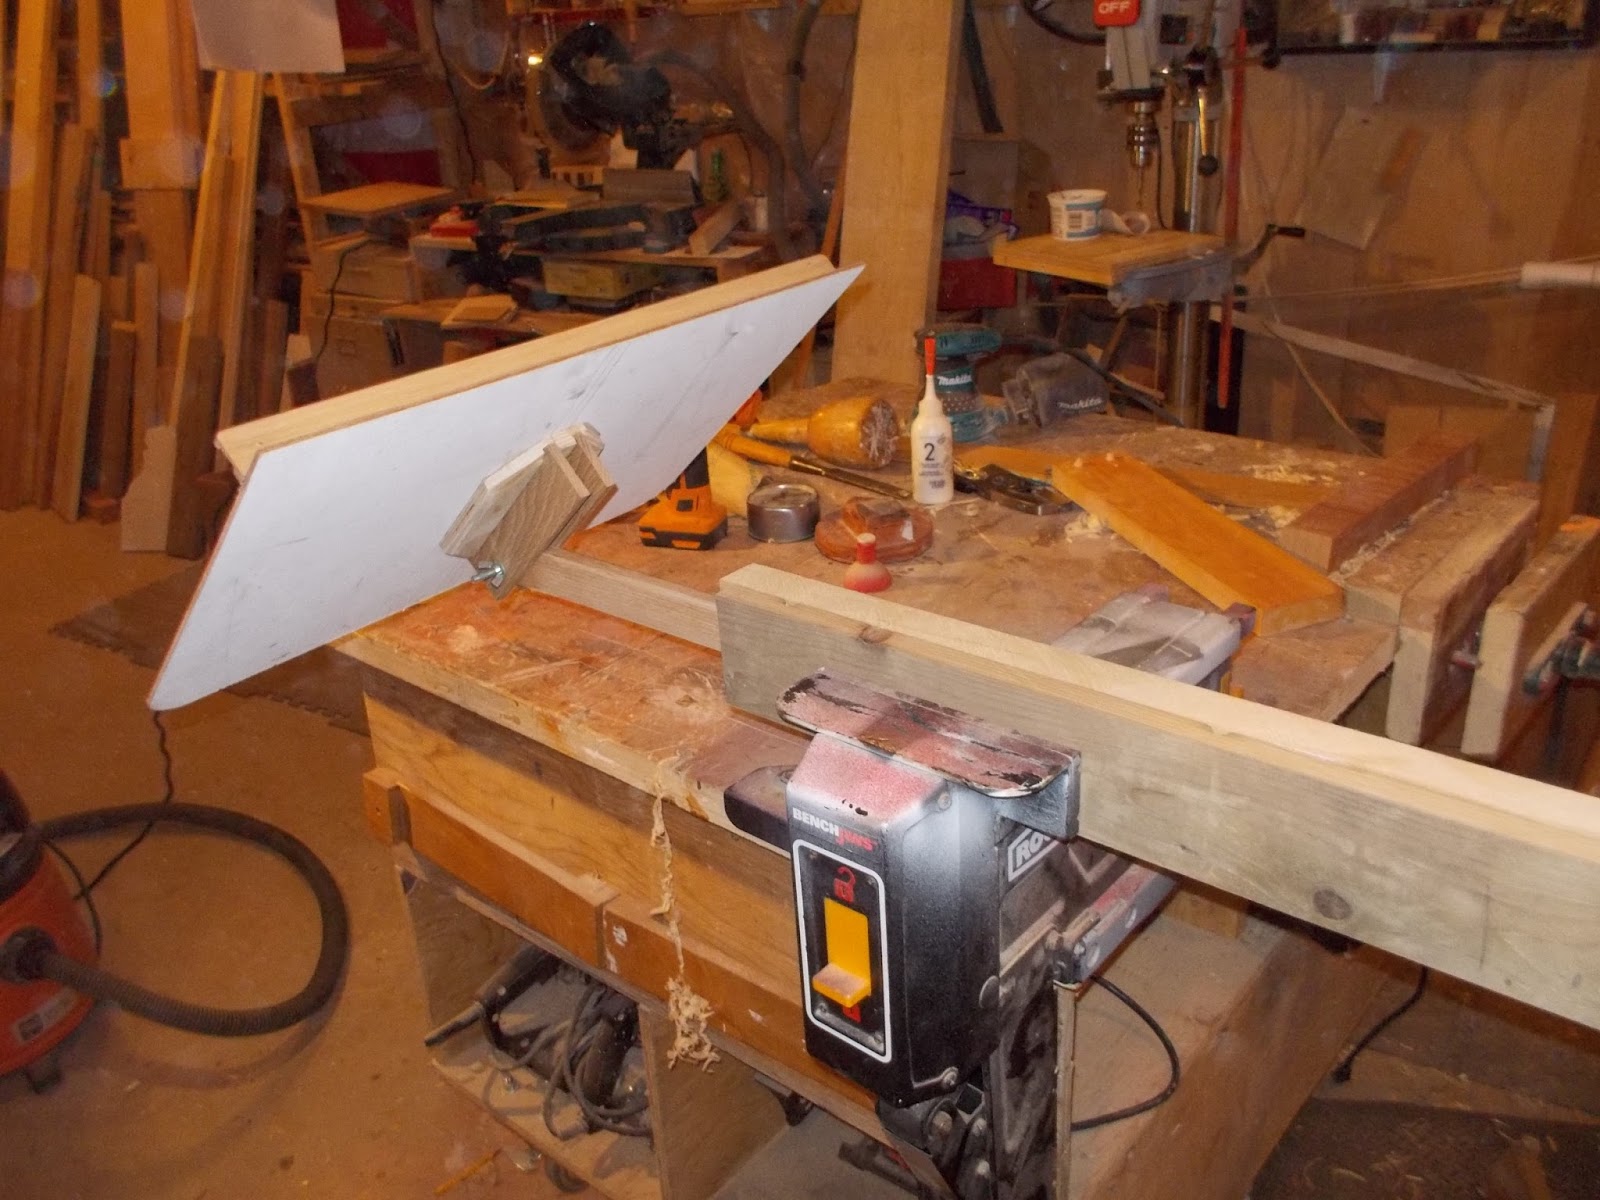
  I have a wood working shop so I made myself a good sturdy, useful music stand.


  At this point the bottom section of the stand is not finished.  Probably I will stain it black too, but for this week I am going to leave it unfinished so that the wood is obvious.

  The whole project was made from re-claimed or left over wood. The body of the stand is re-claimed spruce 2 x 4. The section connected to the top is a bit of oak trim I had laying around, it is fairly thin and so I wanted oak's strength. The face is a bit of door skin.


 The stand is adjustable for angle with a bolt and wing nut. I had the threaded stock available to make the bolt.


 I cut a channel in the 2 x 4 using dado blades into which the oak stem fits. There is the possibility of adding adjustment for height later, currently it is made by me, for me, so it fits. 

  I would go with the hard wood/soft wood combination on the next music stand too. I soft wood base/body is not very heavy and the hard wood stem and legs are small yet strong.
Making a project from mixed wood pretty much means it needs to be darkly finished or painted to get a consistent looking finish.

  There is a sofa table lurking in the back ground but it involves some heavy machining, and my back it not allowing me much heavy lifting just now.  Later I the week, I hope.


Monday, October 13, 2014

Happy Thanksgiving


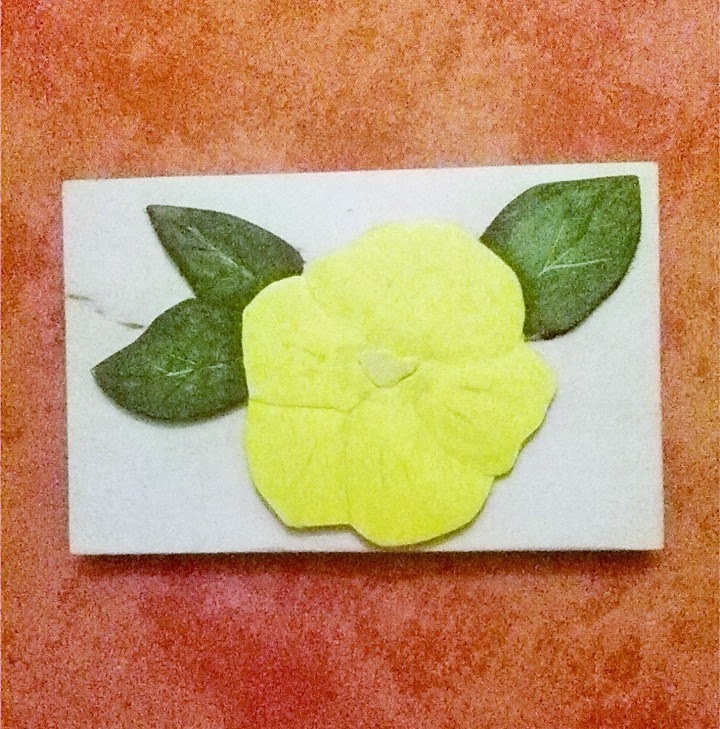
Friday's blog talked about the Rockton World Fair. I have two pieces of wood working and they got second in their category.


4 by 6, relief carved painted bass wood.
 You can see a dark line in the upper left hand corner, that is a dark strike in the grain of the basswood.  A serious carver would have either discarded the piece of wood or used it for a design that was going to have a painted background. I will not enter a piece in competition with a flaw like that again, I'm sure it didn't help my chances with the judge.

3.5 by 8.5 on Baltic birch finished with varnish
  The pieces that came first in those categories were good, but also at least twice as large as mine. Next year I will enter larger pieces, on better wood and I hope pieces with improved technique. Both of these pieces are going to be lids for small boxes, so though imperfect they have a purpose. 


  The Thanksgiving Weekend is over, it is time now to think of Christmas gifts and decorations.  The twisted Christmas tree project by Steve Carmichael is a good looking project that can be folded flat for storage in the off season. 

  The only special tool you'll need to have to complete this project is dado blades for you table saw. A project like this with its many cuts warrants the time needed to set up your dado blades.  I also liked the sled that he made to improve his accuracy and safety (check at 3:17 in the video).  Since the dado he is cutting is 3/4 inch, there will be use for that sled/jig in the future too.

  If you get working on Christmas projects now, there will not be a rush to complete work in December when your schedule fills with family and holiday cheer.  Now if only I would practise what I preach.

cheers, ianw


Monday, September 22, 2014

Small Parts Cabinet

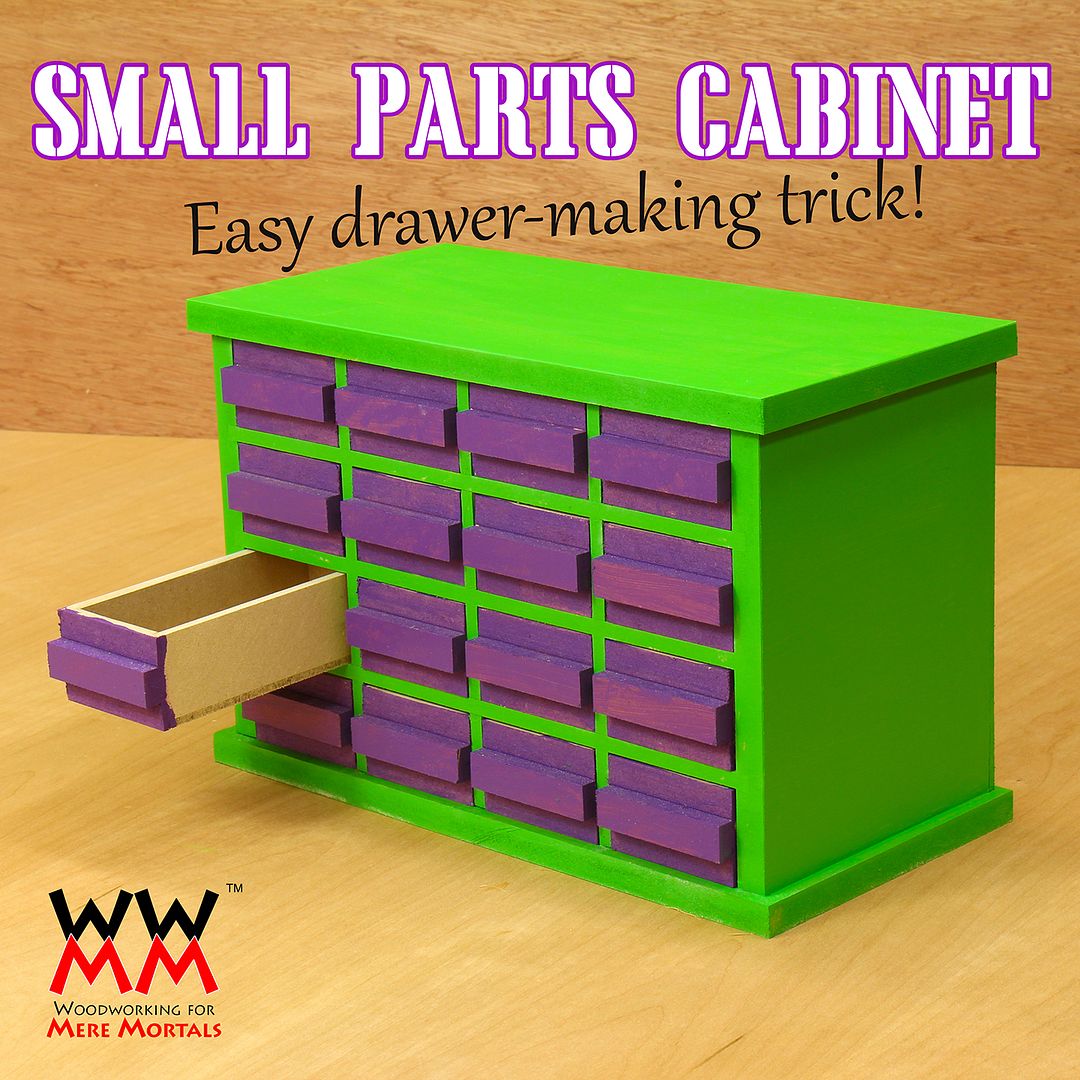
Steve over at Woodworkingformeremortals.com has recently posted a video showing him building a small pasts cabinet. 


Small Parts Cabinet

  Usually a project like this would drive a wood worker crazy, there are just too many little drawers.  In the video Steve comes up with an excellent method for making drawers quickly and easily.

 The corner stone of this building method is the use of dado blades on the table saw. With a dedicated cross cut sled and careful set up it is amazing what can be done with dado blades. It is 'old school' but effective, especially for cutting dados on shorter pieces of wood.

  Cheers, Ian W


p.s. don't forget to  check out our Facebook page too, at