Showing posts with label kreg clamp. Show all posts

Thursday, April 4, 2019

Table Top Ready for Varnish


  Before I get to the table top I will share some of the distractions that are ongoing.

  I re glued and  screwed the music stand I made a while ago (September 19th 2016)  It was a dark and windy evening on Wednesday and my music stand blew out of my hand and across the parking lot, breaking which is why it needed to be repaired 


  I had to repair a push stick featuring a really nice handle from a jack plane, that fell on the floor and got stepped on. Needed to be fixed.


  And worth the trouble since it is very nice for working on my jointer.

  Also, today.....I took my first bicycle ride of the season.  I collected my new bike at Brant Cycle and road it home.  That was a bit of an exercise for early in the season, it was only 2 degrees about freezing when I set off for home.  An hour and twenty minutes of great riding and a chilly face. (that's where I was this morning David)
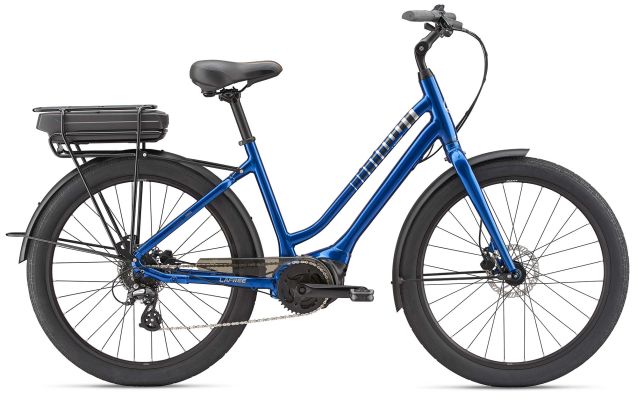
Giant LAFree E-Bike
  The e-bike lets a fat sixty-one year old man ride like he is a teenager.  I road 35ish KM today in the cold and didn't even care. I love the bike it, it is comfortable, quick as I want and it was reasonably priced. WOW.

  The other wood working project began with a need, of sorts. 


  Working on pallet wood often has me begin the sanding process with my 4 1/2 inch grinder and sanding disks.  So I have a grinder, various disks, an arbour tech cutting disk, several wrenches and other stuff.  I finally decided that these various things were drifting and needed a proper home.


  This is to be a storage box, all it needs to do is keep the grinder and its friends together when on the shelf, so I gathered up materials from the bins.

  So the bottom of the box is:


a pocket hole project.  I love my KREG jig.  It made two pieces of plywood destined for the fire place into something useful. 

  When I put the ends on the box I used pocket holes too. And for right angle assembly there is no substitute for the KREG Right Angle Clamp. 


  For the sides I got even more thrifty.  I have a couple of old pieces of Masonite, that were sink cut outs.  The pieces are warped, but almost indestructible.  Since the pieces are too small to be used to make an impregnable criminal hide out they've just sat on a shelf in my shop for years. 


  My Freud thin kerf rip saw blade cuts a slot almost exactly the width of fifty year old Masonite.   So I cut some slots and used various bits of left over plywood and made the box slightly more of a production that it would have been I my wood scraps were larger.  The Masonite almost makes it appear as though I was doing something special, instead of something cheap.

  A piece of old belt and a couple of screws and the box if done, sanded and filled with the extra bits and pieces that accompany the grinder around. 


 So the table top:


  Pretty interesting I think.  It will get a couple of clear coats on top, once I decided whether it needs indoor or outdoor varnish.

  A shop tip to complete the blog.


  You should keep a yellow or orange coloured pencil in your shop to mark on dark wood and Masonite etc.  


  cheers ianw


Monday, June 26, 2017

A Sow's Ear?

  The expression making a silk purse from a sow's ear has a hint of irony to it that makes me think it is impossible, not just difficult.  For a family wedding happening at the end of the week I have a silk/sow sort of assignment.
  I am turning, up scaling some pallet boards into a wedding guess signature board. A board where guest will write messages for the bride and groom rather than a guest book. It seems like a good idea, it may get put on a wall some place and be seen, unlike a guest book that is buried in the bottom drawer in the back room and never seen again.

It is going to look something like this.
  Image result for wedding guest board ideas

  Never discount just how much work goes into making tired old wood look nice. 


  I used my King KC-150C jointer to get straight edges for gluing. Then I added faux breadboard ends just to give the planks a little bit of style.  I used my KREG pocket hole jig to attach the edges.  You can see the edges held in place but the KREG Right Angle Clamp.  I did not use a face frame clamp because these pieces are wood aren't the same thickness, the face frame clamp would not have held things in place as well. 


  All that remains is a whole bunch of sanding.  

  On a lighter note. On the weekend I worked to my grand daughters design and made her a turtle.


  She drew the design and I cut out the legs,head and tail on the band saw.  Currently the turtle is downstairs guarding her bed.  I think I will give it a bit more attention before she comes back to paint it, every turtle needs a bit of sanding I believe.


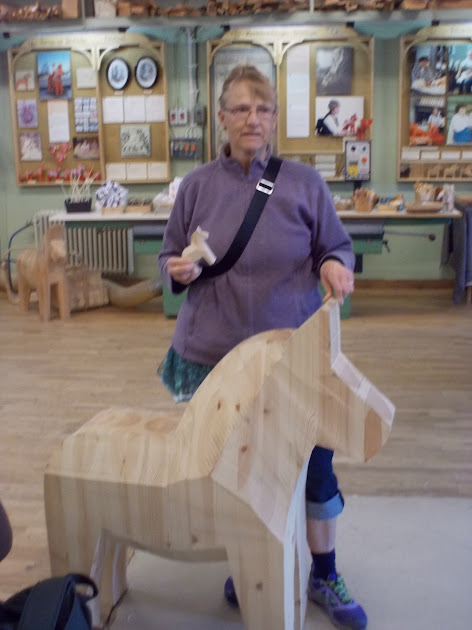
  Just a horse foot note.  We brought home the small horse, but the big on was way cool too. I suppose the large horse is for sale but I didn't ask.

  Lots of sanding to do tomorrow.

cheers, ianw

Image result for dala pig

In case you thought the Swede's are one trick ponies. 
They do pigs too. This pig is about five feet tall. 


Friday, September 5, 2014

2 x 4 project

  If you wander around the internet like I do you are familiar with the 2x4 Challenge. My project is not an entry into the challenge but...something that I whipped up with an eight foot 2x4 left over from a fence repair job.

 The basic dimensions are easy and really the only tools you need  are mitre saw, Pocket Hole Jig, a drill and a sander.

  Parts List:

4 at  11 by 2 by 4
4 at  12 by 2 by 4

  I cut 45 degree mitres on the ends of the 12 inch boards.

  Seven of the frames parts were assembled in the shop using  wood screws and the last section was screwed together when placed around the tree.

completed frame, 26 1/2 inches across

  When I put the frame together I used Pocket Holes, this is how I clamped the frame together when I screwed it together.


   After I screwed the frame together I cut the over hang off with a hand saw and then sanded things smoothish.

  When the project is finally done you get this:


Cheers, Ian W