Showing posts with label ash. Show all posts

Wednesday, June 7, 2023

Live Edge Projects- finished

 Traditionally 'live edge' projects leave the bark on to add texture and interest to the table/bowl/ charcuterie board etc.  Recently I have made a couple of things following this thinking. My most recent projects made use of Ash wood.  In our area, (ontario) the emerald ash borer beetle has attacked and killed millions of board feet of mature ash trees.  There are worm holes in some of my latest projects, however, when the bark is stripped off  completely the result is interesting and a bit different.


  This is a 12 inch round of ash.  I removed most of the bark, actually most of it dried and fell off, I just helped it along.  The edge is a different colour and texture and this will be turned into a three legged stool/side table. It will sit beside a chair and hold a snack and drink or can be used for a causal seat when there is a crowd. 

  The next barkless project turned out to be amazing.  I had an oval shaped cut off and began carving the inside out to make a bowl.  ( see previous blog) Carving end grain ash is definately a power tool task.  I used my arbortech turbo plane to rough the bowl.  Next was time using grinding bits in a drill and smaller bits in a dremel too. I then used just about every kind and size of sander I own. The finish was mostly one inch sanding disks and hand work.  The inside is good, but the star of this project is when I pried all the bark off.


  The bowl is a 14 inch oval and the entire outside is this mass of worm channels.  I gave the bowl two coats of Minwax water based sealer and two coats of water based polycrylic. I am happy with rhe result, application is real easy and clean up is effortless.  I know I get a good finish more regularly than I did with oil based varnish and never have issues with runs.  

  The bowl is finished inside so will be for dry things, chips etc. only.

cheers ianw


Saturday, May 29, 2021

Its been a while

It has been awhile since I posted to my blog.  There are several good reasons, it is motorcycle weather and so I have been out riding, also bicycle riding and for the most part spending less time in the shop.  However. I have been using my tools and time to repair hoses and extension cords and flower pots and other things related to getting the garden season underway.  Those jobs included sanding rust off shovels and hoes as well as painting and sealing tool handles for example.

This little flower pot cat was a gift to my wife from a friend that is now gone and so something to be preserved. 

first leg replacement.


Last November I replaced a broken leg, this spring the other needed replacement too. This time the little cat got repainted as well.  A job doesn't have to be big to be meaningful

  
  I also took some time to make a wooden box for a set of watercolour paints. I had been using a cardboard creation held together with duct tape and decided as I was puttering around to use some basswood and door skin to make a nicer case for my paints.


  There was designing, cutting,gluing and sanding, so it was a shop project, just interesting enough for a blog.

  This afternoon however I did a real wood working project. Or rather re-did a wood working project.

  In 2017 I made a four legged end table using as ash round and turned legs.  The project result was about a C+. Worked okay, but didn't look so good.   I made a couple of design mistakes and a couple of execution errors. The table didn't fall over or anything but it really looked like a failed prototype. The biggest problem was drilling the angled holes for the legs. In January I tried a three legged version and had much better results. It was time to fix the first version.


  The top of the table is a good size and two inches thick on average. 


  I decided to re-use the legs. I cut them off leaving the holes plugged, since I was going to have to drill new locations for the three legs anyway. 


  By reloading the elm legs on the wood lathe and turning a new shoulder I was able to re-use the legs.  The mini lather is just long enough to fit these legs.


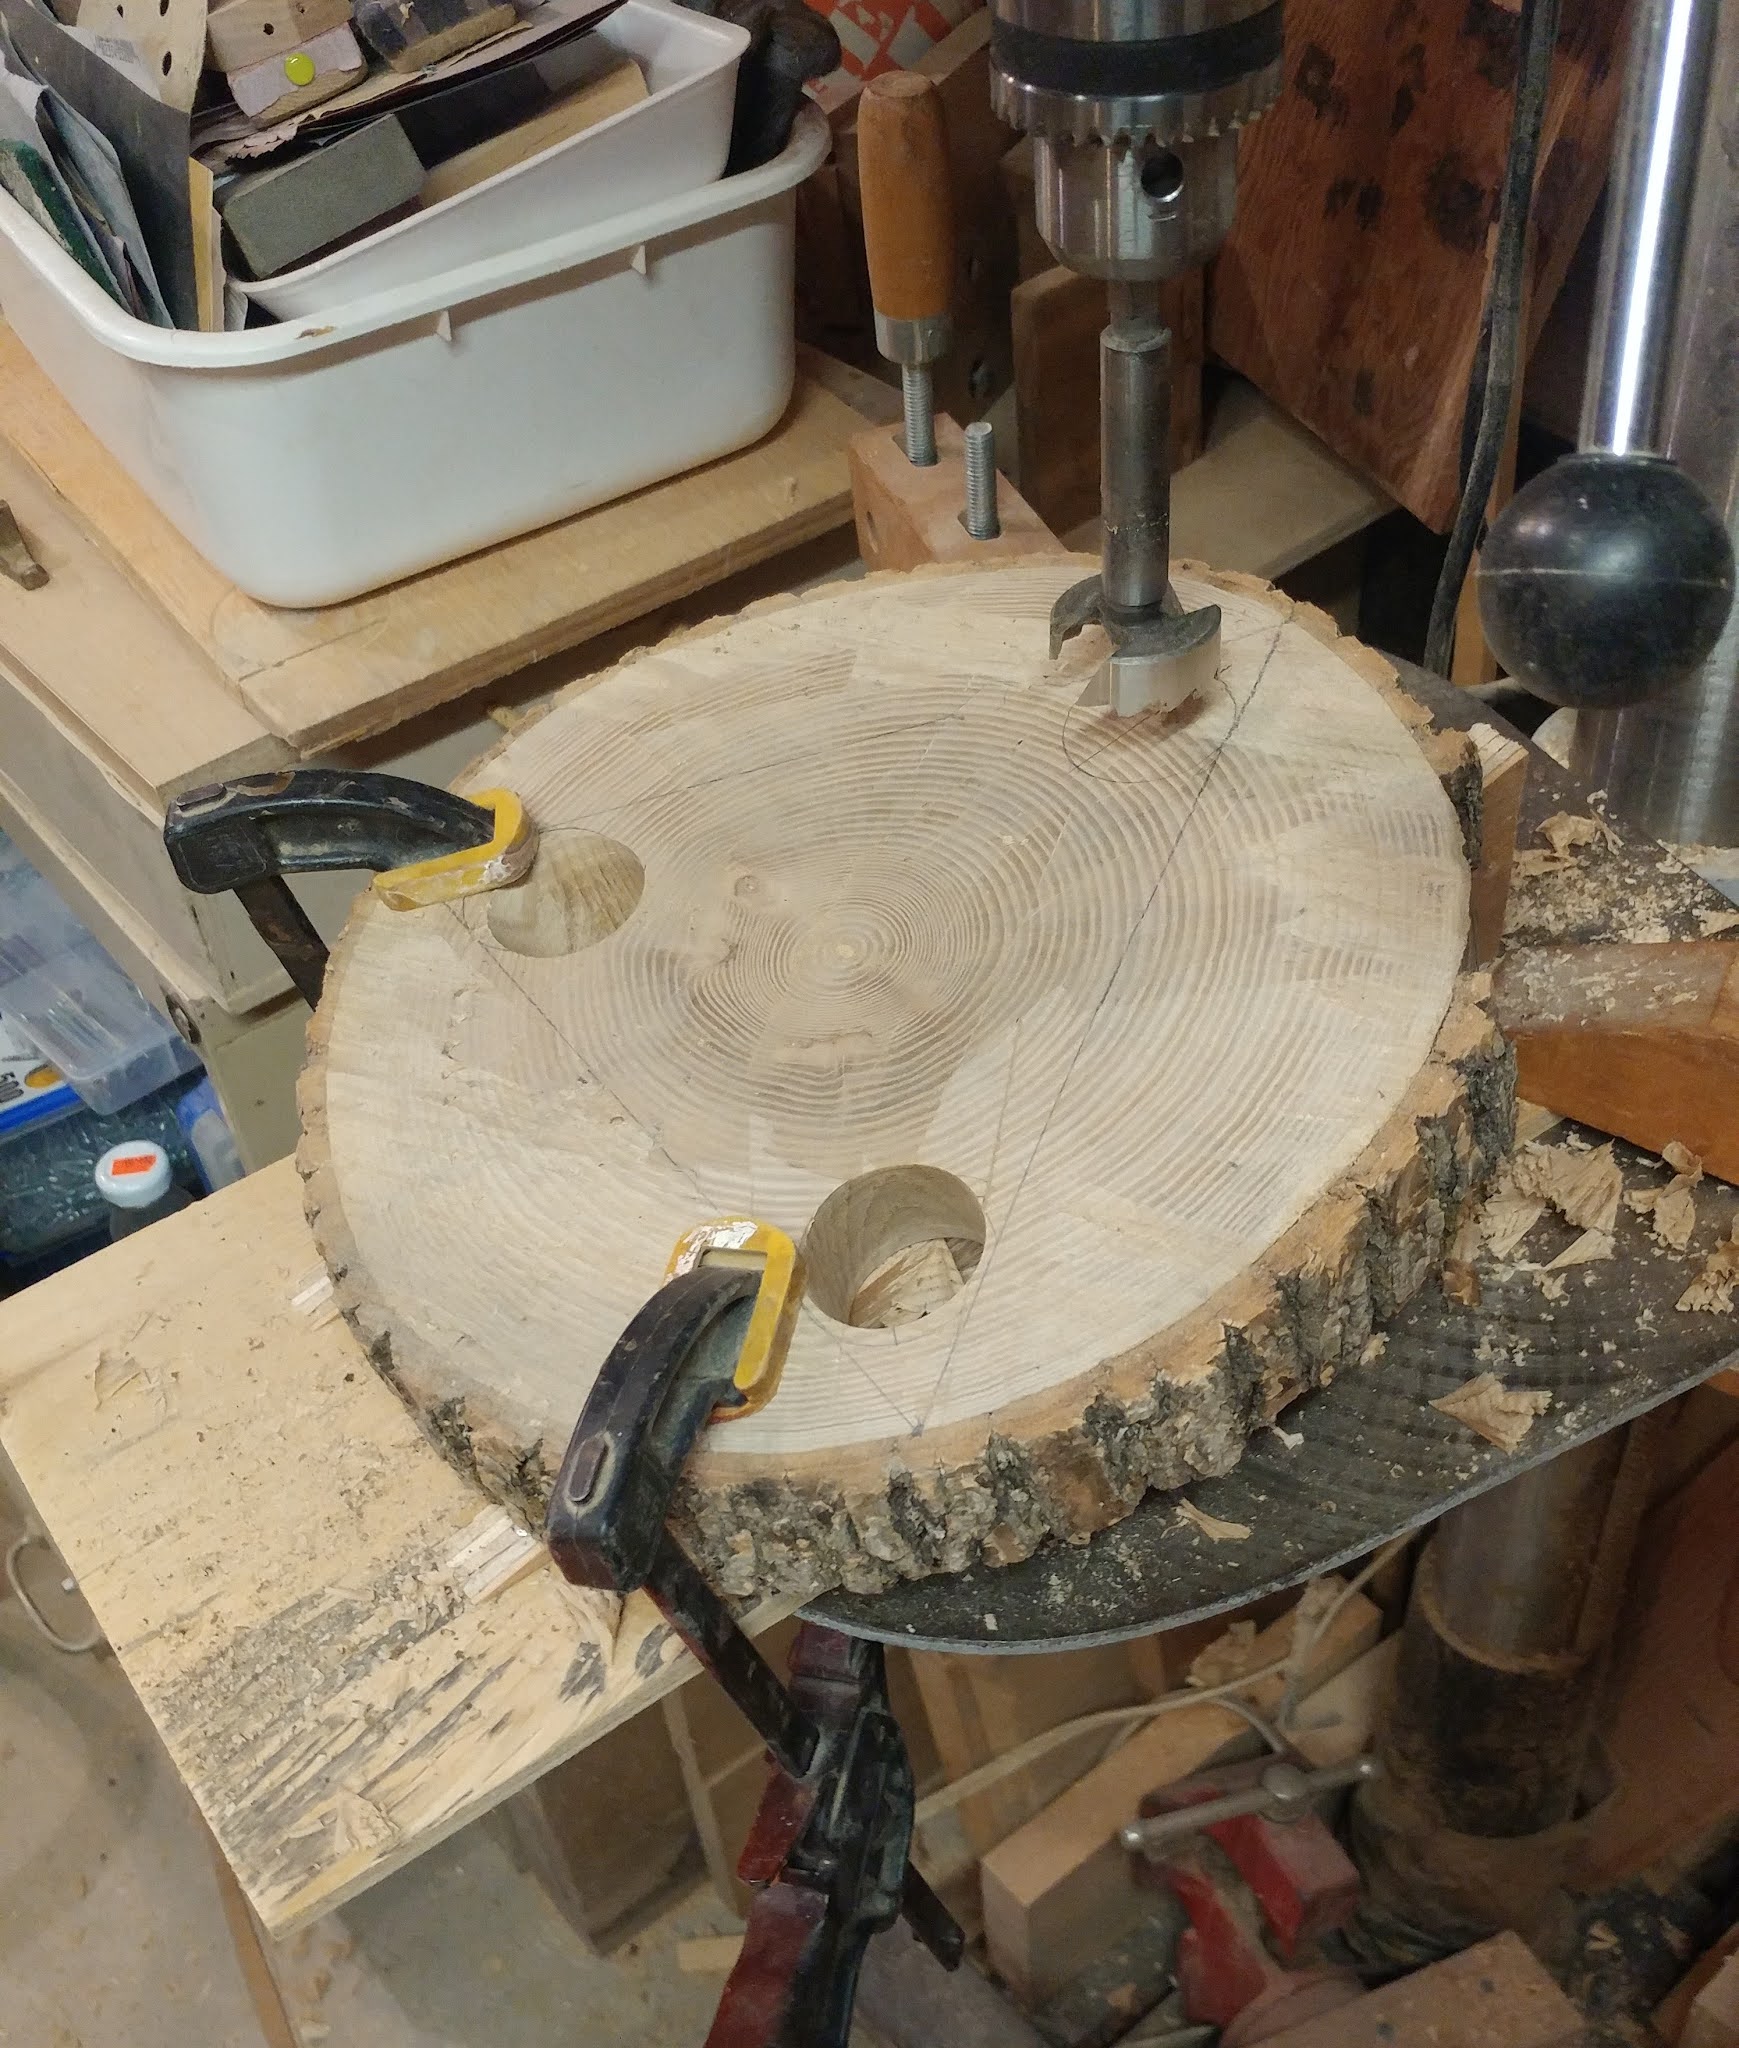
  The real advancement to achieving a better result was the making of a jig to go on the drill press table to give me a constant and controlled drilling angle. The January 22nd 2021 blog entry talks about the jig, which is now painted bright red.  The photograph shows how I control the drilling process, clamps, lots of clamps. I clamped the jig firmly to the drill press table first, making sure that it was not going to move. Then I clamped the wood firmly, to the table and the jig.  I usually work by my self in the shop and so have many clamps of many types and sizes. Since the forstner was 1 1/2 inches and drilling through end grain ash, 'slow and steady wins the race'.  
  
  The final construction turned out well.  The table sits very flat and stable.  The legs also look balanced and symmetrical  from all sides.  Once the glue dries I will sand the whole thing before re-applying the shellac finish.    


  You will see the other small change I made to the table top in the next blog when you see the finished product.

cheers, ianw


Friday, January 22, 2021

Finishing the Three Legged Stool


  The stool is 10 inches across and 12 inches tall.  The seat is ash, the legs are poplar and the wedges are cedar, This turned out to be a good little project and with careful set up not a difficult one after all.
   

  The internet told me that the typical angle for the leg holes was 12 degrees.  I decided to make a proper jig to hold the work while drilling.  The last time I did this I just wedged the work piece and ended up with one leg hole misaligned, this time perfect.  The jig will now hang on the wall with all the others, after it gets a coat of bright paint.


  In action the only trick was to solidly clamp the work piece to the jig, to the drill press table. I think it is past time to address the challenges of clamping to the drill press table.  I've got the time, I want to make more stools and tables, so...get on with it.


  After the holes were drilled and the legs attached I needed to glue a couple of pieces of bark back on. As well as make repairs to my mitre saw jig. And assemble the paper towel holder for our laundry room.  All those things are being held together with glue.  Glue works great when I give it time to set.  When I put up the sign, I remember. Visual aids are important teaching tools for some people. (me)

   A three legged stool was on my "make it"  list, as well as bellows, wooden nut cracker, spinning wheel among other things.  It feels good to check off something on the list.

  cheers, ianw

 
the other thing I have been doing with my time, thinking spring


Tuesday, January 19, 2021

Flattening, Planing, Scrapping and Sanding

  The current project is a three legged stool using an ash round as the seat.

the half round marble table top is used as my 'flat' reference surface in the shop.
I found it put out as garbage by a neighbour one day, a real find.


  My Brother in Law cut down an ash tree a couple of seasons ago and generously gave me a dozen rounds of various sizes. The wood is  gradually getting turned in to cheese boards, clocks etc. This round will have three legs set in as a small side table/stool, plant stand.  The rounds were cut from the tree trunk with a chain saw and so are pretty rough. Even with skill and care a chain saw leaves plenty of marks on the wood.

   The  challenge is making the flat face smooth using a reasonable amount of time and effort.  Having now flattened several rounds I think I have arrived at the most efficient method.  

electric power planer.

 I bought this planer on clearance from a booth at a wood show a few years ago. It is fairly short and somewhat awkward to use but...it cost $10.00.  As a rule I don't use a power planer but for hacking away at end grain like this it works very well.  Once the face of the round is flattened somewhat,  hand scrappers are the next step.  Again the scrapper can be used aggressively but still controlled.  The final stage is random orbital sander time, 80 grit and up.


  The end grain planing leaves a pile of rough saw dust, not nice shavings.

   The legs are poplar 2 x 2's 14 inches long.  Initially, since the power planer was on the bench I used it to knock the corners off the legs before turning them on the lathe. Funnily enough the power planer was not the best tool for the job.


  Quickly I turned to using my jack plane to ease the  corners, and the result is much better for the shop's air, and as quick, in my opinion.  My Grand kids used to call the shavings feathers. They liked cedar feathers best, don't we all!


  It is quick, easy and quiet using a hand plane.


  It took about 20 minutes a leg to turn on the mini lathe, and sand ready to be set into the seat/top of the stool/table.

   Next, decide the leg angle, make a jig and drill the holes using my drill press. 

   Planning and set up will take longer than the job. 

cheers, ianw