Wednesday, December 29, 2021

Merry Christmas and a Happy and Healthy New Year.


  The spoon from the previous blog is sanded and finished with hemp oil.  I finished another spoon, yesterday but it has already gone out the the door.  These make great gifts, everyone needs a spoon.


  Over the Christmas holiday two of our grand children were here and I cut the shapes out of the wood rounds and my grand daughter and I decorated them.  It was interesting, we used acrylic paint and bamboo skewers for painting.  The skewers make is very easy to make and control the dots.


We also made a house for small stuffed animals to live. Also it got taken away before it was photographed.  That was a shame, this was the first time the coping saw was used by a kid. She designed and built a nice little bungalow with very little intervention from Opa.

  This was a better Christmas than last year, we got to see family and have people visit and with luck we will pull through this latest health issue with as little suffering as possible.
  I hope the same for all of you.
cheers ianw

Thursday, December 16, 2021

Deer


  Yesterday, I made a deer for our yard.  Eva had talked about wanting something to add character to the otherwise dead winter yard.  We looked a a variety of things on the Net and as always I went my own way anyway.  I did closely examine several of the internet examples to get an idea of what sort of proportions  worked best.  The trick is to get the general size, shape and proportion so even something this rustic and non-representational  will be perceived as a deer.  It is also important to remember that your "art" may be better if it doesn't try to copy real life too closely.


  I had the good luck to pick up the cedar body on the side of the road a while ago and then get the head just the other day.  Dried cedar is very light and so spindly legs are plenty strong enough.  The neck needed to be thicker than the legs but I didn't have a natural branch available so I roughed up an aged 2 x 2.  The building process was not complicated, creating the design and gathering the materials together took the majority of my time.  I even made several sketches first.  All the angles are drilled free hand and set by eye, once the general plan was formed it was easy.  Making up my mind took the most time. 


  Rustic wood working might be a good place to start your wood working career since it doesn't really require any special or expensive tools.  I have the good fortune to have inherited two excellent draw knives but lower cost alternatives are out there if you look and can sharpen your tools properly. Any drill that will turn a large spade bit is adequate.  The saw I use for tough lumber is a cheap pull saw from the local hardware store.  I have two very good edge tools in the hatchet and bench knife, but again decent quality tools are readily available for a decent price. 

  I will keep my eye out for materials to make a fawn for the spring time.

 cheers ianw 

Monday, December 13, 2021

Spoons, it is the season.....


  Step one in carving a spoon is wood selection.  Sometimes I begin with a sawn board about one inch thick, usually I also mark the spoon out and cut the outline shape on the band saw. 


  Fast and effective, but lately I have been using Japanese Ornamental Cherry, last spring I cut a fairly large branch off the tree in front of our house. Using wood like this  results is more individual and attractive spoons.

  This week as I split the branch I discovered the wood is still a bit damp inside. Slightly damp wood is easier to carve. I split the branch with a hatchet and large wooden maul. 


  I mark the basic outline on the wood and then use my hatchet, draw knife and heavy carving knife to rough out the basic shape.  The handle's ultimate shape is decided by the wood grain and so often not perfectly straight. Shaping the handle to be comfortable and useful even though slightly bent is part of the carver's art. A spoon with a bent handle is definitely a right or left handed tool, but that is part of what makes each spoon individual.


 This spoon is awaiting final sanding.  In my experience it takes longer for the final sanding then to get the spoon to this stage. I usually carve a couple of spoons, clean up the work space and then sand them. Sanding is noisier and not as much fun as I often opt to use power sanders for the final shaping, it is just faster.

  If there is any doubt about this being hand hewed,


the shop needs to be cleaned with a shovel after making a couple of spoons.

 I have a few spreaders and a couple of cutting boards to finish before Christmas so I best carry on.

cheers ianw


Wednesday, December 8, 2021

Quiet Projects - a solution to a problem.

  Elm is an interesting wood with nice colour and grain. I was listening to an audio book and played around in the shop.  I decided to make my wife a pendant. I had cleaning to do and a bunch of little bits of nice wood accumulated, so I carved out a pendant ( 1 1/2 inch across).  It was a pleasant diversion, with knives, rasps and sand paper.  

  I think I will make some more to attach to Christmas gifts. I will have to write on the To:, the From will be obvious.


NEXT
  A silly project:
   My soap kept falling off this shower rack and finally I got around to fixing the problem.  I actually had to wait until I bought copper wire before I could  make this.


  The top shelf needed something to keep the bars of soap and little things from falling off. A world famous blogger would not post this, their projects are so much more epic.  Probably.         I am retired; at this point I avoid epic, but also.....most of life is not epic.

  I ripped the wood on the band saw, drilled, sanded and assembled with copper wire a solution to a problem.  To me, that is one  reason for having tools and a shop. It is nice to solve a problem in house. The typical solution is to go to a store and buy something made and shipped from the other side of the world.  I only call on international industrial might when I have to.  Maybe that is an attitude to cultivate?

cheers,ianw   

just an idea, 
if you've got the materials at hand.


Tuesday, November 30, 2021

Long Spoon, and Another Cedar Project

 You don't know you need a long spoon until you get one and then wonder how you lived without it. Big pots of chilli, stew and simmering fruit all need a long spoon to reach deep into the pot's corners while keeping your hands happy and safe. 

  This one is walnut, finished with Hemp Oil. I shaped the spoon mostly with knives after roughing it out on the band saw.  Hollowing out the bowl of the spoon is a job for my Dremel Tool. I like using walnut for spoons because it is fairly hard and yet it is easy to get a glass smooth finish.


  We have several hand made spoons in the kitchen drawers now and it is surprising how often it is better to have a slightly longer, or stouter spoon at hand.

**********************************

  I have been working away with my found cedar. Yesterday another project emerged that suits found cedar.  This time I cut the strips on the table saw, I am leaning toward hand tools, but haven't fallen in totally. 

BOOT CLIPS revisited. 2014 March first visit.


  Winter has arrived and so it is tall boot season. 


  The boot clip is like a extra large clothes peg.  It keeps soft boots from flopping over, taking too much space by the door or in the closet.

   The design is two long pieces with a spacer in between. Once I got the boards cut into strips I used my hand planes to clean up and smooth the wood and a shop knife and files to round various edges. 
jack and smoothing plane.


  I think cedar is the perfect wood for these holders and it planes nicely. I'm making 6,  almost no noise and lovely shavings.  I have a Anant Jack plane with an up graded blade and a Veritas low angle smoother. (thanks Santa)  For a couple of years I was the Canadian Importer of Anant planes.  I always frond them to be good general carpentry tools.

  Time to think about some more quick Christmas gifts from the shop.

cheers ianw


Saturday, November 27, 2021

Bird House - Tea Pot

 Having written 1128 posts over nearly a decade I have never really broken into the "Big Time". I am not surprised, I chose not to get involved in Video Blogging six or seven years ago when that was the coming thing, and I know that I am not so skilled a craftsman that the internet hangs on my every word.

  Today's blog is a clear example of why I am still here, but not a big noise on the net.

   A coupe of weeks ago I picked up an armful of discarded cedar deck boards. Cedar is nice to work with, especially with hand tools. I used some of the boards to knock out a planter for our back deck and now I am making a bird house.


  This bird house has been put together with glue and finishing nails and soaked with 1/1/1 finish.($). I enjoyed making this bird house which I will have my grand daughter paint when she is here for Christmas holidays. Why was the such an enjoyable project? I only used hand tools.  Cedar is wonderful to cut and plane. While making this project my shop smelled of cedar and the floor was covered with sweet smelling shavings. My shop looked like something from a children's story where a white haired Grampa is making something for someone special. Well....I am a white haired Grampa (Opa) and I was making it for my oldest grand daughter. 

  I have a shop filled with tools, some good, others excellent, both modern and traditional. With my full 'power tools' shop I could have knocked dozens of bird houses out in time it took to make this one.  All the saw dust would be collected in my shop vac system from my table saw and random orbital sanders and the product would be excellent. It would be efficient and praise worthy,  every yard has room for another bird house.

  Instead the process became the goal, not the product.  As long as a bird house emerged from the time in the shop, how fast it happened did not matter.

  So, I began rough cutting out the wood to length with a hand saw from my Grandfather's work shop, I'm 63 and I'm sure the saw is 25 years older than I am.  That saw built houses and boats, boxes and furniture when my Father was a little boy.  Once I got the boards roughed to length I used my Jack Plane to flatten then.  I created mounds of feather-like shavings and filled my shop with the aroma of  dry cedar. After I got the wood splinter free I cut everything to size. I have a rip saw from my Father's shop that is a joy to use and in dry soft wood, quite effortless.


I drilled some holes, drove some nails and used a nail set to sink the heads.  And voila a bird house is born.

  When you make a bird house don't just drill a random hole, find out what birds are in your area and drill an appropriate opening.  

 ***Also don't put a peg below the hole.  The birds that live there fly in and so don't need a peg, that don't climb into their homes. All the peg does is provide a place for a predator bird to perch while attacking eggs or baby birds.***

 The other thing I did was put a good, useful handle onto my lovely new tea pot.


  I have a copper wire core surrounded by small branches from our Mulberry bush wrapped in hemp cord. I'm not 100% convinced that this the the best look, I think the handle is too heavy for a delicate little pot but...it will do from now.

  The more I work in my shop lately the more and am moving away from noise and dust. It don't know if this is a fad or evolution.

cheers ianw


($) 1-1-1 finish is one part varnish,one part linseed oil and one part turpentine. It dries slowly but soaks in really well.


Saturday, November 20, 2021

Photo frame, tea pot and book rack

I have puttered away in the shop lately, and actually finished a couple of things.

Painting from P.E.I


  This photo frame is made from found wood and found glass. Eva bought the painting while on a week's holiday in September. We are a bicycle riding family, so we like bike art.


There is plenty of talent in our family.  My niece and her mother throw pots and I have one of their tea pots.  It is lovely and will live in my shop.  I am working on a handle, the glue is drying as I type. 

  The tea pot is sitting on one of my favourite book rack patterns. I think I have made at least a dozen.


  This version used 24 inches of re-claimed cedar decking. I cut the board into its three pieces then hand planed and sanded it smooth.  The angle is just enough to lean the books over. 
   I know that cedar dust it dangerous but with the right precautions cedar is lovely to work, it is light, strong and smells great. I used one coat of Garnet toned shellac just to seal the grain and bring out the high lights a bit.  
  A project like this is a great, easy D.I.Y type gift. This is another project for a two power tool shop.  The two power tools, a jig saw and a cordless drill. If you are starting out or have limited space or money those two power tools and a hand full of basic hand tools will build lots and lots of small things that will personalise your home and life.
  Winter is coming folks, we put up our Christmas lights today.
 cheers ianw


Thursday, November 11, 2021

Spreaders, Spatulas and Spoons, Oh My.


Those of us playing in our workshops must remember and respect.

 November happily has had unusual weather. This day last year I needed my snow blower, this week I've been out riding my motorcycle.  We know for sure that there will be weather, we just don't know what kind. 

  In the shop lately  I have been making spoons and spreaders for church sales.


  These wooden tools have been made from milled lumber that was collecting in a box by the bench.  I like to make longer spreaders to reach to the bottom of the peanut butter jar.

  There were a whole spectrum of tools used to make these pieces, power does make it happen faster.


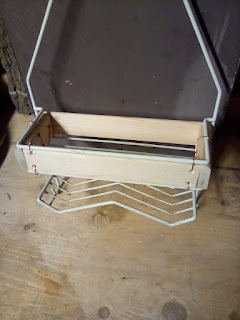
Bench and Sanding Station


  First I cut the basic shape with the band saw then various sanders and my Dremel Rotary Tool makes short work of these pieces. Generally I used planes, saws and sanders on milled lumber as I find it more difficult to shape with knives and chisels.  If I begin with a piece of wood that is split out it seems that the grains works with me rather than against me and so I use knives much more in the shaping process.

  Years ago I recovered an A.V. cart from a school dumpster. It had lost a wheel. It wasn't that difficult to replace a missing caster and I've used it as a sanding station since. When I am in production like this I roll the sanding station into place, clamp the Dremel to the bench and layout all the tools I could want to use. 

  The final stage for the spoons is hand sanding with 400 grit and a hemp oil finish.

  The other thing I did one evening was:


  When I  made my antler handled tankard I had two small bits of horn left.  I love the feel of horn. I got an inspiration to use the small bits of antler.  These are two horn handled scrapers/awls . The blade is 1 inch finishing nail, one pointed and the other hammered into a thin wedge shape. I frequently use a nail or knife to scrap crud out the teeth on a file or rasp or dislodge dried lumps from sanding belts.  I now have a couple of proper tools for those scraping jobs and won't need to risk my knife's edge.  There are other ongoing uses for a fine tipped awls and these fill that need.

  Remember, Christmas is just around the corner, get making your gift. 

cheers ianw


Poem by Lauren Binyon
Music by my friend David S. Fawcett, 


Friday, October 29, 2021

Road Find and Jig

 I have recently made a couple of picture frames.  I have the good fortune to live with a Glass Artist that can cut the glass for the frames, I've had no luck cutting my own glass. What was then needed was clear glass to put in the frames, preferable cheap glass.  As I drove home the other day,  what was at the end of someones drive way but....free glass.


  Once it is taken apart I will have to wash the glass before it can be used. Eva can cut the terrarium  into small pieces and hey presto, custom frames from re-used materials. 

  The other thing I though I would  share is a jig that has been used quite a bit lately.  I made this jig a while (years) ago to help me accurately make 45 degree angle cuts and to trim the pieces using a plane.


  I use the jig to hold the wood while hand cutting the small pieces or to hold the material while shooting in with my low angle smoothing plane. When shooting I set the jig on a piece of counter top, the plastic/acrylic top is smooth and slippery so the plane slides along very nicely. It's maybe time to make a new cutting  jig this one is getting pretty cut up.  

   I have found that fine mitres,  as on picture frames require some fine tuning with plane
 and/or sand paper regardless of where the cuts are made.  I have a pretty good sliding mitre saw and its cuts still need fine tuning where the joint is going to be highly visible.  If you go onto the inter-web there are many many videos on how to make jigs for all type of saws. Invest the time a a good jig and mitred corners should cause you no worries.

  cheers ianw

  I love fall colours.

worthy of a Group of Seven painting. 


Tuesday, October 26, 2021

Picture Frames and a "tankard".

   Since the grand kids were here I have been working on a couple of custom picture frames.  For these small projects I opted to work only with hand tools, for a couple of reasons.  One, small bits of wood are easy enough to work without all the power of mitre saws and routers, also small pieces and power tools together sort of scare me a bit. The other reason is hand tools make almost no noise and so puttering around in the shop in the evening, listening to music is good for my soul.

  Making the frames with hand tools is slow, but satisfying.  Over the years I have collected a shop full of fine tools, good saws, knives, planes and jigs. I cut the frame material in a mitre box, trimmed the ends on a 45 degree angle shooting board.  Then I hand cut the rabbet for the glass and cleaned it up with my rabbet plane. Once everything was cut and sanded I glued the ends together using my lead weight gravity clamps and my KREG Klamp table.


  It is interesting re-learning a method of work. For the first frame I fumbled around looking for measuring tools and angle gauges and deciding which saw etc. etc. etc.  On the second frame I knew what I wanted to do and in which order.  Now I need to make a better mitre box before I do the next set of frames.


  I spent many hours in my head designing the other project.  I got the idea that I wanted to make a rustic tankard from which to drink my favourite cool beverages.  A wooden tankard sounds good, but I opted to ask my Sister-in-Law to throw a pottery body upon which I would attach some sort of carved, rustic wooden handle.   

The pottery body is very fine.  

How to attach the handle? 

I didn't want to glue the handle to the pottery, too permanent, ugly and too difficult to modify should I have a better idea down the road.

The current result:  


The deer antler handle is comfortable and feels nice in my hand.  Antler is very easy to work on with sand paper by the way.  It is glued to a thin strip of wood, which is glued to a layer of leather and the lashing is waxed hemp cord.  The handle is secure. but not as aesthetically pleasing as I want.  Also, I want to see how well the waxed hemp holds up in  real life.  I have another body so I can try another version without having to take this one apart.  

It is getting cold and wet, the season for painting and wood working is upon us. 

cheers ianw


Monday, October 18, 2021

Table Top, and Kid Projects.

  This was a grand kid dominated weekend, a great return to our normal life.  My Grand Daughter worked with Oma and created this lovely stained glass panel as a gift for her teacher. Once the panel was cooled it needed a stand. Clara and I worked in the shop to make the wooden stand.  She cut the wood using a back saw and mitre box.  I did use the table saw to cut the slots into which the glass fit to help out.

Stained Glass Apple 

  My next project is a coffee table using a large live edge slab of soft maple.  This slab was cut using a chain saw and so needed plenty of sanding. For a task like this I have a heavy duty diesel powered disk sander.  I inherited a 7 inch sander from my father's shop. My father had a "go big or go home" attitude towards tools.  Generally I use my 4 1/2 inch angle grinder with a sanding disk, but this job needed a 7 inch 40 grit disk to flatten the chain saw ridges. I think the table top will be very striking when finished.  It has some spots that will need epoxy to fill and I am going to consult with a friend who is expert in using epoxy before I take this on.  I would hate to mess it up and then have to grind out the mistakes.  


Live Edge Table Top


  This weekend also saw my Grandson make his first lathe project.  There are few tools as much fun as a wood lathe. Kieran designed this light house, complete with a little house for the keeper and made it on my mini lathe.


Light House lathe project

  The next time they are here I'll have wood mounted on face plates so the kids can make bowls.

  Our lives have returned almost to normal after so very long.  We have been blessed, no one in our extended family fell ill and very few people had their work disrupted. I hope that is the situation for you'all too.

cheers ianw 


Wednesday, October 6, 2021

Road Wood

   I am always on the look out for free wood.  I hate to think of quality wood going to waste. On the weekend I was going to my Mother's house and found this collection of wood. This wood is all 1 1/4 thick.  I suspect that these pieces were part of a large reception desk and product display area.  This wood had been very nice custom furniture, once upon a time.  

  Originally these five pieces were were two table tops.  I had to cut the wood into these pieces to get them into our car.


  What am I going to make from the wood?  I don't know.  But...it was too nice to let it be turned into firewood.

  cheers ianw

Friday, September 24, 2021

Quality Tool - Repaired and Things.

    Years ago I bought two galvanised pails.  These pails began as indoor floor washing etc pails. Over the course of time the pails hauled dirt, stones, saw dust, parts and tools. As the stuff rattled around in the cans the bottoms grew thinner and thinner, soon both of my pail's bottoms developed small leaks. 


  These heavy galvanised pails are so much more study and useful around the yard and garage  than typical plastic pails something needed to done to extend their working lives. If you look you can see the pails also have really comfortable handles with make them worth saving. 
   
   The solution is one of those things I do because I have a workshop with wood and some tools.  With compasses I measured  the inside diameter of the pail then cut out from 1/8 inch plywood a disk on the band saw.  Next I soaked the disk in exterior grade vanish.


  To install the new bottom I liberally coated the disk and the bottom with construction adhesive and put the new bottom in place holding it  by gravity clamps while the glue set. 


  The pails will still leak, slowly,  but be tight enough to carry water around the yard or beach and the new bottoms will distribute the general bashing enough for pails to last a long time.

  Project In progress: I have a design idea for this recycled mirror.  I am planning a rustic style wooden frame, that will help high light the cat tail silhouettes.
  

  And of course a work shop filled with potions and glues is where hiking boots go for maintenance.


  So our Grandchildren are back in school, my wife has been able to visit family in Sweden and we are mostly returning to "normal life".  I guess we have to cross our fingers and hope that everything goes according to plan.

  cheers ianw


Friday, September 10, 2021

More Shop Jobs


  A while ago a friend gave me this tin box. He knows that a shop always needs more storage space.  The box is large enough that it really needs handles on the ends.


    I picked an oak off cut to form the handles.  Oak is strong enough that the pieces don't have to be very large, and the handles can be polished smooth and comfortable.


  I shaped the  handles with hand tools. Planes, handsaw and rasps enabled me to make the handles one evening while listening books on tape. 
  

  When I was watering the house plants the other day I noticed:


  the wheeled pot stand upon which our Fish Tail Palm sits had really suffers from the damp.


How much? you can see the bow in the wood compared to the straight edge of the level.  The wheeled pot stand was 3/4 particle board with four casters on the corners.  Particle board is cheap and does not respond well to damp.  The palm tree had been over watered a few time lately and what strength the board had was gone

  The replacement is all around better quality and nicer looking.  I had a piece of kitchen counter which I trimmed with real wood, to improve its look and strength.


  The trim is held on with out door glue and pocket hole screws


  New wheeled stand with a cleaned and stained pot.

  It is nice to have a shop to play in.

cheers ianw