Monday, December 30, 2019

2019 is in the bag

  So the year has wound down.  The decade has rolled past.  Time has flown etc. etc.
In May I will have been writing this blog for a decade and the best part of that decade for me has been having my grand children spend time with me in my shop.  Second best is making things for them. The boy and three girls have progressed from watching, to sweeping and finally to making.  

  During this past Christmas holiday my grandson (the eldest) and I did some wood carving together.  A while ago  we did soap carving. (Dec 14,2015), the soap  flakes got in his eyes and up his nose and so did not make a good first impression.  This time he and I did real wood carving with real tools. 

  After fitting him with safety gloves and warning him about one thousand times to be very careful he carved a practice piece.


  The piece was 1 1/4 square and five inches long.   One of these days we'll make the same practice piece on the lathe.  Working on this piece he learned  he liked palm chisels better than knives and practised cutting away from himself.  In several hours of carving we had no accidents, I'm both pleased and proud of that. Oma and Mother as relieved too.

  The next piece K carved was a narwhal.


  There was plenty of material to remove to get the square block to a mostly round shape. As well as chisels K got to learn about rasps and the disc sander.  He worked carefully and wore his dust mask when using the power sander.  

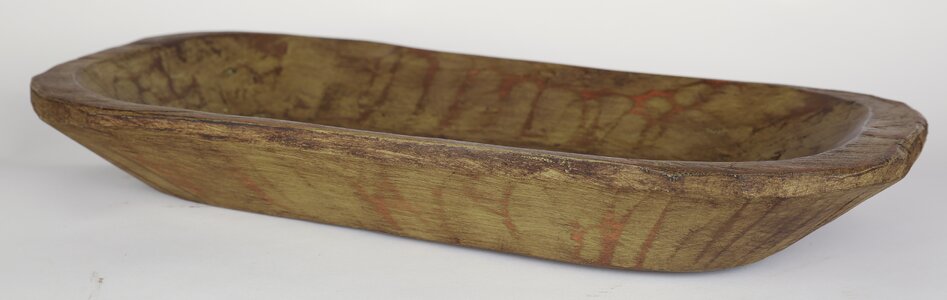
  The other thing that he made was a boat.  He loves to make boats.


  I think for a first effort his day's work was excellent.  He learned technique, safety and invested several hours on these and other projects. It was an excellent day for both of us.

  As the new year begins, Happy New Year, best wishes for good health, good times and good luck.

Sincerely,

Ian W @ walwoodwork@gmail.com


Saturday, November 23, 2019

A Summing Up Blog

  There is my latest box in it natural habitat.  Its purpose is to reduce clutter in my friend's home and look nice. Mission accomplished, I think.


  This morning's project.  The stars are to soon be painted and festively decorated.  Surprisingly there was some puzzling involved in getting the various boards aligned.  It was one of those times that clamps made life easier.   


  This is a sander/grinder that my grandfather made for my father from bits and pieces and a washing machine motor.  I don't know when this machine was created, its been around as long as I remember.  A few years ago I replaced the plywood disk with a metal one and have used it for a long messy time.  The belt is exposed and something of a hazard.  The other day I was sanding a couple of spoons into shape and nearly caught my fore arm in the belt as I manoeuvred the spoon around.   


 Finally I was modivated  to put that whirling belt behind a guard, having my arm hair removed swiftly and suddenly can be inspiring .  It was a job long overdue.  Next thing to fix is dust collection.  I bought a new RZ dust mask a while ago and love it.  It is the first dust mask that I don't hate to wear that actually fits well enough to do some good.  My lungs are in better shape but the other dust is still an issue.


  The last bit of summing up is my rustic bowl.  


  Once I got the inside more or less dug out I flipped it over and used my grinder to shape the ends.  I moved toward power tools from chisels because I found some punky wood and it is easier to sand/grind the wood away that to cut it off.  I was also afraid that using an axe or heavy chisel might break away a larger piece of wood that I wanted.


16 by 8 and 2 inches deep.

  There is the finished bowl getting into the holiday spirit.  If I come  across another log I will do this again, larger would be nicer.

  This is probably a wrap for the season.  December is always filled with family, travel and social gatherings and so I don't undertake much that is noteworthy in the shop before Christmas anymore.  Gone are the frantic last minuted projects of yesteryear.


If time permits I'll share something, it not...Happy Christmas, I hope you, your family and friends have an excellent holiday season and a glorious 2020.

cheers ianw

Related image


Friday, November 15, 2019

Carving a Wooden Bowl.

 This is a project that I had in the back of my mind for a while.  Two years ago I picked up some spruce logs from the side of the road.  The logs were recently cut and oozing sap.  Now after two years under the steps in the garage the wood is nicely dried and ready to be worked.


   Once I scraped the dried bark off I needed a flat surface  for the bowl to sit upon once finished.  I used  the joiner to flatten a small portion by setting the log on the joiner table and making a couple of passes working with the natural shape of the log.

   The next thing  to do was flatten the top side which was pretty uneven after having been split apart.
  

  I set the flat bottom  on the table of my drill press and set the depth stop for the forstner bit to match the thinnest section of the log. Then I the drilled down through the  extra wood until the top was fairly evenly flat.  

   After chipping away any remaining bits around the drilled holes I planed the top of the board enough to make it easy to draw outlines.


  There is plenty of waste wood to be cleared, to  get an even inside shape I set the depth I wanted to go and drilled a bunch of pilot holes.  The centre holes are deepest, the holes on the sides are less so, and the holes on the ends are a little more shallow because I plan to taper the sides of the bowl.  The basic shape is going to be like a pioneer style dough mixing bowl .

Painted Rustic Wooden Dough Decorative Bowl
what I am working toward.

  I have a variety of power tools to clear on the waste wood but so far I have stuck to chisels.  I can rough out what I want without making tones of dust and noise.  A chisel cuts out chips and chunks without making any saw dust. 


  My new  bench set up allows me to clamp this project solidly to one section of the bench while pushing it against the raised work bench which is held on with large C-clamps.  This way the work can withstand heavy chisel work and is at a better height for my back.

  The last glue up with the box.


  Most of this box was glued using lead weights to hold things in place while the glue dried. All that remains is final sanding and a couple coats for spray varnish.

6 x 10 x 3.5 inches

  This is actually a frame in which a drawer sides though from either side.   That way you don't have to reach into the back of the drawer, or pull it all the way out to get to the stuff in the back. The top is maple, the sides and bottom oak and the drawer, exotic mahogany type wood with walnut veneer detail. It wasn't a difficult project, just one that seemed to drift around in the shop while other things took away my attention, you know, things like noses.

  cheers ianw


Friday, November 8, 2019

November 8th 2019 - noses

  I am working on a box and finishing some spoons and working on hand carved noses.


  Last winter our brother in law made snow men from off cut rounds of ash.  We named our snow man Tromso after the city in Norway.


  As you can see he is a noble fellow but...was lacking in the nose department. Et voila.


  He is laying in the shop as his nose dries, also he needs some work on his lower back, to help him hold it together.  The other nose is for his brother Bodo  that lives with my Mother.  I will make the custom installation next week.  By the way, both Bodo and Tromso are interesting cities to visit. Isn't Norway on everyone's bucket list?

 
the natural use for spring clamps

 Yet another box.  This one is made from some sort of exotic pallet wood.  It looks as though it is related to mahogany and will look good with a clear finish.  Under all those clamps are cherry veneer details that I added to the long sides.  Working with pallet wood adds a stage in the work that is not there with new wood.  To get the wood ready I had to do more planing and sanding than with new wood.  Also with reclaimed wood the first step is ' looking for hidden nasties ' .  This time there were no hidden nails or staples, one time there were hidden bits of staple in the material which wrecked some teeth on my fine toothed pull saw. 

  My work style in the shop has slowed down.  Most of my latest projects are hand finished and glue up rather than faster methods, nail, screws, pocket holes, etc and currently the pace and productivity suits me fine.

  cheers ianw
cheers, ian


Monday, October 28, 2019

In the Shop Today- Oct. 2019

  Today I planned to spend more time in my shop. I am returning to my 'work 30 minutes, stretch out 60 minutes-repeat often as possible' schedule.  I have things I want/need to do and I really don't want back pain to stop me. 

  First thing I did was sharpen one of my wife's fine serrated blade kitchen knives.  To touch up the fine serrations I needed my triangle needle file and my magnifying headset .


Donegan Optical Magnifier Type:headband Magnifier - DA-3 Magnifiers
this is another of those tools that I only use a few times per year,
but would be stuck without.


  After I sharpened the knife I set to work to up grade my bathroom caddy. 


  I had up cycled as orange crate and have been using it since December  2016. Over time I got tired of bottles and stuff falling over and getting trapped underneath the handle. The caddy needed a couple of internal dividers added to the design.

  To make the dividers I used my rip saw, planes, drills, dowels and bench top planning jig.
The wood began with a piece of reclaimed lumber from a skid.  First I ripped the board it to width with a hand saw, holding it on the new raised bench top.  Now that is much easier and at a better height.

  After I used a hand saw to  rip the wood  to width I hand planed the board holding it with my planing jig. I used my mitre saw to cut the wood length, hand tools are nice, power tools are quick. 

  I glued and pinned the dividers in place with 1/8 inch bamboo skewers cut to one inch dowels.  Dowels are used because I don't want rust stains from screws in the caddy/tote  which will get damp in the bathroom.  I have made several projects with the 1/8 bamboo pins, the pins really are just for alignment 'til the glue dries, but they are cheap and available. 


    The caddy was painted bronze last time, purple this time.  When I am out and about I pick up cheap cans of spray paint for jobs were the colour  doesn't matter, currently I have purple.  I added the two internal dividers to keep things from falling over while I move the caddy around.

  The planing jig is something I made in May 2017 and used on my lower work table, but really like on the raised work surface.  


I added a couple of semi-permanent dogs
 to the end of the jig. 

  Just for an update:

planter with foam box insert
back on my Mom's patio.

  The cheap paring knives that I sharpened can be replace for a couple of bucks, the planter uses a discarded foam packing box and the bathroom tote thing is an up cycled orange crate and skid lumber.  I like to be able to repair and remake things to keep materials out of the land fill sites as much as possible.  

  I have a couple more knives to sharpen and a small box I am gathering nice wood for to keep me occupied for the next few 30 working-60 stretching days.  The larger raised work surface seems as though it will make a big difference in the long run.

cheers ianw


Wednesday, October 23, 2019

What happens when my back gets sore.

  When I have had several busy days in a row, days with extra walking or oddly enough extra sitting the arthritis in my back reacts badly and I am sore until I fully relax for at least two days, sometimes three.  Of late I have not been able to put 2 or 3 days relaxed time together and so each day is crap shoot as to what I can get done before side lined totally.   

  While I am sore life goes on and there still are a ongoing stream of little things that need doing.  For example, yesterday we pulled our dishwasher out and scraped spray foam insulation off the out side, it needed knives, putty knives, plyers, screw drivers and the shop vac to clean up.  A shop tip: a Dollar Store serrated bread knife cuts spray foam really well, costs $1.25 and is easier to hold on to than a loose hacksaw blade.  I also spent time polishing the plastic guard plates for the stained glass studio, drills, buffing wheels, cloths etc. If you are going to get into big jobs polishing things, cars, boats etc get the machine for the job.  What ever little job comes along means tools taken out and probably not put back where they belong, because the task used up all the available back mobility.

  What happens is this:

bench piled high with small tools
used recently.

work table covered with projects
and stuff dropped off on the way by.
  There are plastic containers saved for later use, the sander than prepared the flower box and various clamps, clothes and bits of wood.  This is not how I like my shop but use and drop is the routine I use while saving my back as best as I can.

  Today, I couldn't stand it any longer nor could I do ANYTHING in the shop with the work space in that sort of shape.

what the bench actually looks like, with its own
work light.

 the work table cleaned up with the
new raised bench in place

  Having gotten the space into shape I decided to add to my Mother's flower planter.


  The stencil was hanging on the wall. The paint was a $1.00 sample colour and I thought it added a nice touch to an otherwise big brown box.

  While I was at it I  used the same stencil to begin a design on some coasters.


  These will get more detail and contrasting colour once everything is dry.  Probably these coasters will end up as a Christmas hand out.

  Today I sent about two hours in my shop before my back started to complain loudly,  half the time cleaning.  However there is satisfaction in  cleaning a shop too.

  cheers, ianw

Friday, October 18, 2019

Picture Frame and Flower Box

  My eight year old Grand daughter loves to crafts and make pictures for Eva and I.  We have a couple of her paintings in our bed room and recently we were given two more pictures to put up.  All pictures look better mounted and framed and so I retired to my work shop and make our drawings a frame.


  I glued the two pictures to new watercolour paper and to a section of foam core.  The frame is made from thinly sliced 2x4 spruce.  I used my thin strip ripping jig on my table saw to make the the pieces.  Often cheap wood has character that makes it unique and interesting, as in this case.
thin strip jig, Sept 12, 2013
(all my jigs are red or orange )

Next I sanded  the wood, then stained it and glued it to the foam core backed paper. I decided that I would not make the typical frame and am pretty pleased with the result.  


  I am polishing clear guards from glass grinders for my wife's stained class group.  It is a slow job using a soft polishing wheel, white compound and lots of patience. Again it is because I hate throwing things away when they can be repaired.(with some effort).  The easy solution is to buy new guards and throw the pitted ones away, making for more plastic trash.  I'm planning to invest the time to renew the life of the safety guards.


  A few years ago I made a fairly large planter box for my Mother's patio. The size was based on a foam shipping box which made for a water tight, fairly light inner liner to hold the soil and water.  After all these years sitting in outside in the sun and winter snow the box was looking pretty shabby.  Remarkably the foam liner box is still in good shape and usable. 

  Originally the cedar box was varnished with a couple of coats of outdoor varnish and then ignored for years. This summer its age was obvious and that most of the varnish had worn away.


  First the  box was sanded vigorously to remove what remained of the varnish.  Since unprotected cedar turns greyish over time I opted to stain the box 'walnut' before varnishing it this time.  Cedar has a good track record of weather resistance, this planter box was still perfectly solid, just tired looking.   I'll put a little time into this project over the weekend and take it home to my Mom early in the week.  That's what sons do.

 cheers ianw


Saturday, October 12, 2019

Another Work Bench Blog

  Since hurting my back a few years ago I have been on a seemly endless quest for a comfortable work shop environment.  I have  raised my work bench/table on blocks, and then taken it down.  I have made a small version of a bench top bench that clamped into my bench vise and still I continued on my quest.


  This version was solid but the work surface was only 8 1/2 by 29.  It was just not quite large enough for most needs.  The height was good and I did like the  available dog holes, but it had no vise or real clamping ability.

  In 2013 I tried a version I called "the box":


  I don't remember what was lacking in this design but clearly it didn't last for very long.  I suspect that it was not large enough either. So, the current effort at the perfect work station for me is: The Pew Bench, so named because it is made from 3/4 laminated oak from a church pew.  


  It has a work top that is 40 x 19 x 3/4 inches that adds  5 1/2 inches of height to my solid work table. The working height for my new work station is 39 inches, which is high but I am 6 feet 1 and have real trouble working bent over.  This bench top bench is pretty solid but can be lifted off if  the other  work station is needed.  Also I have a second smaller work bench in the corner at which I can work while sitting on a stool, its a good spot for carving/wood burning etc. 

  The underside of the Pew Bench: 


  The ultimate type of legs remains to be decided but the trestles that were used with the small bench are solid and the right height so, for the time being I screwed them to the  the pew bench.  I put sand paper on the bottom on the feet too. I may need to make a couple of trestle supports that will match this bench height for projects that are just little too long

   The board with the holes enables me to use the pipe clamps as a vise, an idea that I saw somewhere else, I didn't invent it.


  I can hold material for edge planing while moving the clamps from as close as 4 inches to as wide as 14 inches.  


  On the one end of the bench top is room for my Home Made Moxon style vise for end grain work. 
   The other end features my bench vise.  If I were building from scratch I would buy this vise
6-1/2-inch Woodworkers Vise 010791120


  However I already had a heavy duty vise on the work station and though it is overkill, I moved it to the pew.


   So far the Pew bench is heavy enough and stable enough that it doesn't need to be clamped down except when I do heavy work on the vise end.    To give the acme screw and runners room I had to move the leg closer toward the middle than is optimal.  I may replace that side leg or drill some holes in it so that I can move it closer to the edge.

  The next stage is to do a few jobs on the bench and see how it feels.  It is not designed for heavy hammering and big jobs,  so I am hopeful that I will have a work station what will  enable me to work longer in my shop.  Who knows this maybe the holy grail of work benches.

cheers, ianw

P.S - Happy Thanksgiving, we've got lots to be thankful for.


Image result for thanksgiving canada

and our friends around the world.

Image result for thanksgiving canada