Saturday, May 29, 2021

Its been a while

It has been awhile since I posted to my blog.  There are several good reasons, it is motorcycle weather and so I have been out riding, also bicycle riding and for the most part spending less time in the shop.  However. I have been using my tools and time to repair hoses and extension cords and flower pots and other things related to getting the garden season underway.  Those jobs included sanding rust off shovels and hoes as well as painting and sealing tool handles for example.

This little flower pot cat was a gift to my wife from a friend that is now gone and so something to be preserved. 

first leg replacement.


Last November I replaced a broken leg, this spring the other needed replacement too. This time the little cat got repainted as well.  A job doesn't have to be big to be meaningful

  
  I also took some time to make a wooden box for a set of watercolour paints. I had been using a cardboard creation held together with duct tape and decided as I was puttering around to use some basswood and door skin to make a nicer case for my paints.


  There was designing, cutting,gluing and sanding, so it was a shop project, just interesting enough for a blog.

  This afternoon however I did a real wood working project. Or rather re-did a wood working project.

  In 2017 I made a four legged end table using as ash round and turned legs.  The project result was about a C+. Worked okay, but didn't look so good.   I made a couple of design mistakes and a couple of execution errors. The table didn't fall over or anything but it really looked like a failed prototype. The biggest problem was drilling the angled holes for the legs. In January I tried a three legged version and had much better results. It was time to fix the first version.


  The top of the table is a good size and two inches thick on average. 


  I decided to re-use the legs. I cut them off leaving the holes plugged, since I was going to have to drill new locations for the three legs anyway. 


  By reloading the elm legs on the wood lathe and turning a new shoulder I was able to re-use the legs.  The mini lather is just long enough to fit these legs.


  The real advancement to achieving a better result was the making of a jig to go on the drill press table to give me a constant and controlled drilling angle. The January 22nd 2021 blog entry talks about the jig, which is now painted bright red.  The photograph shows how I control the drilling process, clamps, lots of clamps. I clamped the jig firmly to the drill press table first, making sure that it was not going to move. Then I clamped the wood firmly, to the table and the jig.  I usually work by my self in the shop and so have many clamps of many types and sizes. Since the forstner was 1 1/2 inches and drilling through end grain ash, 'slow and steady wins the race'.  
  
  The final construction turned out well.  The table sits very flat and stable.  The legs also look balanced and symmetrical  from all sides.  Once the glue dries I will sand the whole thing before re-applying the shellac finish.    


  You will see the other small change I made to the table top in the next blog when you see the finished product.

cheers, ianw


Monday, May 10, 2021

Why Wood, once more.

   Over the ten years that I have written this blog I have several times extolled the virtues of wood.  It is my belief that wood is beautiful and rewarding to work with either hand tools or power tools. If you are a reader of this blog you probably agree with me on those points. 

  A while ago my wife collected several bushels of wind fall fire wood for craft projects.  Before Christmas she cut a bunch of wood slices and made then into a small Christmas trees .


  I have used some of the wood for small turning projects and recently for a table ornament.


   We had a larger version of the flower vase on the table last season. This version is smaller and more attractive, I think.   It is used to hold individual flower stems. We have a 'wild' area behind our home, so Eva keeps this filled with seasonal wild flowers.  I spent extra time sanding  so that the grain and worm holes are  highlighted. I hand sanded to 400 grit to get the full effect.  Then I finished it with three coats of shellac. 

  The other project was renewing the mat at our front door.  In 2015 I made a outdoor mat from  oak.  This is only the second time that I have brought the mat into the shop for cosmetic treatment.

  After I wire brushed the wood clear of dust and leaves I sanded it with my random orbital sander, only to 120 grit, its an out door  mat after all.  All the wood remains solid but I replaced the screws holding the edges on as the current ones were rusting.   


  You can see that liberal coat of Thompson's Water Seal improves the look and protects the wood.  


  The weather blows in on this door year round, the oak is quite weather resistant, without much effort on my part.

  Why wood?  It is just a superior building and craft material, what can I say.

cheers ianw


Wednesday, May 5, 2021

Two More Planes Done

A while ago I wrote a blog about my various wooden planes and the plans I had for them.  I repaired and cleaned up a couple already and recently took on two more.

  The one plane was a small smoothing plane for which I did not have a blade.  After much consideration I choose to abandon plans for saving the plane.  It was not worth buying a new blade for the plane given that I have several good metal body planes that size as well as the other wooden body plane I recently cleaned up. This plane was not worth the trouble at this time.  No fear, it didn't get thrown away!!

I am using the plane body as a large sized sanding block. It has three flat sides which will give plenty of use before the 120 grit sand paper will have to be replaced.  I could one day fit a blade and wedge if I wanted. Since there is no blade or wedge I suspect I paid little or nothing for the plane body.

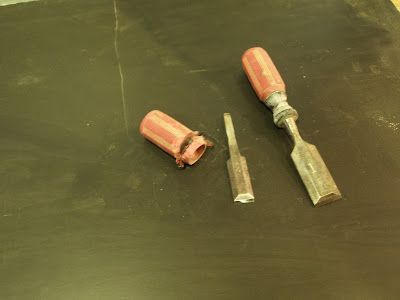
  The shoulder plane I choose to revive.  It lacked a blade and a wedge but the base was still very flat and the sides were true.  Where and when I acquired the plane body, I do not remember. Not wanting to spend money to buy a blade I decided to reshape  a 3/4 inch chisel.  I cut the handle off with my 4 1/2 inch grinder and proceeded to grind the chisel blade to shape.  The tang of the chisel was round with a small shoulder where it fit into the handle.  The only thing to remember while grinding is to keep it from getting too hot and burning the steel. The effort would be wasted if the steel lost its temper. Once the shape was roughed out I switched to files for the final shaping.  Quality medal files are easy to use can remove plenty of material.  You are also not likely to over heat the blade as you hand file. When hand filing metal I have found that you really need a metal working good vise, hand clamps and wood working vises just don't work .


 The wooden body had been well used as it was dirty, greasy and a bit pitted.  I sanded it down, and gave the body a quick coat of spray varnish. The wedge is waxed elm.


  When  the blade was shaped to fit the plane body I found that it was slightly too wide.  I guess the plane was a metric width.  I filed the chisel blade down a few millimetres for it to fit the plane body. 


  I don't make videos so you will have to take my word that the plane ploughs a serviceable 3/4 shoulder.  I now have a 1/2 and an almost 3/4 shoulder plane in my shop. 

   I have four or five more chisels of this vintage in a drawer in my shop.  I have test sharpened them all and they are adequate to need. I kept them for just this sort of thing. In a wood working shop you never know when you my need to customise  a cutting edge.  It is easy to find chisels, files and rasps for cheap at flea markets for your shop.

It only remains for me to decide on the fate of the last two wooden planes sitting on my bench taunting me.

cheers  ianw


spring is sprung.
hooray