Showing posts with label shellac. Show all posts

Tuesday, December 6, 2022

First Time Wood Working - Sanding project and tools

   Honestly many of the first wood wooding projects for my generation (60+ years old) no longer exist.  We don't need to make book ends, bird houses, storage boxes etc. they are all now readily available for reasonable prices from all sorts of retail outlets. So a person doesn't automatically end up making things from wood any longer.

  However if you like making things and aren't that keen on glue/saw dust board or plastic you may still want to make some basic things for your home space.

  Last blog I talked about how to start wood working  by beginning at the finish. (end)

  Imagine I had no tools, but liked wood more than plastic and wanted to have a slightly individual project when I was done.


   I spent $2.00 on this plywood box. To end up with a nice finished project I have to take a couple real wood working steps.

 1st- I sanded this box with 100 grit sand paper.  I sanded all the edges and corners to make the box nice to touch and reduce the chance of splinters. 

 2nd- I sanded all the edges and surfaces with 180 grit sand paper. You might not believe it but that makes the box smoother (softer) to touch.

 3rd- I sealed the wood with shellac. Any of the many sealing products could be used. I like shellac because it is quick drying, fool proof to apply and compatible when dry with just about any other type of paint, stain or varnish you may then use.


all the tools needed for this project.

  Then I used the 180 grit to lightly sand the shellac, once dry.  Our house has forced air heating...there is always fine grit in the air that settles into the finish. Next I used some water based craft to paint to colour in the box top.


  Since the box had been sealed the water paint did not blot into the wood and only one coat was necessary to get good coverage.

  Once the paint dried I but another seal coat on top just to make it more difficult for fingers to leave smudge marks.

  Doing this project will help you or your child to decide if you like the feel and smell of wood and wood dust. Rounding over edges and making the wood box gentle on your hands is a great feeling.

  This was a  'one time', project requiring two sheets of sand paper, sealer and some craft paint.  
  There are many pre assembled  wooden projects out there just waiting for you to finish them. When I was an apartment dweller I finished a couple of big items, including a television stand on a drop sheet in the living room.  Larger projects can be sanded by hand but......


A random orbital sander can make a large job, quicker and easier.  As a rule, the most expensive sanders have better dust collect, make less noise and run more smoothly.    If you find you enjoy staining, painting or other wise finishing wood projects sanders are big help with a shallow learning curve.

  A finishing sander works more slowly than a random orbital, but runs with the grain and so will not leave tiny swirls in the wood grain like a random orbital can, if you aren't careful.

  The monster of the sanding family is the BELT SANDER.  


  The belt sander can be used to remove a great deal of wood in a short time. I bought one early in my career before I had hand plane skills and flattened many board. In fact I still have that sander and occasionally still use it, though it doesn't have any dust collection  capability.  It is pretty much and out door tool now.

  I used to make cutting boards and so had a bank of sanders with ever finer grits of sand paper mounted so that I could proceed from 60 to 600 grit by switching sanders.  

  There is a fascinating world of specialty hand held sanders  as well as machines out there for all types of unusual tasks. check it out.

cheers ianw


Tuesday, January 16, 2018

Maple Knife Handle, by hand, mostly.


the yellow handles knives were destined for Iceland
fishermen but the deal fell through. I got the knives for 30 SEK ($4.55 Cdn)
each. The blades are stout and very sharp, the handles will be replaced.  

  I brought those knives home from Sweden last spring and have finally got around to making  a replacement handle.


  Don't get me wrong, the yellow plastic handle is excellent and probably easier to hold on to when wet than my maple handle. After all Frost/Mora are world class knife makers.  But, the handle is yellow plastic, its just not pleasing to my eye.

  The first stage of the process was to grind the plastic handle off.  I used my angle grinder and a course abrasive disk, easy and quick.  Every shop needs a 4 1/2 inch angle grinder. 

  Once I cleared the plastic away I drew a design for the handle, by tracing the blade and drawing around it.


  I picked maple for this handle. I picked a board twice as long as I needed. First I ripped the board in half, the length of the handle. Then I cut the rough shape of the handle on the band saw.  This let me cut both halves of the handle as though I had stacked them for cutting, with the uncut end providing plenty of support.


   Once I got the rough shape cut I used my dremel tool  to hollow out half the thickness of the blade on each side of the handle.  When the blade fit tightly into the hollows I glued the blade in and the sides on with contact cement.  I know there are plenty of new high tech epoxy style glues out there but....contact cement has never let me down.  You just have to give it the time it needs to set.  As the blade is inset into the handle I am not concerned that it will wiggle.

  After I finished with the Dremel  I settled in to watch a Youtube series on Queen Jane of England. ( reign 10 July 1553 - 19 July 1553).  I know that I spent a little over three hours shaping the handle with rasps, files and sand paper.  Three episodes plus coffee drinking time. I sanded the handle to 600 grit.  It was so smooth it felt soft.  


   That is the chaos of my work space as I shaped and sanded, if you look closely you can see the knife in the middle of the photo with green tape on the blade.  I think that a belt sander could have done the job 3 or 4 times quicker, but I didn't feel like the noise or aggression that comes from power tools this time.
  
   I finished the handle with two coats of orange shellac.  Maple is so close grained and so hard that I didn't even try to stain it, the stain just sits on top.  Old style maple furniture if usually finished with tinted varnish.   I picked orange shellac because it has a old style traditional colour and feel to it.

  The handle is a bit rustic and probably too small for most tastes but I quite like how it fits my hand.


  I have few more of these blades. My plan is for the next knife handle  be made from walnut or some other dark wood.  The handle will be a bit longer and more round with a hole in it for a leather thong too.   I am also thinking of drilling the blade to put in a couple of brass rivets, more the the look of things than any other reason. 

   I should gather together the knives that I have put handles onto.  I think I am getting better. Maybe in a coming post. 

cheers, ianw


Thursday, October 12, 2017

More Small Projects

  We just had our Thanksgiving Weekend in Canada, and as it should be it was filled with family and a fall fair.  This year the weather was spectacularly un-seasonable, we can enjoy climate change for a while, then it going to get us good.

Rockton Fair from the air.   Rockton Ontario, Canada
    One of the latest 'small' jobs I've done was a repair for 10,000 Villages.  One of the cast metal  statues that they sell fell on the floor in the store and its arm broke off.  Needless to say I did not re-cast the statue, I used epoxy to attach the arm and then got creative in how I hid the repair.


  The left arm was broken off at the elbow,


  You can see that I gave the repair a decorative wrap with coloured wire to hide the joint. To make the decoration believable I put a wrap on each elbow.  Today I returned it to the store and the manager was pleased with my work.  I don't know if the sale price will be discounted but even so it is better than written off totally.

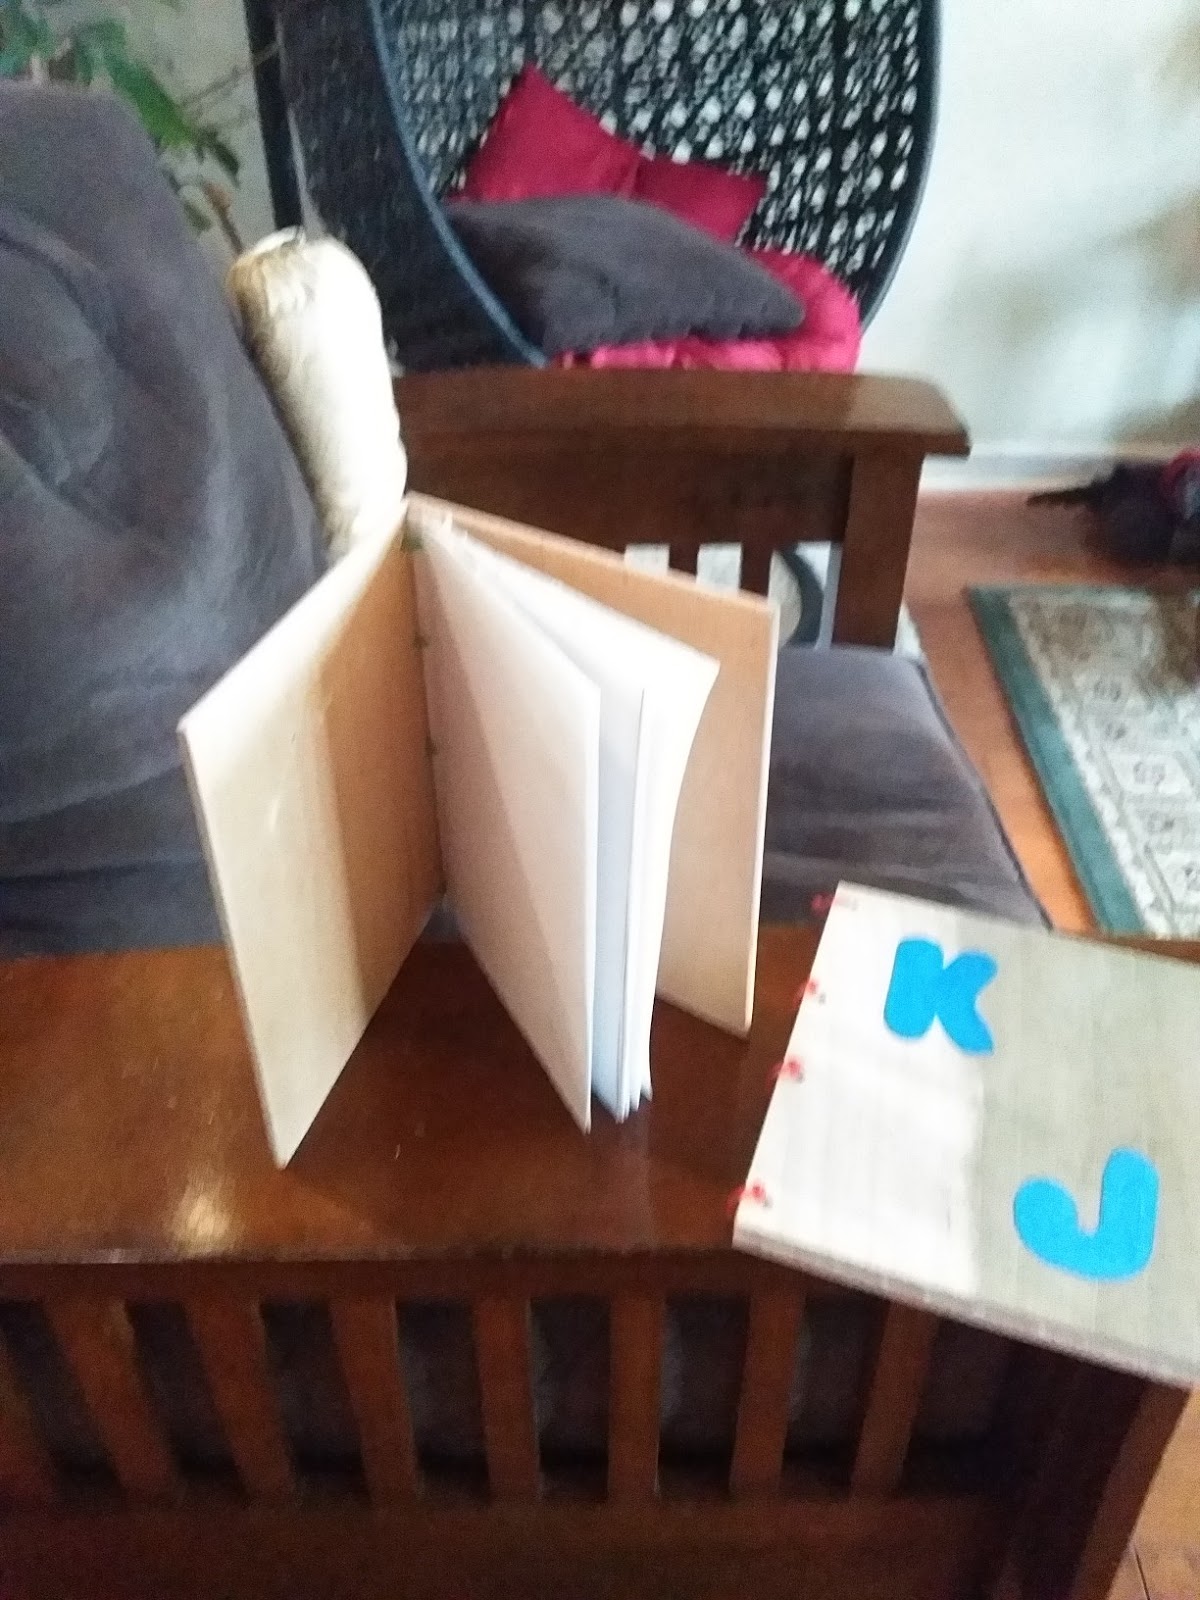
  The other little project was inspired by the visit of my grand kids on the weekend.  My Grandson is getting pretty good at drawing trains and machines so I made him a drawing book, and one made one for his sister too.  She is younger but artistic too.


 I made two sketch books one for C and one for K.  


  This is a simple project as long as you have the tools and the skills.  The first step was to fold and bind the pages. I started out with three large sketch pad pages, folded the paper in four and then bound three sections together to give each book twelve pages.  Binding books is easiest if you have a fine sharp awl, wax thread, large needle and a bone folder.  Once I had the booklets bound I trimmed the edges, (very sharp utility Knife)  and then  cut some 1/8 plywood for the front and back. I clamped the pages between the covers drilled and counter sunk four holes through the covers and pages.

  You can see that I used zip ties to connect the sections.  Once the books were assembled I took them up stairs and painted initials on the outside cover.  To control paint successfully you need decent paint and decent brushes, and a bit of practise. (more tools and skills). After painting the letters onto the book covers I took the books apart and sealed the front and back with shellac.  

  When I went to the shop my first thought was water based sealer instead of shellac.   Water based sealers are all the rage and are better for your brushes and the environment.


  However, I have some experience with finishing wood projects and so....did not fall into the trap.  The initials were painted on with water based poster paints.  Water based sealer would have softened and probably smeared the paint.  Shellac on the other hand doesn't react with water based finishes, the result is good sealing and no smearing.  The covers are hanging in my shop drying currently.  I will add a couple more coats of shellac and then some wax to make an easy but tough finish.

  There is no way to know if they will draw in their books or ever use them at all, but I still like to make things for  kids, just in case.

cheers Ian W


Sunday, September 25, 2016

Finally Finished. Finishing

On August 5th I posted my completed jewel box and said that I would shellac/varnish the box once the weather dried up a bit.  Well, the temperature has gone down and the humidity has gone down, and the box has gone back down to my workshop.


  This is the jewel box back in the shop awaiting a finish.  I dusted it off and scraped the old stain off the top two handles and applied one coat of clear shellac. 


  First coat of shellac.  It took a few minutes to prepare the box and a couple of minutes to apply the shellac and then I left it for an hour to fully dry and harden.

  I have brushes 100% dedicated to shellac.  The brushes are cleaned with alcohol and are never used for oil or water based finishes. My habit it to wrap green tape around the handles of the shellac brushes so they are cleanly identified.  

 Once that first coat was dry I rubbed the box down with 320 paper, just to knock off any bumps or fuzzy bits.  Then I vacuum and or wipe the project down with a clean lint free cloth.  I shy away from the standard 'tack' cloth because they are oily or waxy.


  This is finished box in my shop the next morning.  I put on a second coat of shellac last evening, again giving it one hour (approx) to dry. Shellac will dry in just a few minutes but I like to give it some extra time to harden, especially when the piece has nice wood.

  Once the second coat of shellac has dried I lightly sanded it with steel wood. After sanding I again carefully to remove and dust.  Next I sprayed the box with aerosol varnish, just a light coat.
I left the varnish to dry overnight. Again I do not rush the process once I get to this stage. However with shellac as the foundation of the process it takes hours, not days. (when the humidity is low). 


  Here is the box, completely finished and sitting on my dresser.  The last thing I did was  apply a thin coat of paste wax and used a  buffing wheel to get a soft glow and a finish that is soft to the touch. 

  This box is made from elm and oak with the small trim made from a piece ??? cherry?? flooring.  I don't often make a piece for which this amount of effort is investing in the finishing process, but when I do I find it very satisfying.

cheers, ianw

Wednesday, September 16, 2015

Shellac under Polyurathane

Shellac under Polyurethane 


  Folks that read my blog know I like shellac. This video by The Wood Whisperer  talks about a number of things that are relevant to using shellac and addresses the question of shellac under polyurethane.  I have used shellac under old style varnish and got tremendous results, as long as the humidity is low. Over time I have also sealed acres of wood with both waxed and de-waxed shellac and put all sorts of finishes on top and not had any issues.  Paint goes well over top shellac and helps to give a sealed and smooth finish.

  When ever you plan a project it is very important to consider the environment in which the project is going to live. The environment will effect choice of wood, fasteners and finish, it is important to remember that wood can last 100's of years.
Swedish Stave Church 
 or fall apart from neglect in a few years.  This winter I have to begin replacing window boxes and flower boxes that I made 10 years ago for friends and family. The cedar boxes spent many hours wet, and many hours in the hot sun and didn't really get any TLC so they have not lasted.

  Wood finishing is treated as though it is an arcane and black art, it's not.  It is just another area of wood working that can be improved with study and practice

 cheers, ianw

Monday, June 17, 2013

Shellac by any other name: Zinsser Seal Coat

   Since my shop is a hobby shop I find myself moving toward more hand tool work and toward more traditional wood finishes.

   Using hand tools is more about quiet than anything else and appropriate to small projects on flexible time lines.  I can do many things with couple of hand saws that I can do with a band saw, just not as quickly.

   Older style finishes are also slower, generally.  I use a home made wipe on finish that is oil. paint thinner (turpentine) and varnish for many projects.  I got the idea from Tom at tomsworkbench.com so I call it Tom's Finish.  A finish that I have  been using for quite a few years that is not slow, but.....very fast,  is shellac.  Shellac is a natural product and plays nicely with either oil or water based finish and so I have been using it as a pour/sanding filler for a long time regardless of what I plan to put on top.


Zinsser Z00861 Sanding Sealer Sealcoat 3.7L


   Shellac is also at the heart of "French Polish", a very classic, warn rich finish that was popular with wood turners and furniture makers for many generations. 

    This finishes can demand more time and technique  than modern plastic finishes but the results when you have the time is ageless, and repairable.  In the last couple of years I have been asked to repair damaged furniture or recently a wooden bowl and in each case the finishes were old style and so I was able to make a nearly invisible  repair.  

   The shellac can also be sprayed over paint to give it a glossy finish without working about lifting the finish, since paint is either water or oil based and shellac is alcohol based.  As long as the paint is totally dry the shellac goes over it fine.


Friday, October 5, 2012

Small Cat

walnut cat pin with pencil to show scale
  I have decided that it is time to get back to my roots and make some small scroll saw projects again.  The scroll saw was the first power tool that I got for my shop 10 years ago when I started back into serious wood working. I had an uncle that had become quite expert at scroll saw projects and I hoped to emulate him.  Little did I know the path I was going down.

   This winter I plan to spent time on small projects, carving  and improving my detail work. I have built book cases and flower boxes and dozens of cutting boards in the last while but I think it is time to work with some hand tools in the quiet and make projects that need fitting with files, and finishing with rifflers.

  This little walnut cat, from an off cut is the beginning. Actually it was cut with a band saw rather then the scroll saw.  I painted the details with acrylic paint and then spayed the cat with shellac. The spray shellac is expensive but quick, easy to use and leaves a nice finish.  Any time that I can spray and avoid brush marks is a good time.

Sunday, January 8, 2012

Finishing Challenge

Ten Thousand Villages is one of my charities.  I don't generally give them money I give them time.  When wood products arrive at their Hamilton Store cracked, or broken I try to repair the defect.  If I can repair the product than the store can sell it, sometimes at a discount but at least cover their cost.  The products come from small artisans from all over the world and are sold a fair market prices and the money actually ends up back at the maker, not swallowed by middle men and hustlers like many things from disadvantaged communities. (10,000 Village has been doing Fair Trade Coffee for a long time)

Up til now I have glued and clamped and repaired, boxes and shelves and things, this time... I face a greater challenge.  The bowl in the photo has been turned on a lathe and finished on the outside to a high gloss.  But....the finish is badly flawed and needs serious repair.
 
  The facts:
  -the outside is high gloss the inside is matte. It could be French Polish, a old and common finish that will give you a high gloss when buffed on the lathe. But why did they not polish the inside too, it would have been easy if the bowl were turned on a face plate?  So I am thinking not French Polish.

  - the finish is brittle. This bowl is from India and so is shellac, is it shellac that didn't stick to the wood because of natural oils?  Or was the bowl banged around on it long journey to Hamilton and just needs to be touched up with clear shellac?


  -I have no idea what the type of wood is, so it could be naturally oily and was less than perfectly prepared to recieve the finish.  If so, what will stick and stay?
  
  I am going to see what alchol does to the finish and if it softens then I'll know it is shellac.  If it does not soften then I will try varsol (trade name) and see what happens.  If that doesn't effect the finish then I will .......I don't know!!!
 
In an ideal world I will be able to blend and buff the flaws away if I can get sort of a match to the finish. Just as likely in this less than perfect world I will end up having to strip the finish off the bowl and then start from scratch. 

I'll keep you posted.
 

Wednesday, November 23, 2011

Practice Piece

 Perfect Practise makes Perfect.
    I used to say practice makes perfect but a student of mine taught me the more correct saying.  In the wood shop there is practice needed to learn and perfect techniques in the same way that it takes practice to learn a new song on the piano or how to control your slap shot.

   To keep woodworking interesting for me I need to learn new things, the areas that appeal to me for development are joinery techniques and finishing.  The products from you shop are generally pretty good also fairly basic, which is fine but occasionally a person should stretch themselves and learn new things too, I think .  I read Lumberjocks.com and just saw a fabulous small wooden boat as a project, clearly that fellow and I are from different galaxies.

   The thing I need to remember is that he was born in the same galaxy and through effort and exploration he has moved far ahead of me. The photo is a joint in a recent project.  Usually I would use pocket holes and make this a simple butt joint, this time I had time to do something more.  There are eight joints like this on the project, seven of them turned out perfect and one was less than perfect.  Next time they will all be perfect.


  This project actually was the platform for both areas of development and it is also a useful. Useful appeals to my practical side, this time, unlike the other week when I was making raised panel doors with no purpose I was learning but not enjoying the experience.  This project uses raised panel/router skills and now that it is finished it has found a useful place in my closet.


  The final finish on this project is a non-toxic and fast combination of water based stain and orange shellac.
 The milk paint stain went on super quick and dried in about 30 minutes.  Initially it was dull and flat but had brought the grain out nicely none the less.  One coat of orange shellac and it was looking real good.  I will use that combination again for a piece in the public eye, the only difference would be rubbing the shellac between coats and putting 3 coats instead of one.

Wednesday, October 26, 2011

Dowels put to work

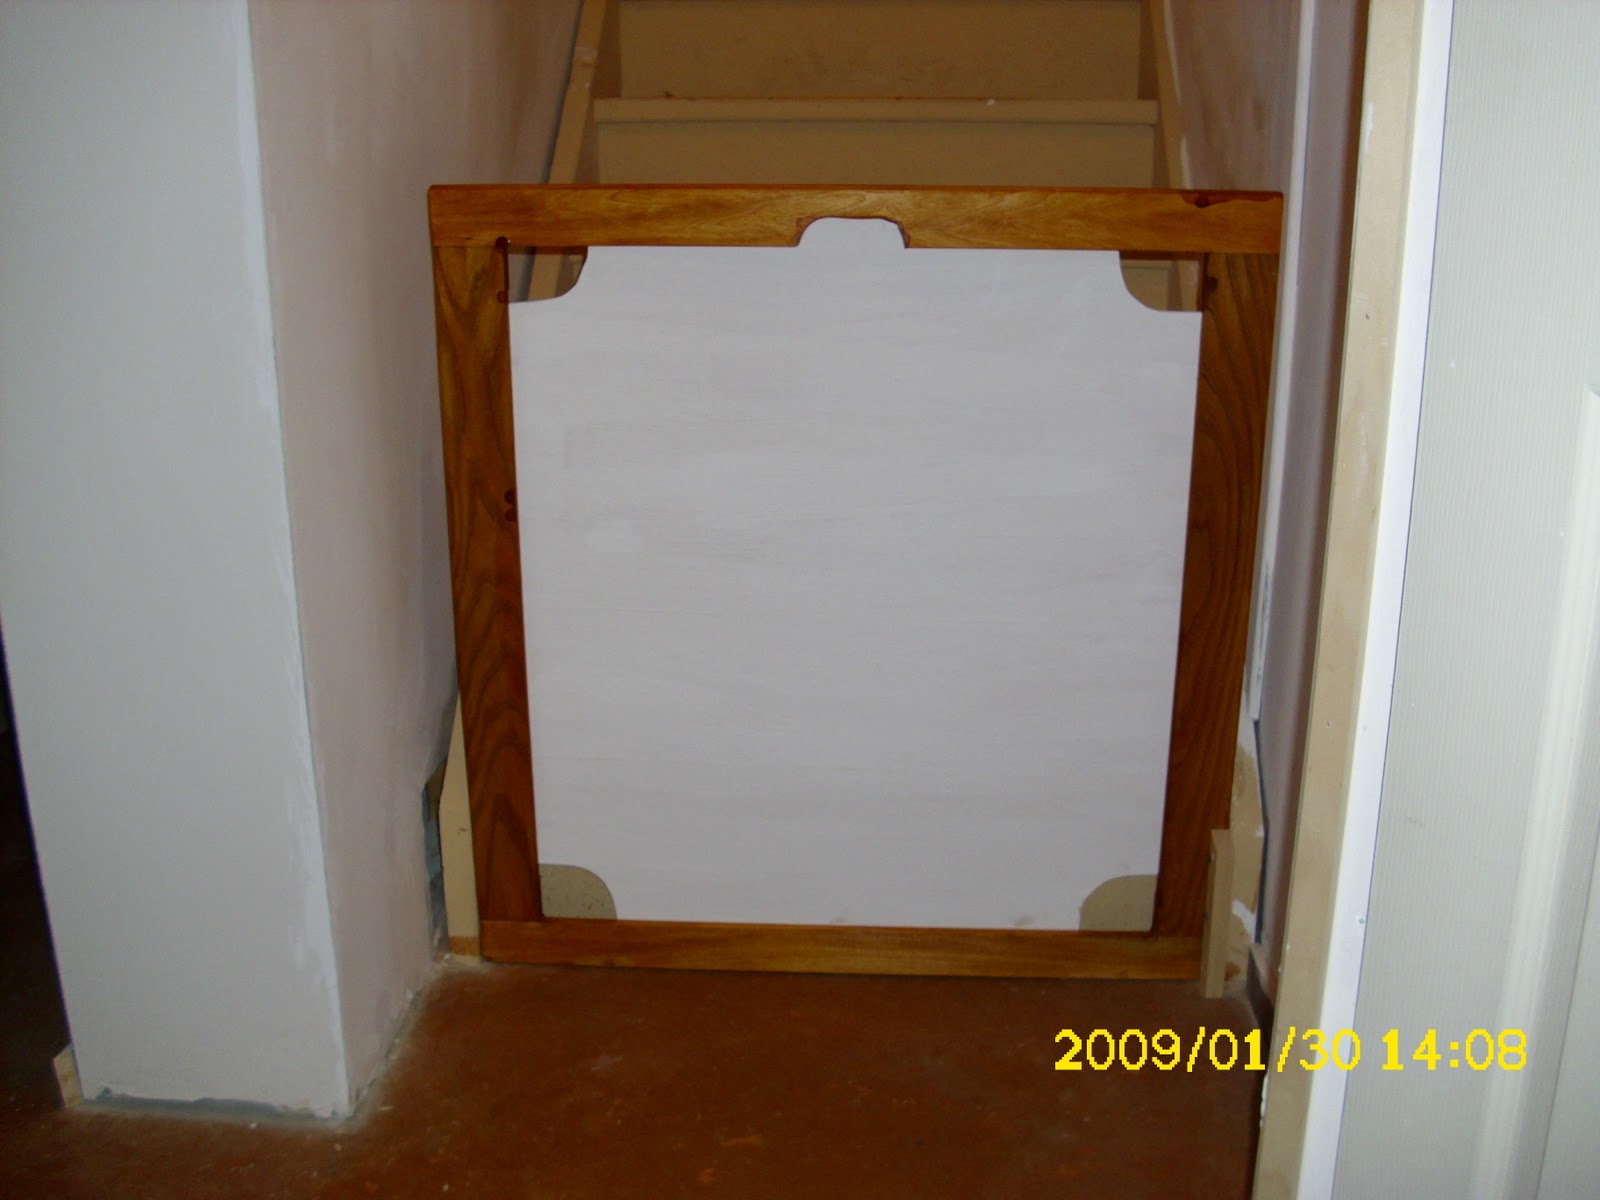
   The face frame gateway is sitting at the bottom of our basement stairs.  This gate is designed to keep Kieran downstairs when he really wants to come up stairs and hang out with us. If you are a parent/grandparent you know the routine at nap time.  They fuss and cuss and as soon as you leave the room they fall asleep.  The gateway is there to keep him from climbing the stairs and not being about to open the door at the top.  We are concerned that he would then start to push and pull at the door and maybe....bump...bump....bump and then everyone would feel bad.


  I used the JessEm dowel jig to make the face frame.  Ordinarily I would have used Pocket Holes but in this case the project did not have a hidden side so the holes would have needed plugs.  It was one of those few occasions that dowels or mortise and tenon were just the thing.  


  The JessEm jig worked perfectly.  All the holes were in exact alignment and and the was easy to set up.  I have gone on record as saying dowels are mostly about alignment, in this case that is especially true.  The gateway is longer then my longest Bessey Clamps and so I had to improvise a clamping station on my work table.  Since the dowels kept things lined up all I had to do was clamp one side to the table and push the other side in tight before clamping it to the table as well.  The adhesive quality of modern glues means that all it needed was a firm hand and 24 hours to cure, I'm sure the glue joint is as strong as the wood.


   The frame is elm, because I have a bunch of it laying around and finished with orange shellac.  I have found that the orange shellac goes very nicely with the natural colour of the elm.  


   The white section of the gateway is door skin.  It paints easily and weights nothing.  This way the gate serves its purpose and is easy to lift in and out of place with one hand.  It remains to be seem how long it fools the little guy because it is light enough that he could move it if he wanted to.


   FootNote:  The date time stamp is not right.  I don't know why that is on the photos and clearly it has not been updated since the batteries went in.


Thursday, March 24, 2011

Photos that Follow

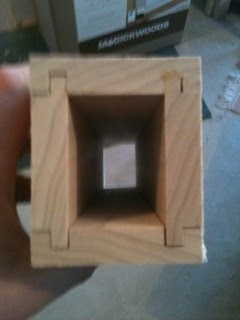
The Box Joint Jig Story in Photos
The first part of the task was making the Jig.  It is 1/2 Baltic birch and about 30 inches long.  It is long enough that it reaches the full length of my small router table with lots of room for clamps.

This is the first box that I made. It took a few tries to get the fit correct but once learned it is going to be quick and easy. As a note, the box is poplar finished with Orange Shellac, two coats.

Just for perspective.


This is the other type of joint that I wanted to do.  As you can see this one is not perfect. I need to refine this joint because I want to make some bird houses and use no fasteners, so there will be no rust showing on the outside after a season or two.