Showing posts with label poplar. Show all posts

Thursday, August 8, 2013

poplar


   My local lumber guy turned me onto poplar four years ago and I have never looked back.

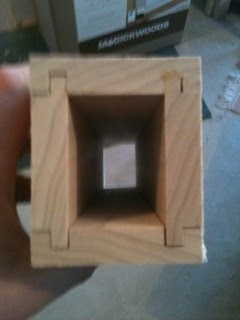
A three candle holder that slides in and reduces its foot print when not in use.

A box with a locking top used to hold cat treats.

     Poplar,  has become a go to wood for me.  I can get it at a good price and in a large assortment of rough cuts, both think and wide. I had a chance at a 2 x 18 by 10 foot board one time.  I just couldn't think of a good use, or how to get it home in my car. Poplar can give good colour though it has a greenish tint that can come through some  stains.
Looking for a tool box?  It will carry other things that pocket hole screws.


Tuesday, August 9, 2011

A favourite woodworking project Revisited

Crib that I made just over two years ago.
    This is the crib that I made for my Grandson's room two and a bit years ago.  Yesterday instead of writing my customary Monday blog I went to the kids house and put the crib back together, a new baby is due any day now.  I built the crib from poplar and remain very pleased at the colour variation that the wood provides. Poplar was also quite good to work, it is a hard softwood and generally straight grained.


wood so green that it is black.
    I can see why makers of fine furniture would shy away from poplar because of the colour variation but for us, it adds personality.

    Instead of making a side that adjusts I went with a design where the mattress platform is raised at first and then has legs cut off to lower the mattress down as the baby gets bigger.

   Aside from the excitement of being blindingly proud of another Grand Baby I also had my favourite helper while doing the re-assembly.


     I held the drill and Kieran pushed the button and made the drill go, green light-go, red light-stop.  He was excited to be helping get things ready for the baby too.


Friday, June 24, 2011

Making Trim

     A couple of years ago I bought 1500 running feet of 2 7/8in x 1/2in x 14 ft. poplar from a local lumber yard.  The story was that the mill had run the stock and it was supposed to be 3 inch and they didn't want to store the wood until something smaller was ordered.  What ever the story I bought the wood at a very good price and survived the stare of disbelief when it arrived and occupied a big section of the family garage.

  It seemed at the time as though it would be a life time supply of poplar.   When I finish this latest project, trimming the recently completed family room, I expect it will be nearly all gone.

  Making trim is dead easy and fairly dull work, if you have the tools.  Lets look at the process in this situation.

  1. I have to cut the 14 foot lengths down to 5 to 8 foot lengths so that I can work safely and comfortably in my small shop area.  Anyway, I will have to put it up myself and 8 feet is a manageable length.

2. After I cut the poplar to length I run it across the router table to create my profile.

3. Then I run it through the table saw to cut the secondary piece that I glue/nail to the wide section to get a profile with a little bit of a shoulder.  I need a little more width to cover some of the irregularities in the recycled wood paneling that is going on the family room walls.

4. glue, nail, wait to dry and stain or paint depending on where in the room it goes.

   None of those steps is really challenging as long as you have the right tools.  I talked about the hold fasts being made by the blacksmith, Anthony Moore, in a previous blog entry.  Same thing, It is was dead easy for him to make the hold fast, all it took was a forge, mighty hammer,  a bending bench and 10 years experience and practice.

the profile features beveled edges instead of rounded edges.


    I stained the trim dark walnut and put it up against light pecan paneling and it looks pretty good.  A  couple more days of dedication and cutting of mitre corners and on to the next project.
   I'll show a photo or two next week.

Friday, June 17, 2011

Re-learning or Why I should make notes in the shop

 
3 thread winders and what it looks like before I start to work.
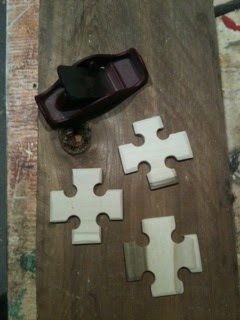
   There is a company in Hamilton that provides historic products called Spencers Mercantile.  In the past I've made some thread winders for them to sell in their store.  I guess these were used before thread came on spools like it does now days.  Historically many of this type of small object was made out of bone or ivory, the last time I made four from poplar. Poplar was and is a common tree, easy to work and somewhat harder than pine. It was a harmless little distraction on a rainy evening.

   Last week Spencers Mercantile  ordered two dozen.  Now I have to get smart and develop a production system to make the thread winders efficiently.  Two dozen is not just fiddling around for a bit after supper any more.  Done properly 24 will not take too much time if my method is good. 

  First I gathered the wood, cut it with a mitre saw, drilled it on my drill press and then shaped it with a band saw. That represented only a few minutes work.

   Everything was going swimmingly, then I tried to decided how best to do the final shaping and sanding.  The following photos show some of the tools at my command. I left out the obvious, many different power sanders: finishing, belt and orbital.

needle files, knives and rasps
nearly every bit and burr that you can imagine

power shaft driven by my 1/2 drill.
   I worked away for sometime trying to quickly shape and sand the items smooth.  In my mind high tech + power = success.  I could not get a smooth enough result to suit me, regardless of bit, file or rasp; hand or electric powered.  In desperation I next  scoured the Lee Valley catalogue looking for the perfect burr for my drive shaft and planned a trip to their retail store for the following morning. After supper I took a coffee and went down stairs, not to work but to putter around, you know the routine, put some tools away and vacuum up the day`s mess, maybe fiddle with one small thing that was left on your bench from the afternoon.  Nothing big.  It was then that I discovered, or more correctly re-discovered the perfect tool.  The one that I had used the last time.

  The very best tool for quickly and easily finishing the thread winders.
a small bit of sand paper wrapped around a pencil.
   Sanding the thread winder is not that big a job,( It can be done by hand, quickly). When I have sanded the items smooth with the sand paper wrapped around a pencil I wax it.  It feels good to the touch and won't bleed colour.

   I spend hours in my shop, it is my Man Cave, my sanctuary, the place where  I can spend time doing things that are real.  Much of my working career was paper movement based, and not as satisfying as making stuff can be.   The thread winder is a case were had I made a few notes and taken a photo or two last time I would not have had to spend time re-inventing my wheel. The project would be done and I`d be onto something else. Will I learn from this experience?? as they say, Stay Tuned to see the thrilling conclusion.


Tuesday, May 3, 2011

Oak

http://en.wikipedia.org/wiki/Oak

   It is nearly impossible to add anything to what Wikipedia has to say about oak. 

    Having come into a large amount of oak for a very reasonable price I have lately been making things from oak.  If you read back you'll find I have also used poplar, for the same reason.
 
   When the reserves of cheap oak run out it will be interesting to see if I will bear the cost of buying it at full market value.  I suspect I will move onto something else that comes at a good price. I do have my eye out from some cheap walnut, (if there is such thing).

Thursday, March 24, 2011

Photos that Follow

The Box Joint Jig Story in Photos
The first part of the task was making the Jig.  It is 1/2 Baltic birch and about 30 inches long.  It is long enough that it reaches the full length of my small router table with lots of room for clamps.

This is the first box that I made. It took a few tries to get the fit correct but once learned it is going to be quick and easy. As a note, the box is poplar finished with Orange Shellac, two coats.

Just for perspective.


This is the other type of joint that I wanted to do.  As you can see this one is not perfect. I need to refine this joint because I want to make some bird houses and use no fasteners, so there will be no rust showing on the outside after a season or two. 


Sunday, March 6, 2011

New Profile Photo and Shop Space Questions

  My new profile photo is about 24 months old.  That is me, in my workshop with the crib I built for my Grandson.  It was the biggest job I had ever done.  I started with rough Poplar and re-sawed, planed and jointed every board.  I learned so many thing on that job that I have used since.  Should the need ever arise I could make a better crib, in half the time.


  The need is not likely to arise, short of a fire, since that crib will last many generations.  I hope that it out lasts me by many years.

    What brought the photo to mind is that last couple of very hard days have been spent working in our basement.  I built a lumber rack, a serious, large scale, bad ass lumber rack in the shop and then spent a long time trying to get the living space in the basement, well.... livable.  The photo shows that the shop didn't even have walls when I was building the crib.  Now there are walls, but too much junk.  I have to figure out how to get the space workable again.  Having cleaned up the other part of the basement, the shop is now piled high with boxes and no room to work.


    Is this ebb and flow of usable, vs. chaotic space typical of a workshop?  How often do you have to take your shop apart and reassemble it?  Storage and floor tools are making my space too crowded to work. How do more experienced shop people deal with this situation?
   
  I am dying to know.
cheers, ian

Wednesday, February 9, 2011

Small Jobs and New Tools

   Last weekend I was at the Hamilton Wood Show and wondered past the Dura-Grit booth.  In the past I had purchases a couple of their sanding blocks and this time I saw that they were selling rasps.  I am very happy with my sanding blocks and so added the rasps to my collection of tools.

   One rasp is square with two sides 60 grit and the other two 120 grit while the round rasp is 120 grit. The section with the bonded grit is about 6 inches long and the handles are small in diameter but that is easy to fix.  I expect that I will wrap the round rasp's handle in tape.

   I make an assortment of smaller projects and I also do some scroll saw work.  Both types of project usually need small touch ups before finishing, until now I have used needle rasps, files, hand held rotary type tools and an all sorts of tricks and jigs.  These new rasps do a good job on small edges and I found working with them easy. Things I especially value in these rasps are the blunt ends and the length of cutting surface vs. the sharp ends on the short little needle files.  Cleaning out inside cuts on scroll saw projects will remain a needle file task but the outside edges will be touched up by these rasps in the future. ( and I will not poke myself if my mind wonders)


This is an example of the current small job.  These are Thread Winders.  A local store, Spencer's Mercantile   specializes in historic re-enactment products and I have been making some small things for them. The latest products are these thread winders in poplar, the new rasps worked great for easing edges after I cut them out on the band saw.

Monday, January 31, 2011

Inspired by Roy Underhill

   I watched a Pod Cast of the Woodwright's Shop and saw Roy Underhill make a tallow box from a block of walnut.  After a couple of tires I arrived at a version that suited my tastes.    My boxes are oak or butternut when I plan to put a clear finish on them, poplar if the boxes are to be painted or stained.