Showing posts with label mitre saw. Show all posts

Monday, August 30, 2021

Found Wood Project

 The other day I picked up wood on the side of the road.  Usually the wood lays around until a project comes along.  This time I was inspired to use some of the wood right away.

  I decided to make a corner flower box to sit on our deck.    Preparing the the wood did require some edge trimming but not much else.  


Several of the boards had 45 degree ends and so I decided to use the already cut wood.  I used a combination of Kreg Pocket Holes and screws to put it together.  The were a few rotten spots  I had to work around but I like the result.


  I cut the mitre using my sliding mitre saw and measured the lengths I needed  once I fit the corners.  This found lumber is cedar and nice to work with.  In the fore front of the photo is my try square.  This try square is from my late Grandfather's wood shop. I'm not sentimental but....I could never replace Grampa's square.


   I think I will paint or stain the project, after it gets a little bit of sanding.  It will look nice on the corner of the deck with flowers next summer.
 cheers, ianw


summer flowers


Saturday, August 28, 2021

Found Wood

 Yesterday a neighbour threw out wood left from repairing their deck.  I can't pass up free wood.  This heavily weathered wood will be used for flower boxes and other rustic projects.


  A collection of cedar boards  with some rotten sections. Happily all the nails had been removed, my guess is the deck was screwed together.


three bundles,
 cleaned out and ready to be stored until....

 Three bundles of wood secured with string made from soda bottles.  I tie the string and then heat it with my heat gun which shrinks the plastic  and tightens the knots.

  I brought the wood to my shop and with my sliding mitre saw cut off the rotten ends.  In truth I didn't have to cut off much. To use the wood the edges of the boards will need to be planed or trimmed on the table saw, but I will leave that part of the process until an actual project. 

  By the time I was done I had 18, 1x6 boards, between 2 1/2 and 3 1/2 feet long. That will make several projects for the back yard, and all for free.

  Today was the first cool ish day in a while and so I was over come with ambition.  I cleaned and organised the garage this morning, before the heat rose to roasting.  That was one of the jobs on my "To Do" list, one down ??? more to go.

cheers, ianw


Sunday, August 28, 2016

Easy Easels

 One of my fellow art students asked me to copy our studio's table top easels for her

new easel on the right
 So I did, I copied the studio's easel in poplar, using an off cut from the table top.  The poplar is strong and easy to work either by hand or machine.  After cutting the three legs to length with my mitre saw I did the rest of the work with hand tools. (just for fun). I used a back saw, a block plane and a bit of sand paper. I did use a cordless drill to make the holes for the threaded rod that holds it all together.  I do have a brace and bit if I need be.  I actually use it when the forstner bits aren't long enough.

  After I got the commissioned easel make I decided to make one from my self. Mine is made from:
from this:

  One of the car load of 2 x 4's that I brought home a few weeks ago from our kids house. The board was weathered and a bit twisted but after I cut it to length on my mitre saw, joined one face and one edge, then ran it through the planer and ripped it on the table saw:
to these:
 I even went to the trouble of putting a round over bit in my router table and smoothed all the edges. It took longer to rout the edges and sand everything nice than it did to cut and drill the thing. My easel doesn't have a cross piece like the others, it has two dowels upon which the canvas or book or what ever will sit.


 The only trick in making this....


The angle where the three pieces come together.  To move the easel around, just undo the bolt at the top.

cheers, ianw


Thursday, March 12, 2015

Thursday' Project - continuing the Spring Cleaning Theme.


    On the wall above my sliding mitre saw is a shelf unit that I built four or five years ago.  The unit began life as a prototype for my Grandson's room.  Lucky it was a prototype made from mixed materials because once done it turned out to be the wrong size and shape after all.  Being ever thrifty I brought it home and nailed it to wall in my shop after adding a couple more shelves. The whole thing is a saw dust covered mess most of the time, and not very well organized at the best of time.


  This afternoon I went down to my shop and invested a couple of hours making and organizing.


  After I cleaned off the shelve unit and made a plan I built a small set of shelves using 1/2 inch and 1/8 Baltic birch plywood. The plywood is off cuts from the Great Cajon kit build, I never throw away a piece of wood that maybe useful one day. (that is part of the reason my shop is a bit untidy).

 I cut the dados with my 10 inch Bosch sliding mitre saw. The saw blade was not 1/8 thick so I had to cut tiny rabbets on the edge of each shelf board.

   
  To cut the rabbets I used my 1/2 shoulder plane.  I held a piece of 1/2 plywood slightly back from the edge of the 1/8 plywood as a fence when planning the thinner wood. It only took a couple of passes of the plane to thin the board to make it fit.

  The final result after glueing and nailing was a purpose built self.

 Once I sorted, consolidated and tossed some stuff from the big shelf unit I put the new small shelves in place.  The drills stand up, the bit and pieces have proper homes and it will be easier to vacuum in the future.


  I have a couple of other sets of shelves that could use this attention too.

 cheers, Ianw

Friday, September 5, 2014

2 x 4 project

  If you wander around the internet like I do you are familiar with the 2x4 Challenge. My project is not an entry into the challenge but...something that I whipped up with an eight foot 2x4 left over from a fence repair job.

 The basic dimensions are easy and really the only tools you need  are mitre saw, Pocket Hole Jig, a drill and a sander.

  Parts List:

4 at  11 by 2 by 4
4 at  12 by 2 by 4

  I cut 45 degree mitres on the ends of the 12 inch boards.

  Seven of the frames parts were assembled in the shop using  wood screws and the last section was screwed together when placed around the tree.

completed frame, 26 1/2 inches across

  When I put the frame together I used Pocket Holes, this is how I clamped the frame together when I screwed it together.


   After I screwed the frame together I cut the over hang off with a hand saw and then sanded things smoothish.

  When the project is finally done you get this:


Cheers, Ian W


Friday, April 4, 2014

Tray Molds


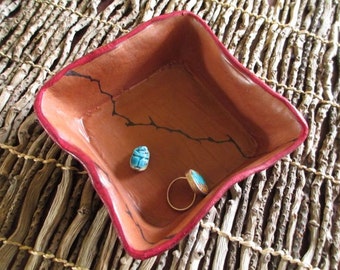
  I have a friend that is a potter. and the other day she asked me to make her a couple of moulds for making trays.  Generally pottery is thrown on a wheel, ( a mud lathe?!) but another way to shape the clay is moulding it and wood makes the best moulds, I was told.  

mould with the mud on it

8 x 16 mould
square mould 8 x 8

  Making these moulds is not high art and it was nice to find purpose for some of the bits of wood that are still laying around in piles.  This imagining oneself as the most primitive of pattern makers. One day I will have to buy more wood, but 'not today'. 

   Making the moulds was an exercise in 45 degree angles.  A sliding mitre saw makes short work of a project like this.  I bought my 'slider' quite a few years ago and have been working it hard. Bosch has continued to develop their saws, and I would certainly look to Bosch for my next saw too.

My only complaint with this saw is the dust.  It maybe the biggest mess maker in my shop, it is almost a messy as a lathe.

  After I made the two moulds I got a brain wave.  What about an eight sided mould?  And, why not just make inserts that fit inside the square mould?


   Why not?  Because you end up having to cut a whole bunch of 45 degree angles on very small pieces.  If anyone decides that they want to try something like this I suggest you make a larger mould so that you have bigger pieces with which to work. Since some of the pieces were too small for me to cut on the sliding mitre saw I used hand tools to cut the angles, even at that  the pieces were so small that they were very hard to hold on to while cutting.

  If you were to make a dedicated 8 sides mould it would be like cutting crown moulding for a tiny, tiny room.  If my friend is interested I would give it a try.

cheers,


Saturday, July 7, 2012

Mitre Saw Dust Control

  Last March I wrote a blog about mitre saws of various types, I really like my saw and use it all the time.  If you click this link you will see a very good system to reduce the saw dust and blow by dust that you get when working with your saw.


I strongly encourage you to check out the link and watch the video.


Wednesday, May 25, 2011

A New Design for an On Site Mitre Saw.

http://professional-power-tool-guide.com/2011/05/tools-action-supports-tool-inventors-innovative-miter-prototype/


     I got a tweet about the saw yesterday.  If you have a minute watch the video and see what you think.  I think it would be an excellent tool for flooring and framing.  As a shop tool it would be good for breaking down long stock too.