Showing posts with label dowels. Show all posts

Saturday, May 19, 2018

Cleaning Up a Small Mess

 The mess, the problem.  That window sill had become a hopeless mess and I couldn't  open the window any longer.


   For several years loose dowels have collected on the window sill in my shop.  Initially it wasn't a big deal and I could still open the window to let in fresh air and/or let out smelly chemical air.  As often happens, a short term stop gap measure becomes standard operating procedure, but eventually  the system breaks down. Not only that, it looked like crap.

  After a bit of planning, measuring, and drawing a plan I gathered together various bits of wood.   This project was not made from the scrap cut off bin, but very nearly.


  I decided to make a three section storage bin from skid wood and some plywood.  The bin is 24 inches, 12 inches, 6 inches tall, 12 inches wide and 6 inches deep.  I made the bin so that it would still sit on the window sill.  


    I find that every time I buy dowel I have a bit left over, that I can't bear to throw away.   The plastic bin on the left contains bits of copper pipe, brass, and other none wood items.  Now this is a useful and organized space, the window can be opened with ease and while I was at it I even  washed the glass.  

   You can see on the right one of four bins containing pieces of wood too large to throw out, but too small to be useful.  I am working on over coming my 'wood' addiction, but it is tough.  I never look at a little piece of wood that I don't think it could one day use it for something.  Ultimately the wood will end up in a fire pit, I just need to accept that reality and get rid of the bits, I might discover that my shop is really quite large and comfortable.  That will be embarrassing....

  cheers, ianw


Wednesday, April 19, 2017

While the Glue Dries

  I was waiting for the glue to dry.  I had done a couple of little trim things on the paint box and was waiting for the glue to dry before final sanding and varnish. 

Image result for i hate waiting

  Sometimes I fill the waiting time with sharpening tools or sweeping or I just give up and go away.  This time I did a bit of shop maintenance that was long long over due.  I while ago, more than a year, maybe more than three years I cut the top of my work table with my circular saw and not long after that a corner broke off.  I have struggled to work around the broken bit of bench ever since. Finally yesterday I was waiting for the glue to dry and decided to do something about the problem. There was also a bit of wood just the right size staring me in the face.


  First thing to do was cut the edge square, for that I used my circular saw and the saw guide that I made a few weeks ago.  Once again the saw and guide worked easily and accurately.  My bench top is 1 1/2 inch thick plywood and this time I decided to cap the edge of the plywood with real wood. You can see, I used glue and wood dowels to attach the face board. The entire work table is assembled with dowels, Miller dowels generally.  I chose  to use wooden fasteners so that anytime I saw or drill on this work table I know, for sure, that I won't run into a screw or a nail.  For example, today I added three new dog holes in the work top, which is easy knowing what is hidden.

  I have been working for several projects now without a table saw.  Now I have no plans to replace my table saw , if I won the lottery I might buy a dedicated track saw but I'm not even sure about that.  The saw I could not live without is the sliding mitre saw.   They do half of what a table saw will do, for half the price, but it is the half that makes life in my  small shop much easier.

  All that remains after the varnish for the paint box is a carrying handle. I need to see what is out there in hardware.

cheers ianw

Image result for the princess bride quotes
but not the sandwich kind!


Sunday, August 14, 2016

Garden Structure

  I  recently picked up a station wagon's worth of 2 x 4's that had been used for temporary fencing.  The wood had been outside for a year (temporary?) but is still useful for rough projects.

  Today's rough project is a quick but sturdy trellis for our back garden.

Coreopsis
  Against our back fence grows a clump of coreopsis about three feet wide and one foot deep. The clump grows bigger every year.  By now the plants have grown six or seven
feet tall and one good storm with rain and heavy wind blows the stalks into a twisted mess. This happens every year, this year the clump of flowers is big enough and I have the right materials at hand so I did something about it.

trellis, 5 ft. by 3 ft.
  I started out with weather 2 x 4's which I ripped into approximately 1.5 by 1.5 inch boards. Before I let the wood near my table saw I brushed in heavily with a wire brush and double checked the wood for nails and screws.  When I picked up the boards I took time to remove all the nails and screws that I could see, but checked again to be certain.  I like re-using materials, I hate to see wood wasted.


  I used 3/4 inch dowelling as tenons. The up rights were drilled on my drill press and the ends of the cross pieces drilled free hand.  I opted for tenons and all wood construction so there would be no rusting screw or nail heads next season.

  There are many ways to cut dowelling and a variety of jigs that can be built but I have found that a mitre box and hand saw do the job as well as any method.

Stanley Clamping Mitre Box w/Saw 20-600
Stanley mitre box

  Nearly always I am cutting a piece of dowel less than 2 inches long so the 10 inch sliding mitre saw is too aggressive. = (scary).  Dowels can also be easily cut with a band saw, probably my second choice. 

  When I came time to glue the trellis together I only had two pipe clamps that were long enough so I improvised for the third.

c- clamps attached to the rails, Bessey clamp
pulling the c-clamps together.
 A quick and adequate extension.
  When this year's flowers die down I will move the trellis closer to the fence so that next year the wooden trellis will be somewhat hidden by the growing flower stocks.  The flowers between the trellis and the fence can be ignored and the flowers outside the trellis I will tie up.  

  We have a couple of other spots in garden that need extra support and so I will probably make a couple more versions of this trellis over the next while.

  cheers, ianw


Monday, January 13, 2014

Rack in the Bathroom


  Shortly after we moved into our new house (5+ years ago) we both realized that our master bathroom is larger than my first apartment.  We decided to make use of the space by my building a rack which sits over one of the heat vents in the bathroom.


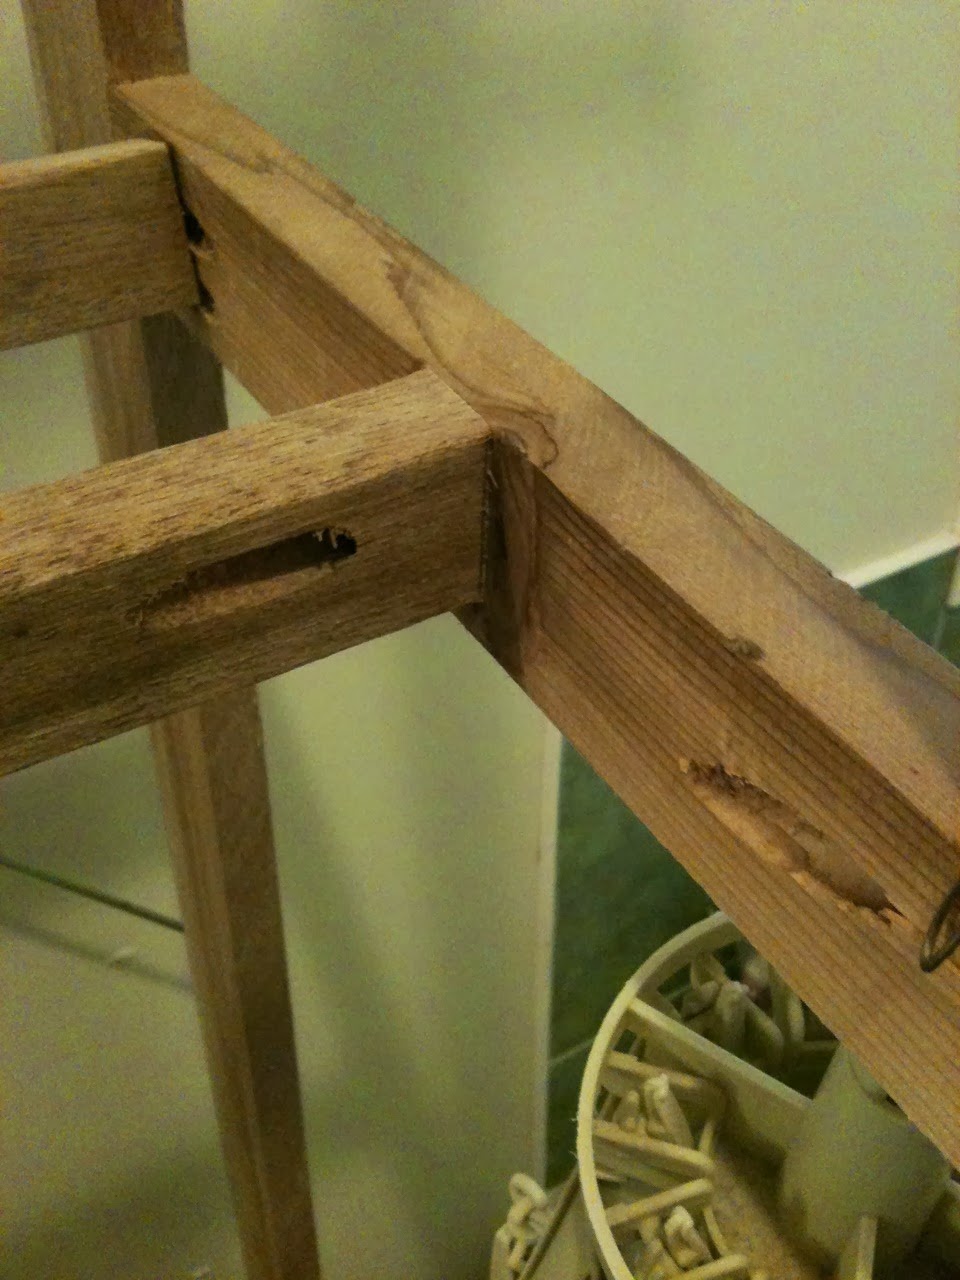
    As you can see this is a pocket hole project.  Where I used the self taping pocket hole screws as designed the project worked fine.


  Where is used the screws and allowed them to be exposed to the air and damp, they begin to rust. (not surprizingly)  I decided to get on this little job and replace those rusting screws.  I had two options.


  Or: remove the screws, drill out the holes and replace them with wood dowel.


  I opted for using dowels as you can see.  I found that I had 1/4 inch dowelling and I didn't have any of the stainless steel screws.  This job wasn't big enough to warrant ordering special fastening hardware, If there were more repairs necessary, or if quality of finish had been more critical then I would have ordered the screws.

  FYI- stainless steel screws are weather resistant etc., but sometimes their sheer strength is lower than quality hardened screws.  You need to adjust the torque on your driver or you will twist the heads off your screws.

cheers,