Friday, April 28, 2017

F.Y.I re: reclaimed pallet wood.

  I finished pulling all the nails out of the pallet boards today. I figure that I got 15 3/4 board feet of usable wood.  There are of course nail holes and if I want smooth wood it will be probably only 1/2 inch think by the time the boards are planed.  Rough storage or out side flower boxes seem like a good use for the wood.  I want to make something  quick and easy.  I may not even fill the nail holes.

  Now that I have worked out a method for reclaiming wood I may do it more often. My first efforts, trying to pry the skids/pallets apart meant too much of the wood was wasted to make the effort worth while.

two and a third layers of reclaimed wood.
   There are lots of things that can be made with rough lumber.  There are even more things that can be made with lumber that has been filled and sanded.
  I think I'll make something quick this weekend.
  cheers, ianw

Thursday, April 27, 2017

Recycle a Pallet, Get a Reciprocating Saw

  It is all the rage to collect and reuse shipping pallets.  I am a strong supporter of reusing and recycling anything if possible.  Today I spent some of the first real nice days cutting a pallet apart with my reciprocating saw.  Technology has advanced significantly since I bought my saw, the saws are smoother and available in cordless models.  When I bought my saw a decade ago battery technology wasn't up to powering a reciprocation saw.  

  As with jig saws there are many specialised blades for recip saws. I have a reciprocating saw to prune small trees and cut up green wood too. Every major tool company and blade maker has developed all sorts of blades.  Cutting the pallet apart I used a blade that sliced through the nails. This way there is less damage to the boards.  Using this system the next most important tool is a nail set to drive the nails out of the boards. 

  Now that I have some pallet wood I thought I'd look at some pallet projects on Instructables 


Pallet Coffee Table From Reclaimed Wood
Looks nice.

   After I bashed the pallet apart I sent quality time with fine wood working tools.  I  have three small repairs from 10,000 Villages and finally affixed a handle to the paint box. I like making repairs to wooden objects for 10,000 Villages, repairs always involve sharp knives, planes, rasps and files.   I find  relaxation and comfort in fussy and fine wood working. After the tools are done the next stage is finishing with shellac or wax.

  I am hoping the weather will be good tomorrow.  I want to ride my motorcycle, and then I will take out the rest of the nails and move onto a project.

cheers, ianw


Tuesday, April 25, 2017

My shop is a mess, again.

On Sunday, after church my grandson and I crashed down to the shop to make another boat.  Last September 6th we made a submarine.
A proud maker.

  Last weekend we made a boat that provides support services to this submarine. 

Image result for submarine support ship

    This type of ship was our basic inspiration, but we did not have enough time to really do the project justice. There is nothing better that working with an enthusiastic seven year old with a plan, also almost nothing as challenging.  We also added a time crunch to this project which is partially why my shop is a total mess.  

  I have tried to set an example of calm and focus in the shop with a routine of returning tools to their proper place as we work.  On Sunday it was chaos, there were tools on benches, and machine tops and even the floor, when we were done.  After seeing the kids off home, Eva and I jumped in our car and headed away for an over night holiday, leaving the mess behind. Today I was off running errands and so Tuesday after supper and still the shop is chaos. The house Elves do not put away tools, or sweep the shop.(sadly) I'll get to it tomorrow morning. 

  We were so rushed that I didn't even get a photograph of our effort.  The plus side of this building project was  it introduced Kieran to two new tools.  We used a jig saw and a wood rasp for the first time together.  I think I will try and create a project that uses the jig saw for his next visit.  With the correct blade in place a variable speed jig saw can do lots of things, and he maybe ready to use it. (with coaching and supervision) Kieran is comfortable with the band saw and the drill press now and uses his small cordless drill driver for putting in screws, so it is time for some new tools. 

  I think the wood rasp was also popular, it clears material faster than sand paper, and speed is important when you are 7 1/2 years old.

Big beard, long hair but no horns, to easy to break off,
just like on real Viking helmets.

  I need only a handle for the paint box and so am making a small carved Viking for my youngest grand child. On our last trip to Sweden she got the Puffin
the last minute puffin.

  The small carvings are a good size for small hands and are pretty much unbreakable. Once the Viking is painted it will be another bright thing for be dragged from place to place and finally lost in the long grass.  (which is exactly why I make them).

  This evening I am relaxing and stretching out my sore back, tomorrow back to work.

cheer, ianw


Thursday, April 20, 2017

The Design Process or How To Make A Mountain Out Of A Mole Hill. Project #10

  Yesterday afternoon I set about fixing a small problem in my shop.  I like to listen to music or pod casts while I work and have been using my tablet computer for that purpose.  A couple of years ago I made a passive speaker system for a previous tablet, my new tablet doesn't fit, of course. I have been leaning the tablet on things and hoping it doesn't get knocked over for a while now, yesterday I decided it was time to take a stand, and make a stand.  Another passive speaker system wasn't necessary but I wanted a stand.

finished version


  My initial plan was basic, cut a slot into a chunk of wood and have it hold the tablet.  Once I got the slot cut I decided it would be a good idea to drill some holes into the wood so the sound wouldn't be blocked.  Okay.  I measured the holes and made an effort to make it look designed rather than random.  


  Then the trouble began: the hunk of wood now needed to be shaped a bit on the band saw, then sanded on the belt sander to make it looked designed rather than random.  That took almost no time and improved the visual effect. What happened next was just silly.  I decided that the general shape needed so be sculpted and shaped, after all I had jumped off the artistic cliff and there was no going back.


  First I decided that the top of the hunk of wood was too plain and so I used my drill press and various chisels to carve out an indentation, in which to put.....I don't know but small somethings now have a place to be put. It wasn't that tough to rough out.  I drilled a bunch of holes with a Forstner bit upon which I have ground off the centre spur.  This modified bit leaves a much smoother bottom .  Not so smooth that it doesn't need to be sanded but not bad.

  Since that worked no bad I completely lost my mind and decided to shape the front side of the tablet stand/wood hunk.  The layout was easy, but I should have recognised the can of worms I was opening when the marking gauge had trouble with the end grain.  


  When I began this project I selected a bit of 2 x 6 spruce lumber from the scrap bit.  Spruce is fairly soft, pretty cheap and totally crap for carving. Not a problem since at the beginning of this process I had no plan to carve, shape or even sand this thing. 

  Now I am trying to cut a dado on a curved surface, across end grain that is course and chippy.  I cut the limits of the dado with a hand saw, then I cut more slots in the waste material hoping that it would make clearing the material away easier.  It didn't. I tried various chisels, fine with the grain, no luck across the grain, on the curve.  Finally I finished the job with wood rasps, they removed the wood but left a surface covered with voids when bits of wood pulled out while being rasped.  The wood that was left was filed smooth and sanded but there were many voids and much tear out.

  The holder was too ugly to be left bare wood and so I had to fill the rough spots with putty  before I resorted to spray paint.  If I'd left it as was I would have to invent a story about it being the loser in a pitch fork catching contest.  

  REALLY, all I wanted was a piece of wood to hold up my tablet computer.  It was organic design? Are organic designed products meant to be ground up and composted when you are done?

  For all that, it does the job, it is holding my tablet right now, and blasting away bassoon concertos. 


cheers ianw

Wednesday, April 19, 2017

While the Glue Dries

  I was waiting for the glue to dry.  I had done a couple of little trim things on the paint box and was waiting for the glue to dry before final sanding and varnish. 

Image result for i hate waiting

  Sometimes I fill the waiting time with sharpening tools or sweeping or I just give up and go away.  This time I did a bit of shop maintenance that was long long over due.  I while ago, more than a year, maybe more than three years I cut the top of my work table with my circular saw and not long after that a corner broke off.  I have struggled to work around the broken bit of bench ever since. Finally yesterday I was waiting for the glue to dry and decided to do something about the problem. There was also a bit of wood just the right size staring me in the face.


  First thing to do was cut the edge square, for that I used my circular saw and the saw guide that I made a few weeks ago.  Once again the saw and guide worked easily and accurately.  My bench top is 1 1/2 inch thick plywood and this time I decided to cap the edge of the plywood with real wood. You can see, I used glue and wood dowels to attach the face board. The entire work table is assembled with dowels, Miller dowels generally.  I chose  to use wooden fasteners so that anytime I saw or drill on this work table I know, for sure, that I won't run into a screw or a nail.  For example, today I added three new dog holes in the work top, which is easy knowing what is hidden.

  I have been working for several projects now without a table saw.  Now I have no plans to replace my table saw , if I won the lottery I might buy a dedicated track saw but I'm not even sure about that.  The saw I could not live without is the sliding mitre saw.   They do half of what a table saw will do, for half the price, but it is the half that makes life in my  small shop much easier.

  All that remains after the varnish for the paint box is a carrying handle. I need to see what is out there in hardware.

cheers ianw

Image result for the princess bride quotes
but not the sandwich kind!


Monday, April 17, 2017

You're Not Going to Believe This.....

  I have been a long time fan of Jimmy DiResta, I honestly think he can make anything. I've seen videos where he does leather work, wood work, metal work, carving and casting but I've never see anything like this.
  Jimmy DiResta posted a video of him making an aluminium handle for an axe.  I expected milling machines and lathes, not just a band saw.


  I encourage you to watch the video all the way through just to see how he cuts and shapes that piece of  aluminium.  
  
  I hope you all had a happy, Easter weekend.  Our weekend was filled with family, children and chocolate, we are blessed.

cheers ianw


Thursday, April 13, 2017

Tova's Paint Box

  I was able to return to this little project yesterday.  The dead line for finishing this small box is 5 weeks away so I have put it aside a couple of times as other things have come up.

  You can see three sides clamped into place on the box.


  The bottom of the box is plywood, but the sides are aromatic cedar.  Aromatic cedar is relatively soft nice wood to work with, most of the time.  The wood can be chippy and knots are especially hard and will deflect drill bits or saw blades if you are not vigilant however.  The fourth side chipped while I was fitting it to the box.  I was able to glue three sides in place but I had to glue the chipped board together before I could glue it in place.

  I decided on a sliding lid for this paint box and so had to cut 1/8 inch dadoes in  three sides. In table saw days I would have ripped those slots in minutes.  Without the table saw I opted for another method, that worked fine and was quieter.


  I laid out the lines for the dado and used my home made marking knife to cut the lines into the wood.  I found that I could only hold the ruler perfectly straight and still by clamping it into place. I scored each line into the cedar multiple times and then cut down the lines with my dove tail saw. This was one of those "OH" "DUH" experiences.  I'd made three marking knives while on a blacksmithing course a few year ago, and not used any of them much. If you are going to cut your material with a power saw, scoring the wood isn't really needed.   Those of you that are smarter than I am, (that's everyone right now) know that when you score a line with a marking knife the hand saw blade settles into the cut much easier and faster and your cut gets better automatically. DUH.  So I made the six cuts, easily and accurately and used a narrow chisel to clear out the little bit of wood that remained. Chisels are generally 1/4" and wider. My 1/8" inch chisel is a souvenir that I bought at a tool store in Berlin, Germany on a trip in 2010.

  How did I know when to stop cutting you ask.  I made a depth gauge by marking 3/8" on a putty knife blade and used that to check how deeply I had cut into the wood.  I could have also marked the saw plate but decided that was a habit I didn't what to start.  Thinking about it now, I could have put painters tape on the saw plate to mark the depth!!! I'll get better at these short cut and tricks the more I saw by hand.


  These are the three marking knives that I made 2012.  I brought them home, fitted handles (poorly) and sharpened them (sort of).  It is clearly time to treat these tools with the respect to which they are entitled. That will be my ongoing project. I have good saws, and now I know how to make quality cuts, duh.

cheers, ianw


Tuesday, April 11, 2017

Kreg Micro Pocket Hole Jig

  To keep things from falling off the top of the rolling glass cabinet I put a two inch board across the back edge.  

  I used a 5/8 inch board and attached it with pocket holes.  The screws act as clamps while the glue dries. 


  You can see the difference between the standard pocket hole block (3/8 inch holes) and the micro block with (19/64 or 7mm holes).  The micro jig is one of those tools that I only use a few times a year but I have found it to be worth having on hand. Kreg makes pan head screws to be used with this micro jig. I use the micro jig when working with 5/8 and 1/2 materials. 

  While I was working on this last project I was drilling holes in 3/4 inch material.  This set up is my third generation K-2000 pocket hole  jig. The K 2000 was the latest jig on the market when I started to work for KREG Company.


  Even though there are several newer models of jig I have kept the K 2000 set up. Having a dedicated 3/4 inch set up is quick and time efficient. You can see that the K 2000 has no built in chip collection which came one generation later.  If I am working on a project with many, many holes to drill I use the K-4 model with the chip collection. 

  cheers, ianw


Sunday, April 9, 2017

Working in the Garage

  On Saturday it warmed up enough to work in the garage on the rolling glass storage cabinet for the Ancaster Seniors Achievement Centre. All the the plywood came from the Box Store cut into 20 x 48 x 3/4 sections. (two 4 x 8 sheets)   Those sections fit easily into the back of our station wagon and only needed to be cut to length at home.   The unit is 20 inches deep, 43 inches wide, 42 1/2 tall. 

  I had two circular saw jigs in my shop, one designed for cross cuts up to 16 inches and the other for cutting plywood sheets in half. You get the picture, one jig too long and awkward, the other too short. The first thing to do was make another jig for cutting the 20 inch widths.  Initially I made this jig as a throw away . I the end the jig I made served my needs better than expected.  


  The jig is made out of left over plywood from the bin and I opted to leave the pieces large since I planned to take the jig apart once this job was done.  I found the large top section was a boon,


I was able to use my anvil to hold the jig in place while cross cutting, it acted like a quick clamp. Since the jig was so large the anvil, or any clamps used were not in the way while I was doing the cutting. 

    My plan now is to clean up this jig, and paint it red. (keep it, with the other jigs.)

  I cut all the wood in my shop then took it up to the garage for assembly.  I got a bit of a work out going up and down stairs with tools and wood, more than I had planned upon actually.  The light is still better in my shop and made for easier and accurate cutting. 

  I used my Makita circular saw with a Freud 7 1/4 inch 60 tooth plywood blade LU79R007. The quality of finished cut is excellent, smoother than the cut ends from the Box store panel saw in fact.


  Since this cabinet will soon hold nearly 16 cubic feet of stained glass panels I made it heavy duty. The first and second shelf are supported on the ends as well as the middle. 


  The shelf dividers are 16 inches instead of the full 20 inches but will still provide tonnes of support. There is a full back on the cabinet as well as 5 casters.  I put an extra caster in the middle so that there will be no chance of sag if the glass panels migrate from the sides and place all the weight in the middle. I don't know how much rolling this cabinet will do but I glued, screwed and braced everything so there is less chance of twist or racking as it it rolled around the studio.  There are nearly $200.00 worth of materials in the unit and I used sheeting grade plywood to keep costs down.

  In this build there were few times I  missed  my table saw.  My shop set up wouldn't have enabled me to cross cut the plywood on the table saw anyway.   A couple of little rip cuts  would have gone quicker on a table saw but I am pleased with the accuracy possible with well made jigs and a circular saw mounting a quality blade.

  All that is left is sanding and delivery.

cheers, ianw


Thursday, April 6, 2017

What do you do, on a rainy afternoon?

  I have a pile of pre-cut 3/4 inch plywood sitting in the garage waiting to be turned into a rolling cabinet for the craft room at the Ancaster Seniors Achievement Centre. The wood will have to wait a bit, it is currently 5 degrees C, windy and raining.  I just don't feel like working in an unheated garage; with the door closed it is too dark, with the door open, too cold. And the cabinet has to be made in the garage because it will be too big to bring out of the basement. (I made that mistake once. I had to take the thing apart to get it through the door at the top of the stairs. It's not like building a sail boat in the basement, that is worth knocking down a wall)

  So....I have be puttering away in my basement shop where it is a good working temperature.  If you have grand children there seems to always be some small thing that needs to be done. One of the ways I filled my time yesterday was making handles for a skipping rope. 


  I started with two 1 inch square pieces of poplar.  I began the drilling process on my drill press and finished with a long bit in my hand brace.  The drill press creates a deep enough pilot hole that keeping the alignment while drilling by hand is easy. I don't use my brace and bit often, but it is a  easy/cheap way to drill long holes.  If you are young and don't know what I'm talking about here is a video, "How to Use a Brace and Bit".

 One handle is sitting on my latest jig. It wasn't worth setting up the lathe and I didn't have any dowel large enough handy so I used my block plane to round off the poplar pieces.  The challenge of holding onto smaller pieces of wood while planing  is eased with the small jig. Unlike a bench hook this jig keeps the wood piece from rolling sideways while it is being planed.  I made this jig because I have struggled in the past trying to clamp small pieces .  I will be able to use this jig while carving too.

  I broke out my hole saw set again for a Grand Daughter project.


  And remember, don't throw the cut outs away.  You never know when you will need some large wood wooden wheels for a kids project. I cut six holes and one was chipped and nasty, the rest can be used again.


  Using the same idea as my small parts bit, ( Jan 5th, 2017) but with sealing containers I am making a portable paint box for my Grand Daughter in Sweden. She can't read yet so the surprise won't be spoiled by showing the work in progress on the net. Unlike my shop use bins this project will be made with nice wood and decent hardware. 

  cheers, IanW

Related image
When she gets bigger I'll make
 her something like this.


Tuesday, April 4, 2017

Sharing Two Videos

  I bumped into a You Tube site recently and thought that I would share a couple of the videos with you today.  I have taken a couple of days off from the shop again.  My back doesn't let me work actively for very many days in a row.  Last week I was building a fairly large and awkward storage unit and so needed a couple of days with no lifting or twisting.

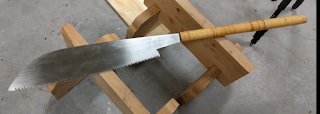
  The first video shows a Japanese style saw I've not heard of before in use.


  That looks like a very good one person saw for heavy work. 

  The second video is making small saw horses.


  When I first started wood working I had a few tools and worked in my parent's car port or patio. My next project is going to be too heavy to carry up stairs so I am going to be working in our garage.  The circle of saw dust goes around and around.  It is wonderful to have a shop, and tonnes of tools, it isn't absolutely necessary if you have desire and a flexible back.
  
cheers, ianw