Tuesday, March 29, 2011

When you Need Help, Get it.

   Last week I spent some time making a box joint jig.  If you read the body of the related entry you may remember that I had a problem with my Triton Router.  The solution at the time was to put the old standby Porter Cable 619 back into the table and carry on.
  
    On Saturday I went to use the large router table and encountered the same problem with my other Triton Router.  The Triton 2 1/4 horse router is an excellent tool.  I have used mine free hand and with the edge guide several times and never had a problem changing bits.
 
   Once I put the router onto the table it was connected to:
An add on switch because I hate fumbling around under table to turn the router on and off. (especially off).  This is an attempt at making my work situation safer.

off


on
   With the Triton router there is another safety feature, a good safety feature, but not one with which I was familiar.
  
   When the router is turned on the sliding switch cover is held open by the toggle switch, which also engages a lock which does not allow the router to go beyond  the bottom of the rails, where it needs to go for the bits to be changed. 
   
    When I was using the router free hand I turned in on and off with its own switch, on the table I was using the other switch and so the router thought I was on, even there was no electricity getting to it.  Since the switch was ON, it was protecting me from shredding  my fingers by trying to remove the bit.

      In the manual it probably talks about this feature, my routers are factory refurbs and so I have everything but the manuals. (refurbs can be a great deal)
    
     After pondering this problem, and recognizing that I was the problem not the routers as they were both doing the same thing.  I called for help.  I called Mark Eaton, the router guru, who I know uses this model of router all the time and explained my trouble.
    
   Needless to say, as with all great guru's, once I clearly explained to problem.  He solved it, over the phone.
 
   WHEN IN DOUBT, CALL FOR HELP.  I was on the verge of taking the router to pieces in the belief that something was in the guide rails that was blocking the router from sliding properly.  Had I not called Mark, I expect that I would have have a box full of router parts and still no solution to the problem.


Monday, March 28, 2011

It must be Monday

  Each Monday woodgears.ca releases another in its very good  series of videos showing shop gadgets.
 
  This week's gadget is a router pantograph, and it is super cool.  Matthias's skills as an engineer and wood worker are impressive.  A tool like the pantograph is idea for duplicating existing projects. 


  You have got to check this out.

Saturday, March 26, 2011

Cutting Boards


detail of the board

    A couple of posts ago I said that I liked to build to a purpose.  That means that I like to make things that people find useful.  Cutting boards are useful and so much nicer than plastic or bamboo for China.


  Making a cutting board is not terribly challenging but oddly they can be satisfying.  Let me explain why I find gluing three or four pieces of wood together, sanding them smooth and waxing the final product so satisfying: 

  First; is is time in the wood shop, anytime in the shop is Good time.
 
 Second; it is wood, often really nice hardwood with an interesting grain.  Wood is lovely stuff  with which to work.  It feels nice to the touch and smells good.
 
 Third; making a cutting board is a chance to try new router bits, or clamping techniques or practise with card scrappers or hand planes.

  Fourth; when it is done it is before your eyes in the kitchens of your family and friends reminding you of how good your life really is.
 
   Today's cutting boards were on a shelf waiting for my attention so today, as the spring sun shine streamed into my work space I scrapped and sanded and fussed away until I had two very nice little projects.

  Over the course of finishing them I used a new router bit, (a 15 degree camfer bit, it is OK. I think it would be better on thinner stock). I used my old Stanley hand plane with the replaced blade as suggested by Rob Cosman, wow it works great.  Finally I got organized and made a box to go on the bottom deck of my router table so that everything is easier to access. ( My plan now is to make a custom cabinet for the router table)
elm and oak and maple
oat and roasted ash


Thursday, March 24, 2011

Photos that Follow

The Box Joint Jig Story in Photos
The first part of the task was making the Jig.  It is 1/2 Baltic birch and about 30 inches long.  It is long enough that it reaches the full length of my small router table with lots of room for clamps.

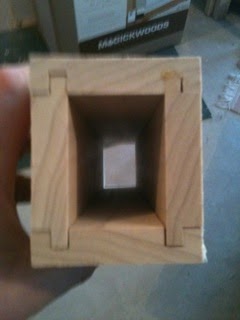
This is the first box that I made. It took a few tries to get the fit correct but once learned it is going to be quick and easy. As a note, the box is poplar finished with Orange Shellac, two coats.

Just for perspective.


This is the other type of joint that I wanted to do.  As you can see this one is not perfect. I need to refine this joint because I want to make some bird houses and use no fasteners, so there will be no rust showing on the outside after a season or two. 


Wednesday, March 23, 2011

Wednesday In The Shop

   I am writing this entry this evening, and tomorrow after the shellac, and Hand Rubbed Poly dry, you can see the result of a long days learning.  Now you just read about it.

   The morning began with me filled with ambition.  Mark Eaton the router guru is a friend and collegue of mind from my KREG tool days.  Everytime I see Mark at a woodshow he inspires me to get the dust off  my router table and do something other than round overs with it.  Usually the inspiration passes and life quietly goes on.  This time, I WAS INSPIRED.

   So...this morning I went to my shop to make a Box Joint Jig for my small router table.  I have a piece of 1/4 inch high density plastic suitable for making jigs and a piece of 1/2 baltic birch ply that both of which  I bought for this purpose. ( some time ago).

  The first part of the task was to put my Triton 2 1/2 hp router into the large router table and put my little old PC router into the small router table.  The Triton router has some sort of problem.  It will not go all the way down on the guide rods and so I can't change the router bit once it is in the table.  Of this I was not aware until I had mounted the router.  To add to the days fun, I couldn't find the 1/4 collet for the PC router.  Naturally I realized none of these things  until I have drilled screwed fitted etc. etc. etc.

   The next step was to put my other Triton Router into the large table, after taking out the spring.  I tried to fit any of my other old 1/4 collet routers into the small table.  NO LUCK.  The router plate is already holey and I didn't want to drill more holes, nor did I want to stray out into the blizzard to buy bolts had I have drilled the holes.( I would have had to walk today, my wife was off with the car)  {the weather was so appalling crappy I wouldn't have wanted to go out in the car anyway}

   Finally after some more searching I was able to find the 1/4 collet for the Porter Cable router and get it mounted on the small router table. (sort of )  (that will have to be revisited soon)  I also mounted a switch onto the small table because the on/off switch on the Porter Cable router is a true pain to reach, it also moves as the body of the router turns in raising and lowering the bit. Personally, I don't think it is safe to go fumbling around looking for the on/off switch.
    
  The large table is a project for another time.

   With the 1/4 inch router bit on the small router table I cut a groove in the Baltic birch ply, then I drilled a hole for the bit to peak through.  Cutting the platic was a bit of a trick, I sandwiched it between two pieces of wood and ripped the sandwich to size.  I kept the meat and threw out the bread.

    I glued the beast together and retired to lunchen. ( that was four hours of fussing, searching and tinting the air bluish)

   After lunch I went to work to learn how to use the Box Joint Jig.  I am a simple man I guess, I think it is cool. 

  Photos to follow tomorrow.

Sunday, March 20, 2011

I like to build to a purpose.

     Some people like to hang out in the workshop and make stuff, just for the fun of it.  Mostly then those projects sit around on a shelf and ultimately get given away to someone that shows even the slightest interest in the thing.

   But for me the greatest satisfaction comes from making something that is sure to be used.   Making a flower box that fits exactly on the window sill, makes me feel good, even though it is easier than a fancy box with interesting finish to make.  Case in point, the Red Elm box I made a couple weeks ago is sitting on a shelf with no one to love it and no one to use it.  I expect it will live out its days in my shop filled with stray nails and screws.

   My wife has been redecorating our Powder Room and decided that we needed a small shelf unit to fit a very particular space.  Even Ikea in all its might did not have what was needed. So, I got to build to her design.

  Initially it looked like this, made mostly from poplar and left over sheet stock.

sitting on the bench in my shop


I confess it looked pretty funny to me.

Next stage was finishing, everything looks better with some effort on the finish.  It is now dark, aniline dyes to the rescue

Once the shelf got into the space for which it was designed it looks pretty good.  The larger panel on the left hides the plumbing from view and the open space below the shelves will shortly be filled with a purpose built step stool for little people.
Last stage:


Tuesday, March 15, 2011

Two of My Favourite Things - Kieran and Woodworking Projects.

   The Marble Tree in the video is a project that I have made several times and even sold commercially.  I began by repairing a tree with broken leaves for a store and then copying the various angles to make my own to sell to the store since they could not get the toy any longer.   As I made the tree I learned to my despair  that the angles must be observed or the balls roll too fast and come off the tree instead of circling around it. 
   It is good also to be reminded that our best efforts are never more important than a familiar blanket and a good drink. 
   This should also prove beyond a doubt that this is not a slick professional presentation.  Just a guy that likes wood, making things  and talking about it.

cheers,
Footnote: the off camera arm is Oma to my Opa.

Monday, March 14, 2011

Wooden Homemade Clamps

Check out woodgears.ca This week he has made some clamps, mostly it is what I have thought to do in the past but....he has a great trick for putting the pad on the end of the threaded stock.

woodgears.ca

Sunday, March 13, 2011

Wood Working for Mere Mortals.

Fibonacci Gauge

A couple of months ago I made this gauge and sent the photo to woodworkingformeremortals.com a blogger from California. Click on the link to see his video of how to make the gauge and why?

Saturday, March 12, 2011

The Last Glue

as seen at the Kitchener-Waterloo Wood Working show at
Bingeman  Park.
  This is an unsolicited review of a great product. I purchased a small container of this glue last year at the Kitchener Wood Show and have used it extensively. I works very well. I have used it to glue rare earth magnets to both,  metal tools,  and to wood when making jigs.  Over the course of the year I have also used it to fix shoes and slippers quickly and easily. If a little glue is directed to flow gently under a chipped corner on a wood working project the resulting repair is strong, machinable and invisible,  or darn close.

  The big sign does exaggerate, the included instructions are more forthright, it doesn't glue polyethylene or  polypropylene and likes non-porous surfaces best.
 
    I purchased the product  because it appeared to work and wasn't supposed to dry and harden in the bottle so one bottle can be used many many times vs. other "super glue" style glues were the entire tube hardens after the tube has been opened for a couple of weeks. 
  
    The result after the year.  I bought some more.

Wednesday, March 9, 2011

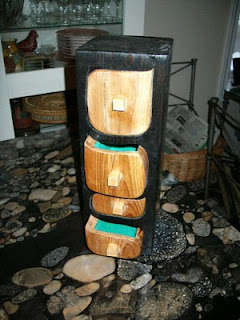
Band Saw Boxes

This little box was one of my first efforts at making a bandsaw box. Also an early effort at flocking.  Steve at
woodworkingformeremortals.com  inspired me when he made a short "how to" video and then sent us off to a couple of other really good sites to see results and methods.
http://www.woodworkingformeremortals.com/2010/05/how-to-make-bandsaw-boxes.html

The box was made from a left over 4x4 and so lacking in real character. Since it was a prototype I also jumped in and tried to flock the inside. The box was more successful than the flocking.  I think I need to use painters tape to control the glue edges. Live and learn.  This poor little box was a further test bed for aniline dyes. I kind of like the orange, it does bring out the grain.  For all its courage in the face so many new things it just sits on my dresser and smells nice. (I love aromatic cedar)

This was also an early effort. Again a glue up of lumber from the cut off bin.  I like everything about this box but the design. Doesn't it look top heavy to you??
http://www.sawmillcreek.org/showthread.php?81703-Simple-Bandsaw-Box-Making-101&referrerid=5960
Is another link to a really good step by step method for making a box.

Now that my shop is showing signs of being usable again I want to get back and try this with better materials.  Something is cedar would be nice.

I'll keep you posted.

Monday, March 7, 2011

Inspiring or Intimidating ?!? You decide

Wood that Works, is a web site featuring kinetic wood sculpture. Kinetic sculpture is art that moves. A wood gear clock is one form  of kinetic sculpture.
Check this stuff out and then decide whether you are inspired to greater challenges or intimidated right out of the shop.

Sunday, March 6, 2011

New Profile Photo and Shop Space Questions

  My new profile photo is about 24 months old.  That is me, in my workshop with the crib I built for my Grandson.  It was the biggest job I had ever done.  I started with rough Poplar and re-sawed, planed and jointed every board.  I learned so many thing on that job that I have used since.  Should the need ever arise I could make a better crib, in half the time.


  The need is not likely to arise, short of a fire, since that crib will last many generations.  I hope that it out lasts me by many years.

    What brought the photo to mind is that last couple of very hard days have been spent working in our basement.  I built a lumber rack, a serious, large scale, bad ass lumber rack in the shop and then spent a long time trying to get the living space in the basement, well.... livable.  The photo shows that the shop didn't even have walls when I was building the crib.  Now there are walls, but too much junk.  I have to figure out how to get the space workable again.  Having cleaned up the other part of the basement, the shop is now piled high with boxes and no room to work.


    Is this ebb and flow of usable, vs. chaotic space typical of a workshop?  How often do you have to take your shop apart and reassemble it?  Storage and floor tools are making my space too crowded to work. How do more experienced shop people deal with this situation?
   
  I am dying to know.
cheers, ian

Wednesday, March 2, 2011

Finished Knitting Needle Box


    This is the box I was asked to make as a gift for a knitter who has everything.  I built the box from Elm and stained it with walnut aniline dye suspended in wood alcohol.  Typically the stain is mixed with water, but I didn't like the way it raised the grain so I tried alcohol. The stain sets slightly darker than in water and very, very fast.  Since the stain sets quickly it is a fast finish, also not too bad to touch up.  Given the speed that the stain sets and how deeply it soaks in I may but a sealer coat on the wood next time. 

   On top of the stain I put "wipe on poly", another  time I will try my typical shellac finish but a paid project with a dead line is not the time to experiment.  I was afraid that more alcohol would lift the stain and I would get blotches everywhere.
I have got so I really like the aniline dyes for staining, they are quick and don't smell at all.  For years I used Watco Danish Oil and liked the results but it takes 12 hours at least to dry and nearly always takes two coats. Maybe if I were better organized or had a clean place for things to dry it would be ok.