Showing posts with label scrub plane. Show all posts

Tuesday, December 8, 2020

Christmas Gifts


 This is some of the typical seasonal stuff that I make in my shop.  Many people I know like wood grain and slightly rustic decor items.  The only special tool that you need for this sort of thing is a Forstner bit of the correct size.  It is nice to have a drill press too when drilling those big holes.  I buy my candles at the $ Store and drill the holes to fit.


  A quick project for our basement bathroom.  I used scraps and left overs to make the bathroom tissue holder. I doubt that there are many bathrooms with elm paper holders. Glue and dowels,  so when the floor is flooded by a grand kid nothing will rust.


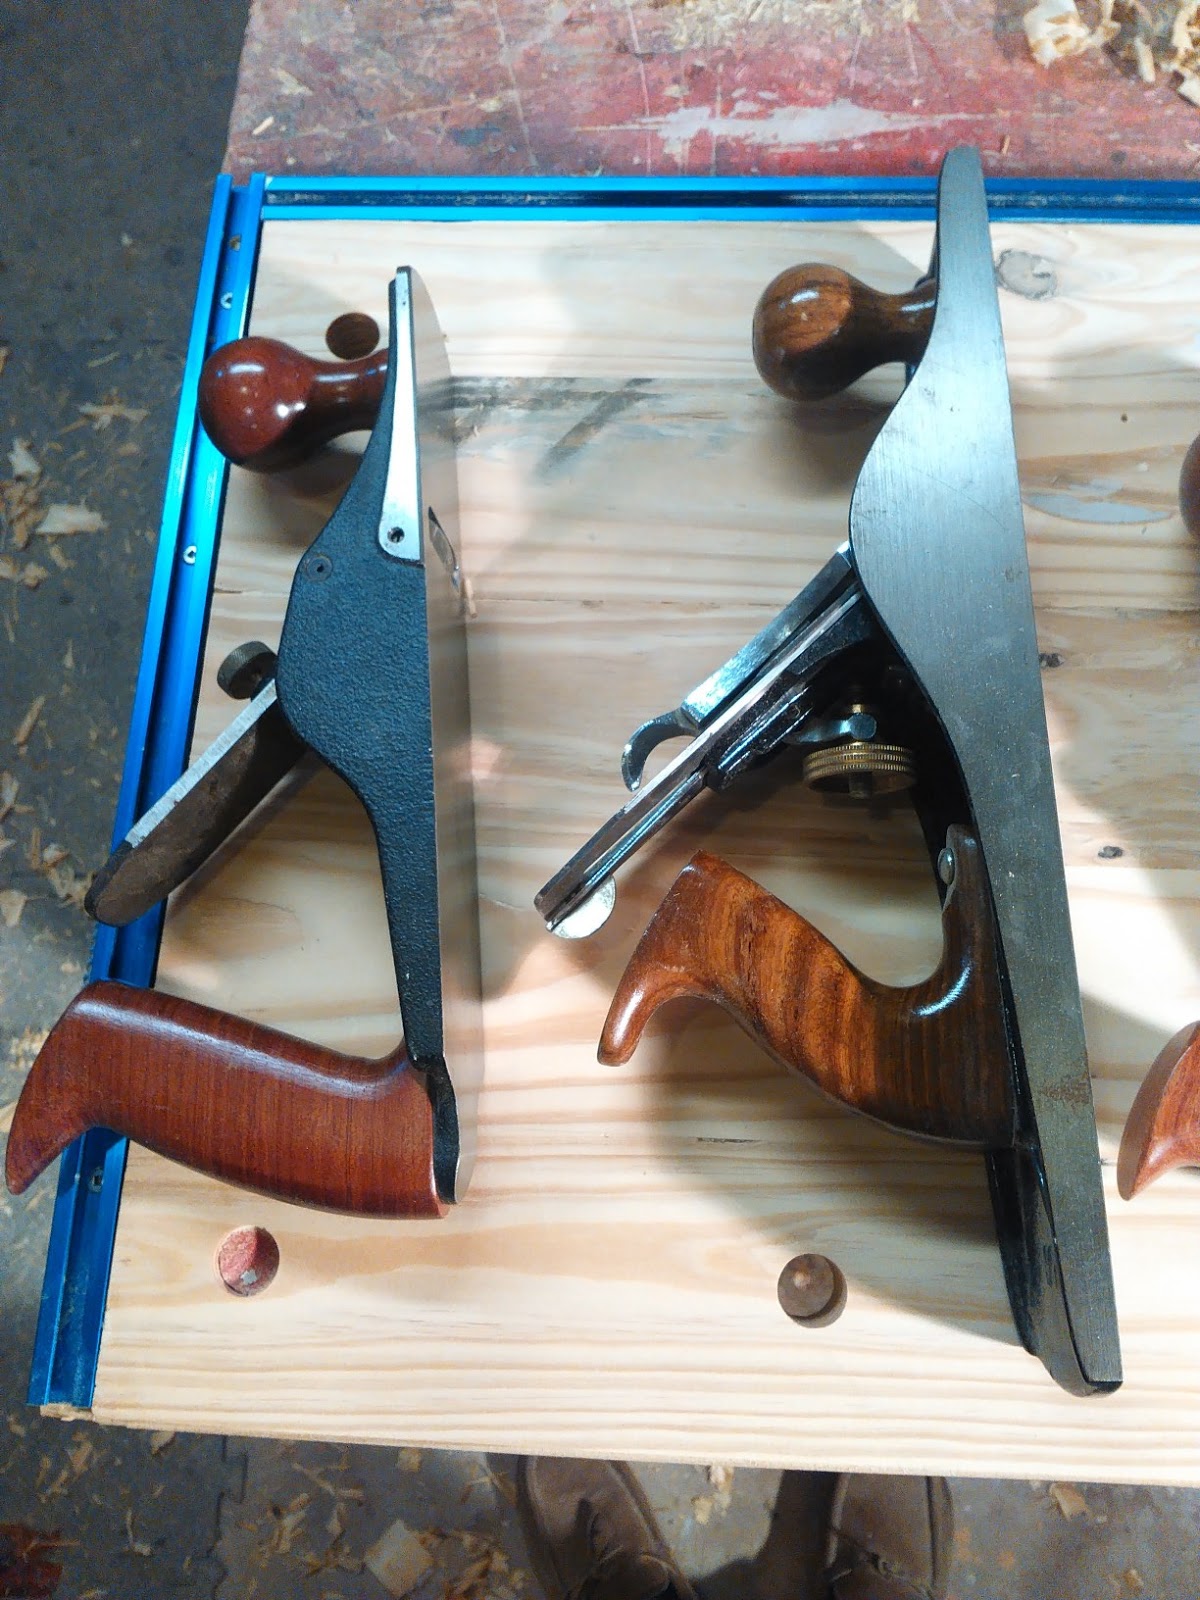
  The joy of doing a project like the paper holder was working the wood with my planes.  I have a scrub plane, a plane I recommend for all shops and two smoothing planes.  The plane at the bottom of the picture is a A 33 Stanley,  copy by Anant from India.  I have been happy with my Anant planes for the price, very happy. The top plane in the photo is my low angle smoother from Veritas.  It was a Christmas gift a couple of years ago.  Properly set up and sharpened those planes are wonderful to use.

  I am still working on the wheel barrow.  Once I got the handles glued and shaped I discovered I was not going to be able to undue most of the nuts and bolts without serious violence.  Also I was pretty sure that I would need to do more metal work than I like or have the proper tools for.  It is always good to have a plan "B".

  Tomorrow sees more of plan"B" in action.

  IMO this is a great year for personal, homemade gifts.  We all need some extra encouragement this year.

cheers, ianw


Thursday, June 13, 2019

A barrel making video and a Hand Plan Project


   As I was relaxing last evening this video came up in mail box.  I think barrels are one of the most beautiful and useful wooden vessels.  I've seen them being made by hand in Colonial Williamsburg and seen various demonstrations at wineries and distilleries. There are many videos showing the special skills, tools and machines that make oak barrels and 'We Know Barrels' is long enough for one relaxed coffee.

  The part of the blog relating to my actual wood working is all about hand planing.  A while ago I made a bench top work table  (June 2016)  actually.  I used the portable top for rough work, carving and some clamping tasks.  It was only good for rough clamping as it was left rough and not very flat, until now.

 I decided I wanted this portable clamping top for more small assembly work and so I needed to get serious and flatten its surface.

work top with winding stick 
The final result is smooth with the  T-track mounted flush on two sides. With six 3/4 inch dog holes I'm able to cover all the angles when clamping on it or clamping it to my large work top.

  Initially the top of these boards was so rough I thought about using my belt sander but didn't want to deal with the noise or the dust so I opted to use my Veritas Scrub plane to knock down the really high spots. This panel is made from 2 x 4 soft wood and the scrub plane drove through it without any problems, it even flattens knots. I flatten both sides, but didn't bother smoothing the underside, flat was enough.

  Next  plane I used to flatten the top was my Anant Jack Plane.  I was for a time the Canadian Importer of Anant planes.  I found their planes to be good value and adequate for most carpenter's needs.  For my purpose the plane worked fine.  The blade is okay but would have to be upgraded if I used this plane by the hour.


  Both the scrub and jack planes are narrow.  The scrub plane is a modern design and the jack plane is a copy of an old Stanley model 5 but with a narrower blade.  


   Beside the Jack plane is my favourite plane, my low angle smoother. My Mom gave it to me for Christmas a few years ago and it is my 'go to' plane for anything requiring fine finish work. 

  The rabbets had been cut first on the table saw but now needed to be levelled and smoothed out.  For that I used my 1/2 inch  Varitas shoulder plane and my old flea market Stanley 192.


  The 1/2 inch shoulder plane is a must for a small shop. It is quicker and easier than setting up a router table for one of a kind operations or cleaning up a channel or shoulder.    The Stanley cost $10.00 at a flea market in Mennonite country, it had been broken and welded back together.  I checked it out carefully and measured to see that it was repaired square and decided to risk ten bucks.  It was money well spent.  Using those two planes I grooved and smoothed the shoulders for the T-track.

  End end result is awaiting a coat of wood sealer and I will be using it shortly. I have a couple of small boxes to make and the portable work top will give me a good surface to work on and let me move the whole project out of the way if I want to do something else.

Three very useful planes for a shop.

  The Stanley 192


and its little friend 

the 1/2 inch should plane.


cheers, ianw


Friday, February 13, 2015

Plane Work

 I have a couple of hand planes that I use regularly in my shop.

  I am not a hardcore hand tool woodworker but I recognize when a hand tool is the best tool for the job.  I recently had to flatten a wide cutting board for our kitchen.


  The photo on the left shows the cutting board after I used my scrub plane on it.  A scrub plane will remove plenty of material is a short time, and the cuts are smooth enough that you sometimes see this pattern on undersides and backs of older furniture. For a cutting board that is not smooth enough. Stage two is the jack plane or another smaller smoothing plane.  Since I am not accomplished enough to fully exploit a hand plane finish I usually end the process with 220 sand paper on a sander, random orbital or finishing

  Another project upon which I am working is a bench.  Years ago I bought a church pew from a junk yard, the bench is ash, I think, and comes complete with petrified chewing gum stuck to the underside. The bench is for the one side of our dinning room table. On large family occasions we are running out of chairs for guests and this bench will accommodate several children at the dinner table.

  The first job is to flatten some sections on the bottom of the pew to enable me to attach rails and legs.  This old pew's bottom has developed a bit of an arch, but it isn't necessary to flatten the whole thing, just the contact sections.


  I knocked off the biggest part of the bump with the scrub plane and then used to Jack plane to finished the flattening process.

  The top side of the pew is a different story, and needs different tools.


   You can see the random orbital sanding, with 60 grit paper attached to my shop vacuum. Since the top of the bench has some contour I decided to sand instead of scrape.  The old vanish came off in sticky little balls and revelled a pretty nice grain and one huge scratch. 

  The scratch is deep and will require filling but once the bench is sanded to 220 grit and finished with 3 or 4 coats of shellac it is going to look good.

  I'll keep you posted.

cheers, ian