Wednesday, May 30, 2018

Two Projects for My Mom, a few years apart.

  Since I am old I lived and wood worked before Ikea eliminated the need to make your own book shelves. So.. when I was a high school student in the 1970's I went with my Mother to Beaver Lumber (long extinct) bought some particle board pre-cut shelves and a couple of 2x6 boards and made a book shelf for our rec room. This book shelf still lives in my Mother's basement and looks as good as it ever did, I think.


  I knew that the shelves had NO strength and so each shelf is supported in at least three places, after all these  years the shelves are as straight and true as they were the day I put this together in the drive way of my house. You can't see but across the back is a half sheet of 1/4 construction plywood providing stability against racking.

  To make this a piece of furniture sort of, suitable for a basement recreation room anyway I even glued trim to the edge of the shelves.


    This is why I like wood. Jeez, this is over forty years old.  And appears to have aged better than its maker.
   I was visiting my Mother today bumming dinner and I brought her a gift from my shop.


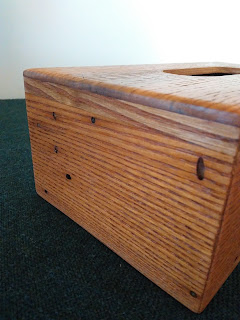
  The last time Mom visited she saw the tissue box I make for us said she liked it.  You should only tell a wood worker you like something if you have a place to put one in your home. This is a cool little box with mitred corners.  I knocked it off with my sliding mitre saw, care in measurement means good corners.  The wood is from a very old chest of drawers that I took apart at the beginning of March. 


  The wood is cool, it is filled with worm holes. 


  Some people would think the holes were creepy.  I think they give the very ordinary box some real character.

 I am not going to do project pictures, because good project videos have already been done by excellent wood workers who are also good video producers. 


Izzy Swan is one of my wood working heroes.  I love his mechanical projects. 

  I hope my American and British friends had a good long weekend and everyone has lots of projects planned for their summer.

cheers, ianw


Thursday, May 24, 2018

Sanding By Hand

   Lets face it sanding can make or break a project.  Time and effort spent sanding makes for a smoother  finish and projects pleasant to the touch. Lets also face it, we woodworkers like our power sanders and hate hand sanding.  We hate hand sanding so much that we will add the expense of  hand planes to our investment in power sanders in the hope that it will  be saved from hand sanding.

  I consider myself an experienced, though not expert woodworker and I display all of the above characteristics. I have several orbital sanders, a couple of finishing sanders, two belt sanders and a power planer.  Plus a few hand planes, some of which are very fine tools. These tools have been acquired over many years, I love them and they've all seen heavy use at one time or another. 

  A few years ago I began wood carving, initially small things for Grand Children, then relief carving larger pieces. It is nearly impossible to sand carvings with power tools so I have gathered together a small collection of special hand sanding aids.


  These are hand sanders that use 3/8 inch wide sanding belts.  The sander body is spring loaded to maintain  tension on the sanding belt.  I have belts in 60, 120 and 180 grit. I bought them at a wood show booth featuring carving tools.  I have had these sanders for several years and use them often.

  When sanding a carving smooth there are many shapes and details.


  I wrap various grades of sand paper around these contours and have been able to sand nearly any shape  I can carve.  I have no idea where these rubber shapes came from.  I bought the set somewhere, sometime ago for I suppose a good price.  Beyond those few details I can't tell you anymore about them.  I use them frequently when finishing small projects and carvings.

  The next three sanding blocks are shop made:

Hook and loop fastener holding 5in. sanding disc.  I made this years ago.

Sanding block with inner tube covered face, made recently. The inner tube glues onto the wood
easily with Contact Cement.

And yes, a chalk board eraser with sand paper glued to the back
and used wrapped in sand paper for softening edges and convex edges.

  I know we hate hand sanding but I have a theory as to why.  Once I began hand sanding starting with 60 grit  and sometimes 40 grit paper the whole process moved forward more efficiently and quickly.  With a power sander we are tempted to begin at  120 grit, lean hard and tolerate the noise. If you begin with 120 grit when hand sanding it doesn't remove enough material fast enough and your arm falls off as your heart breaks. 

   Recently my solution is to load up an interesting Pod Cast and listen while sanding.  It is almost a zen like experience and amazing what  can be accomplished while listening to a scholar expostulate on the reasons for the fall of the Roman Empire or the cause of WWII.  My observation is that time, patience and the application of increasing finer grits of paper lead to a superior finish. ( and scholars love to argue amongst themselves about points of history that can't ever be proven).

  A personal observation regarding sand paper products.  Cheap sand paper is not good value...unless....you have to sand something that is oily, greasy  or covered in glue.  All sand paper  loads up quickly and becomes useless in those circumstances regardless of quality.  If you are trying to refinish a project that has an old style oil finish or has lived a hard life it may use up extra paper.   In that situation you may want to begin with card scrappers. Now that is another blog.

cheers, ianw


Saturday, May 19, 2018

Cleaning Up a Small Mess

 The mess, the problem.  That window sill had become a hopeless mess and I couldn't  open the window any longer.


   For several years loose dowels have collected on the window sill in my shop.  Initially it wasn't a big deal and I could still open the window to let in fresh air and/or let out smelly chemical air.  As often happens, a short term stop gap measure becomes standard operating procedure, but eventually  the system breaks down. Not only that, it looked like crap.

  After a bit of planning, measuring, and drawing a plan I gathered together various bits of wood.   This project was not made from the scrap cut off bin, but very nearly.


  I decided to make a three section storage bin from skid wood and some plywood.  The bin is 24 inches, 12 inches, 6 inches tall, 12 inches wide and 6 inches deep.  I made the bin so that it would still sit on the window sill.  


    I find that every time I buy dowel I have a bit left over, that I can't bear to throw away.   The plastic bin on the left contains bits of copper pipe, brass, and other none wood items.  Now this is a useful and organized space, the window can be opened with ease and while I was at it I even  washed the glass.  

   You can see on the right one of four bins containing pieces of wood too large to throw out, but too small to be useful.  I am working on over coming my 'wood' addiction, but it is tough.  I never look at a little piece of wood that I don't think it could one day use it for something.  Ultimately the wood will end up in a fire pit, I just need to accept that reality and get rid of the bits, I might discover that my shop is really quite large and comfortable.  That will be embarrassing....

  cheers, ianw


Monday, May 14, 2018

Carved Rail

  Yesterday I had help to get the refinished table out of the shop and into the dining room

  The table doesn't look fabulous but it is fine as the second table. Interestingly the table sits between my version of the Tripp-Trapp chair and the grand daughter clock upon which I have yet to repair. 


  The first section of the chair rail is complete and installed.  The rail is almost invisible, unless you focus on it purposely which is the plan.

  The next part of this project is.... seven feet long.


    The real challenge with this job is maintaining interest.  I have a timer that I set when I begin carving since it is a sitting down task. I try to only carve for an hour at a time to keep my back pain at a minimum.  This morning I carved for an hour...I think there is 10 or 12 hours of carving ahead of me plus the time for sanding and painting.  I am thinking this is a three week project at my work pace. 


   There are very few tools needed to do this large relief carving. I begin by laying down relief cuts with my straight knife. Second I use a narrow gouge to cut away material near the relief lines and then I move to wider and more shallow gouges to get a smoother and finer finish.  The more careful my carving, the less time will be spent sanding.

  cheers, ianw


Friday, May 11, 2018

I do finish my projects


  There, the small organizational bin I made from an orange crate is complete, painted and filled with my wife's stuff.  A project like this is a great starter project for kids.  If you like folk art this would also be a good item to paint, more useful and cheaper than buying items from China at the craft store.  Actually I chose the light green paint just in case a grand daughter wanted to paint flowers for her Oma.

   I am a wood junkie, but I am also a bibliophile. ( an a bit over board as a collector of knives too).  Anyway I have shelves of history, art and wood working books.  


  This book fits into all three categories.  Tools - Rare and Ingenious, is a wonderful coffee table book.  Even people that are not interested in tools  will love to flip through the pages of this book.  Maybe you can give it as a Mother's Day gift? 

   There are hundreds of glossy photos showing the art of the tool making as well as their cleverness .


  What a great dual purpose saw.

  Finally spring has sprung here in the north.  We spent the morning working in the yard and now I am going to spend the afternoon letting my feeble old back recover. 

  Thanks to Clive for the loan of the wonderful book.  I will return it....soon...

  cheers, ianw


Wednesday, May 9, 2018

It's been a while

  It has been a while since I blogged last, that doesn't mean I've not been busy. I am one coat of varnish away from having the table finished. My plan is to have it up stairs and out of my way tomorrow.

  On the weekend my Grandson and I found a video on You tube and made a wooden whistle. Now that we have a method, next time,  production: we'll make whistles for all his friends. His school teacher will love us.

  Having the table is the way has limited my ambitions so what have I done.  I sanded to 600 grit and then carved a trivet.

   It is a small space, no noise basic tool thing to do while hanging out in the workshop.  Everyone needs trivets and hot pads. This trivet is exactly the right size for a French Press coffee pot. 
Image result for french press

Or a really big coffee mug.

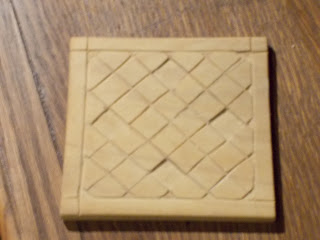
  Another thing I did while sitting around one evening is finish sanding and shaping an olive/pickle tray from oak.  I laid this out years ago while I was developing my skills with my Dremel tool. While I was sitting around waiting for the varnish to dry i decided to finish shaping and sanding.

  I cut the basic shape on the band saw and then gouged out the inside with the Dremel.  One evening last week I sat quietly listening to music and hand sanded the tray smooth.  Since the tray is curved I split a cork in half and glued it on for feet. The tray has a nice shape and is stable in use.

  For portions of the last two days I have been working on two low skill, high back stress projects,  wood chips. And the sump pump water evacuation system has taken the other portion of my digging energy. (it should be finished tomorrow). Chips, not finished tomorrow.


  This is the remaining half of yesterday's dump of wood chips. Dump because the chips arrived a dump truck full. Eva and I moved some yesterday and I moved some more today.  I have learned my limit when doing this sort of task, but it still kicks the you-know-what out of my back.

  Tool for the job:


  Last time we did this I went and bought the specialized tool for the job.  That manure fork is the perfect tool for loading and moving wood chips around.  It is another of those specialty tools that get used seldom, but....make life way easier.  We tried moving wood chips with snow shovels before, Okay, but the fork is better.

  Today's quick project is a glue up.


  Sherlock Holmes couldn't guess what this is. By the way, the pipe clamps have been in my tool kit for thirty years.  I love good basic tools that last.


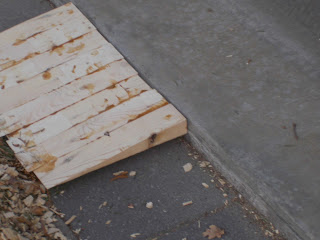
  Our drive way is interlocking stones, and the folks that did the work did a good job and the drive way still looks good.  However it has sunk a bit along the front of the garage. If you look in the 'chip' picture you can see a maxi-scooter. I've put the ramp in place to make it easier for me to push the scooter backwards into the garage. Just a little thing, but little things can make a big difference. 


Tuesday, May 1, 2018

Moving Forward on the Table

On April 18th I posted a picture of our spare table sitting in the middle of the floor of my shop. 


  I had begun by cleaning and staining the legs of the gate leg table.  I began on the bottom because it will be generally hidden, so I could do some experimenting with sanding and finish.  After a bit of work it was clear that the table was solid and would be worth the work to polish it up a bit.

  Moving onto the top meant dealing with some more visible issues. The veneer was thin but glued to a thicker sheet of plywood, then glued to a solid wood core.  In a several places the veneer was chipped,  and every where it is brittle.


  On the middle section I had to cut a entire one inch strip off one side, there were too many and too large chips to be repaired individually.  I trimmed the edge  back and glued in a strip of oak veneer, I hope to make the patch less visible at the finishing stage.  You can see that there is no way to glue the patch in the middle. No problem I have four 8 pound lead weights I got from my brother. He needed them in his scuba diving days.  If he takes up diving again he can have them back. For my purposes the  weights hold the veneer strip down perfectly.


  Once the table top is completely sanded the patch is already less obvious.  The table also needs to be extended by four inches to have it match our regular table exactly.  To make it four inches wider  I added a piece of oak board to one of the wings, using pocket holes and screws. You can see the addition next time.

  While I am working on this table I am also finishing the organization box and had to fix my shop stool.  I've laid out the second piece of chair rail, it is seven feet long, that is lots of relief carving and made a few wooden beer coasters.  I can't stay sitting. standing or bent over in a single position very long and so I need to have to have a variety of projects on the go using different tools and postures in the shop.  

  Having various projects on the go at one time can lead to a bit of chaos in the shop.  Every now and then I have to stop everything and make a focused effort at clearing things up.  I've collected some card board boxes and shortly there will be a cleaning binge where off cuts are hauled away to fire pits. 

  As I putter away at things in my shop I often listen to pod casts or admire other wood workers on the net.  If you want to have your back ache and your soul filled with admiration check out - Massive cross cut saw.  Or maybe I'd find someone local with a portable saw mill.....?

cheers, ianw