Showing posts with label relief carving. Show all posts

Wednesday, October 12, 2022

Catching Up - the news that is fit to type.

  There has been a small interruption in the flow of blogs for no other reason than there were other things to do.  While Thanksgiving is not the huge holiday for Canada that it seems to be in the United States we have still been busy with friends, family and fall fair.

  So the first up date is to show the results from the Rockton World's Fair. I entered four carvings and:


  Two of my entries did well.  The other two where good but not as good as the eventual winners.  There is a serious wood carving club in our area and they keep the standards high.


  Also a Gnome update.  You saw the house in the shop on September 13th. Here it is peacefully installed in Nicole's garden.  

  All of these projects do not require many tools or much expenditure.  Give it a try, chip carving is particularly cost effective, really only one knife. 

  cheers ianw 

p.s. get out and see the Fall Colours before they're blown away.


Tuesday, November 27, 2018

Christmas Projects

  It is great to have a work shop handy. On the weekend I was able to work on a simple project with my Grandson. He used both the band and jig saws to cut out a circular frame for his sister and Oma to make into a wreath for their door.  Once he gets totally comfortable with the jigsaw he can make all sorts of things on his own.


  Today I cut out rings for Eva and her sisters to make into Christmas wreaths to sell at a church sale this coming weekend.  I make the rings from door skin and since I have the tools I used them all.  I cut the rough outside shape with my variable speed jig saw, then I drilled a hole in the middle and cut it out.  The outside was cut more carefully on my band saw.  To smooth out the edges I used a sanding drum chucked into a corded drill. I have had the sanding drum kit for years and consider it a must for an hobby wood shop.

  So that was an easy job that didn't require all those tools, but, it sure is quicker and easier with the right tool.

 Next I made a small wooden stand for our latest decoration from 10,000 Villages, we love the local store and the entire organization.


 The metal silhouette of the Manger scene  needed a boost to be seen over the edge of the window frame.  The wood is left over skid. I glued two pieces together and cut them to size with my band and table saw. Having a shop  with tools  makes it so easy....doing these various little things is No Sweat.   Having a shop and tools also makes it easier to customize your project. For example this green piece of wood 18 1/2 in. long, 2  in. thick and 3 in. tall.  A 2 x 4 wouldn't have done the job, something needed to be customized in the shop to show the silhouette properly.

  The last thing I'm working on actually needs a bit of skill not just available tools.


  If you know your children's stories this is Pettsen and Findus and they are carved Christmas ornaments.  I drew the shapes from a story book and then copied the shapes onto basswood.  I cut the shapes out on my scroll saw and have carved low relief.  Next I sanded the pieces and gave them two coats of spray sealer so that they can be painted in their characteristic colours.  I'm hopeful my little Swedish Grandchildren will like Findus and Pettsen on their tree.


  Image result for findus and pettson

  If you are planning Christmas gifts from you shop, better get on it. Christmas Day is less than a month away. ( not that the grand kids are keeping track or anything.)

cheers, ianw

Tuesday, September 18, 2018

Two Kinds of Carving

  Aside from working on the long, long chair rail I have been spending some time finishing a relief carving that I began a while ago.  The carving part is finished, it is the sanding and finishing part that I am doing now.  It seems that final sanding is going to take nearly as long as the initial carving.

  Basswood is the preferred carving wood in this part of the country although butternut is also poplar although getting very rare.
  

  Chip carving is an old folk art style of carving, to put ornaments on to common objects.  The piece I just finished will become the carved top of an art box of some type.  I don't have a plan yet.


  The great thing about chip carving is it takes one tool, a chip carving knife.  I drew my own design last evening and then cut out the chips.  Spray varnish was created for chip carvers.  


a Moor small Chip Carving Knife.

  I am spending time  carving again because I foresee a time without large shop machines.  Carving will keep me playing with wood, and improving my skills without big machines with there mess and noise.  

  Give it a try.

cheers, ianw 
Image result for hand carved


Thursday, September 13, 2018

Chair Rail Carving

The chair rail for our living room/ dining room first section was done and installed a while ago.  Today I spent a couple of hours working on the big section.


  This section of the rail is 7 ft. 4 inches long. Initially I was sanding and putting finishing touches to the relief carving.  After a while I needed to stretch my back and so turned the rail on edge.  I have put a chamfered profile on the top of the rail to make dusting easier.  You can see that I improvised the clamping with hand screw clamps  there are then clamped to the work table and table saw table.  I have four pairs of hand screws in four sizes.  This clamp is a must in a shop in my opinion.

  You can see some of the detail of the relief carving


  and the clamps up close.  I spent about two hours on this today so expect that this will take another 5 or 6 hours to get ready for painting.  It is a bit of a back breaker unfortunately.  I have a detail sander that helps me sand the larger areas but in the end it is job for needle tiles and small sanding blocks. 

 It will look good when it is done.

cheers, ianw


Wednesday, April 18, 2018

In The Shop, taking all the space.

  Currently I have a couple of larger projects on the floor/bench in my shop. I have four feet of the chair rail carved.  There is a bit of sanding to be done and then there is only sixteen feet of carving left. 


  The carving work station is a particular setup. I have have my bench raised to where I can work standing without  being too hunched over and having my back hurt.  This arrangement lets me carve for an hour or so twice a day. I am using two Kreg clamps, and two bench pucks from a previous generation to hold the work piece down.  

   The other project that is taking space and needs drying time is a  table that I am going to refinish. 


   This table was picked up off the street a few years ago in is used to extend our dining room table when the entire family is here.  The table is solid but a bit tired and shabby looking and was always going to be replaced with something new...if we found something. Well.....after five or six years hidden under a big table cloth we've decided to keep the table and I have to fix it and stain it and make it look 'good'. 

 First task is to glue the oak skin down where it has lifted over time.  The oak is not veneer, it is 3/16" think.  I am pleased with that because after it is glued back into place I have a couple places to repair before serious sanding and staining. I think it will be easier to make repairs to thinker wood. At the end I am going to hide its age and experiences by staining the whole thing dark walnut.

  I also picked up a bag of repairs from 10,000 Villages that I will work on while glue/stain/ paint is drying too.  


Wheat Bran and Rolled Oats Bread.

    I like to make stuff all kinds of stuff.  I like to bake bread. My latest is a Swedish loaf featuring wheat bran and rolled oats. It turned out to be a really good bread for toasting. Bread baking is a D.I.Y thing too.

cheers, ianw


Sunday, April 15, 2018

A Box Of Course

  Isn't just about all woodworking box making? or lathe work.  We arrived home from holiday and resolved to do our spring cleaning.  One thing that we discovered in guest bedrooms and our cars were facial tissue boxes 3/4 filled with tissues that had been attacked and savaged by one or more grand children. Why, I don't know?  

  Since I am cheap and love to make things that have a purpose:


  What makes this box interesting as well as useful is 
a: it is made from the wood that was a drawer in the dresser I took apart just before leaving for holiday.  


The thin lumber that was used to make the drawer once sanded and stained had real character.  The lesson learned is to check out old furniture sitting on the side of the road on garbage day.  &


b: 

   I wanted the box of tissues to stay inside the box when it was moved from place to place so I glued a strap made from bicycle inner tube. I used contact cement to glue the inner tube to the box wall.  I have found, over time, that few adhesives are as versatile as contact cement.  Yes it smells and it does take time to set but I just clamp the pieces and leave them over night. 

  This was an easy project that made use of reclaimed materials.  I think I may make a couple more of these and give them to our church to sell at the Christmas bazaar.  

  I have been spending time painting our new windows, and then touching up the paint on the wall around the windows. We then decided to rehang the old roller blinds and each window now needed a valence type of cover, hiding the roller blind.  We bought new windows, from a serious window company. There are three windows, all the same, except the frames are different sizes, but 1/4 inch.  It is also worth noting they are only sort of square. Jeez louise.

  The current project is a bit of a back breaker. (hunched over carving) I am making a chair rail that has shallow relief carving the full length that about about 25 feet of carving.  I will post some pictures in the next blog.  If you look up chair rail photos there is often wainscoting too, I like the look without wainscoting although a design decision will be made one the rail is up.

cheers ianw


Friday, April 8, 2016

Lap Joints, a Puzzle and a Relief Carving.

  Over the last couple of days I have been nursing a sore back but still trying to do some things in my shop.

 I am taking another painting class, this time oil painting and need a way to move damp canvases from studio to home.

  My plan was to make a frame that would go in between the face of two canvases. That way the wet paint would be protected and hidden.
 The frames are made from 1/2 poplar with lap joints for strength without nails.


I cut the joints on my table saw by making multiple passes while holding the wood on my table saw sled. After cutting the joints I used a rasp to clean up the little bits left over. I keep a fairly course rasp close at hand and use it often to tune up little details when working in my shop. I opted not to use dado blades for the few small cuts that needed to be made. If the project had been any bigger I would have taken the time to put in dado blades, they are the correct tool for the job. 


The stop block limited the width of the cut.


  The frames were glued together and left to dry over night.


  Canvases of two sizes ready to go to art class next week. I had the straps in a box in my shop. They are old straps from camera and tool bags long gone. 

  The other two projects are a puzzle for a grand child and a small relief carving I was working on yesterday between laying on my back trying to find a comfortable position.


  When I am finished there will be six different pictures on these blocks, therefore six puzzles.  If the puzzles are too much challenge just now, then the blocks can be played with just as blocks.

  The relief carving is just a time killer.  


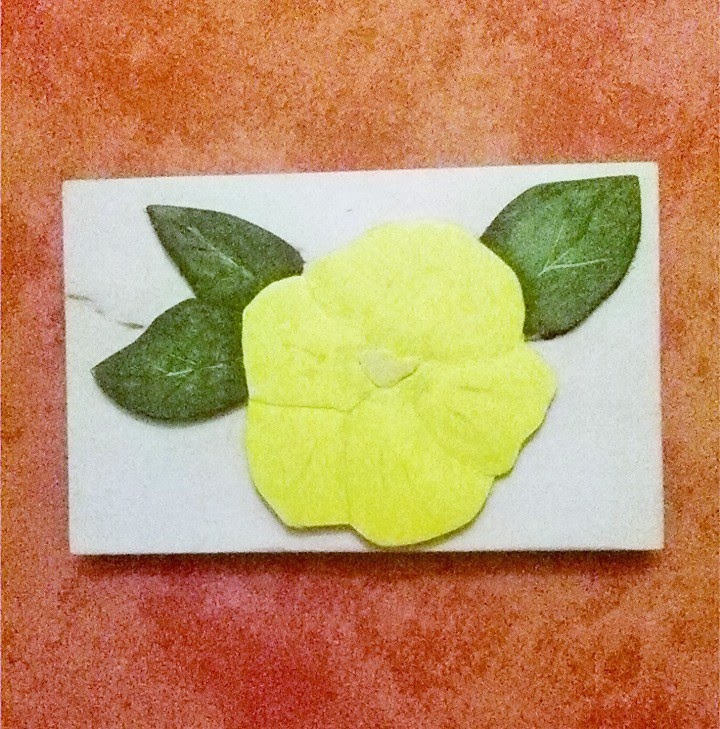
 I think it is a Dogwood. (sort of). I need to add some refinements and then paint it. As I am painting the rest of the puzzle I will get around and finish this.


Monday, October 13, 2014

Happy Thanksgiving


Friday's blog talked about the Rockton World Fair. I have two pieces of wood working and they got second in their category.


4 by 6, relief carved painted bass wood.
 You can see a dark line in the upper left hand corner, that is a dark strike in the grain of the basswood.  A serious carver would have either discarded the piece of wood or used it for a design that was going to have a painted background. I will not enter a piece in competition with a flaw like that again, I'm sure it didn't help my chances with the judge.

3.5 by 8.5 on Baltic birch finished with varnish
  The pieces that came first in those categories were good, but also at least twice as large as mine. Next year I will enter larger pieces, on better wood and I hope pieces with improved technique. Both of these pieces are going to be lids for small boxes, so though imperfect they have a purpose. 


  The Thanksgiving Weekend is over, it is time now to think of Christmas gifts and decorations.  The twisted Christmas tree project by Steve Carmichael is a good looking project that can be folded flat for storage in the off season. 

  The only special tool you'll need to have to complete this project is dado blades for you table saw. A project like this with its many cuts warrants the time needed to set up your dado blades.  I also liked the sled that he made to improve his accuracy and safety (check at 3:17 in the video).  Since the dado he is cutting is 3/4 inch, there will be use for that sled/jig in the future too.

  If you get working on Christmas projects now, there will not be a rush to complete work in December when your schedule fills with family and holiday cheer.  Now if only I would practise what I preach.

cheers, ianw


Friday, February 7, 2014

Depth Measuring Gauge


  Lately I have been working on a couple of relief carvings at the Wednesday morning group.  I have re-discovered my love of this type of carving and am working hard to improve my skills.  Part of the challenge of relief carving is deciding which level various figures in the craving will be and then making sure the levels are consistent.  On a smaller carving I tend toward a maximum of four different levels and usually only three.  The back ground is carved away and I try and have it smooth and level all the way around.  I then decide what should be in the foreground and then try to balance the carving by making some aspects of the picture lower down than the featured item.  For example this carving is a Calla Lilly, the blossom with be the highest,(featured) and then will be leaves at two levels then the background level.


    I am sure that a great artist is able to do all their carving and levelling by eye.  I am not a  great artist, but I aspire to improve as a craftsman.  To make sure that all the various levels   are carved to equal depth regardless of where they appear in the carving I decided I needed some mechanical help.


    The edge is easy.  I make a mark around the edge of the wood and work the  material away until it is even.  Gauging whether I am equally deep into the wood when in the middle of the carving is a much trickier.
 
of course it is red, it is an Ian built jig.

  To make is possible to accurately know whether I had carved away enough material in the middle of the piece I made this depth setting/measuring gauge.


  The gauge straddles the work piece, then I screw the eye bolt down until it just touches the work piece.  I can then check all the sections on level two, or level three against one another.  If the gauge's feet sit flat on the bench while resting on the work piece, the depth is correct.  I haven't bothered with an incremental measurements on this gauge, because the actually measurement are not important, it is the relative/comparative measurements that are important. 

   As a tool this was very to make.  I drilled a slightly undersized hole in the cross piece and screwed the bolt through.  The nut is not really necessary, it just happened to be handy so I set into the cross piece too.  As you can see the eye bolt is much heavier duty than is required but it was was laying around purposeless in my tool box. Instead of going out to buy a bolt, I used what was at hand. 


  I glued the legs on rather than screwed, nailed etc.  I have many good clamps and plenty of good glue.  If there are no medal fasteners in projects connected with craving there are no medal fasteners for you chisels to hit.  Yes, I can't imagine any reason that a chisel would be near this gauge, but.....the precedent of no nails near carving tools is a good one.

Cheers, Ian W