Friday, March 27, 2020

Woodworking and Making

   I was not aware that "making" was a thing as I grew up, because I lived in a family of "makers".  We often made things that we wanted and until computer chips invaded all aspects of life home made things were pretty good.

  I am still a "maker" as well as a wood worker.  Something I have done for years is make books.  I took a book binding course at college 35 years ago and have bound my own note books since then.  Recently I have been making sketch books for my Grand Children.  My most recent book:


6 x 9 inch pages.

    I mixed a variety of techniques to make a sketch book from mixed-media paper and I recycled the card stock from a frozen pizza box for the cover.  I may need to re-enforce the corners before the book is used up.  I  have 24 pages stitched with waxed thread which makes for a study and useful sketch book.  This is an easy thing to do in a 'wood shop' all you need is glue, half a dozen spring clamps and a sharp knife.  I've been doing things with re-used paper for years. 

   While I've been puttering about in my shop my wife has been very busy finishing her latest stained glass project.


  To enable Eva to work as high as she needed we created a platform upon which the ladder stood.  The platform is oak church pew (3/4 inch) Since I have a well equipped shop the wood is firmly clamped together and then clamped to my two saw benches, with the wings supported by stools.  Eva wasn't interested in taking any risks while working on the ladder.

  Eva  carefully hung 60 pieces of cut stained glass to finish the entrance way light fixture.  


    In the wood shop I have been working on a crochet hook case from Eva.


  I opted to drill out the interior of the case.  In the past I have tried to use a router to clear out material but I have not had success.  The router is an excellent tool in practised hands, but mine aren't,  so drilling out the waste material works most comfortably for me.  This particular forstner bit has had its centre bit ground off to make clean up easier.


  These weights hold the inserts down while the glue dries.  My original plan was to use small hinges on this box, but the cheap salvaged hinges would not provide good enough alignment.  I decided to use leather for the hinge.


  The inside of the hook case remains only to be varnished and this project is done.  I will search out a small hook/latch once I am out and shopping again.


  While doing these various small things and waiting for the glue to dry I have been sorting out and throwing away things in the shop.  I knew I saved stuff.  But the saved stuff is beginning to impinge on the reason that it was saved.  So far I've filled a garbage bag with solid wood finishes and useless cleaning rags.  I had many small jars with a 1/2 cup of stain, or vanish, or oil or ..... All of which is passed being useful and it is time it was tossed out.   I have also been sharpening things, my 'day to day'  chisels are over due for attention as are some shop knives.  

  The biggest issue is going to be the back of the shop.  I have a shelving unit that is the catch all, dumping zone for all manner of scraps and found  bits.  Before I get into it in a big way I need to hang another work light in that dark corner.  Have you even noticed that one job leads to another?

  I'm baking bread, varnishing projects and vacuuming the house today, as well as blogging. Really, luckily, I haven't been forced to change my life much.

  cheers, ianw

Friday, March 20, 2020

Social Distance Shop

  Needless to say life is not 'business as usual'.  We did have the Grandchildren here for a few days and have had a few family members around but by Wednesday we have settled into a quiet life.  Nearly everything that takes us out of the house save for basic shopping is closed down.  This maybe a sort of blessing after all, only time will tell.

  I have been spending time in my shop naturally.  I find myself puttering around doing some long delayed maintenance and organizing as well as projects.


  The table and chairs are painted and into action at my sister-in-laws. This furniture set is at least 20 years old. Isn't wood great, with a little effort and a splash of paint another generation will have hours of playtime.


http://blogthetoolstore.blogspot.com/2016/09/claras-clock.html

Clara's Clock

  I while ago the clock's bright tape face began to peal off, I fixed it today. It was time.  


  Generally I don't write reviews of tools.   I was at the Leamington Home Hardware Tool Expo at the end of January 2020 and was talking with Jeff and he was promoting these new saw blades.  I thought it was a good idea and bought a blade with my own money.  This is not a promotion. I have been using the blade on my sliding mitre saw for a few weeks and am satisfied with its performance.  It might be a bit more aggressive than my previous blade, but that could be because it is brand new sharp.  The cut is smooth enough that I am using it to cut a picture frame currently.  I will add a further comment when I turn it around and try the other side, next year sometime.


  Last weekend's shop project was fitting a cover on the upper bunk.  I don't know what inspired my Grandson but he decided he wanted a covered bed.

  I had three thin pieces of wood, off cuts from something, squaring a 2 x 4 I think.


  Since I was balancing two kids in the shop. My Grand Daughter and I were binding our own wooden covered note books like the ones done October 2017.
 

   Kieran and I designed the extension brackets for the hoops and he cut them out on the band saw and sanded them.  Next he used the drill press to predrill the screw holes and we attached the brackets to the bed frame.  While this was going on Clara was sanding the book boards and using the drill press to drill the holes in the boards and the pages for her book.


  I used this project to introduce another and historic wood joinery method. With careful drilling and screwing the thin wood strips could have been attached to the brackets but I wanted the Boy to do his own project.  We put glue on the hoop and clamped it in place while we wrapped the joint with strong string. The back two against the wall where out of my reach so he and his sister did the work, which was great. I know that lashing is always decorative in modern life but....knowing things like this is good for you. (I believe)


  To finish this off we made a draw bridge door, why? why not? I used foam core for the door.  I have found foam core really useful as a building material for kid inspired projects. They can cut it themselves and it is lighter and cheaper than plywood.  The hinges at the top of the door are multi layers of Duct Tape, again cheap and easy for short lived kid projects.


Sunday, March 15, 2020

Table, Two Chairs


  The table was done a while ago, all it needed was to be cleaned up a bit and mostly re-assembled. The chairs on the other hand came with NO legs.   I designed and turned eight legs and recently re-attached them to the seat and back.

  Making the legs was an interesting process. I used some off cut maple stair treads that fell into my hands a few years ago.  Maple was quite wonderful to turn and it was easy to get  it super smooth.  The legs and table are unfinished, my sister-in-law needs to paint the set before turning it over to her grand kids.

  Assembling the chairs was an interesting process:

 First I set up a temporary jig to measure each leg.


  This way I made sure that each leg was the same length to the shoulder at the top.  For a couple of legs I had to cut a little bit off the bottom end.


  This jig helped me hold onto the round leg as I pushed it through the band saw blade. In this photo I am cutting the tenon, but it works just the same.  
  
  The sockets in the underside of the seat were 3/4" and slightly different depths so I assigned a leg to a position, measured the depth and trimmed the tenon accordingly.

  For assembly I dampened the socket and tenor slightly, applied Gorilla Glue and press fit the leg. Once all four legs were attached I used gravity to hold things in place.


  Those lead diving weights are heavy enough to sink a large buoyant man.  With the glue dry I feel that the legs are sturdily enough attached that they don't need braces.  After all the chairs are for really little people.  If need be I can add bracing later.

   I am onto picture frames and hoops for a covered wagon bed, there is always something to do, hooray.
 cheers ianw


Sunday, March 8, 2020

Current Tasks and Distractions

 Currently I am turning chair legs for the children's sized table and chairs.  That is the job I claim to be focused on in my shop at the moment.  In fact I have one leg left to turn and I have each of the chairs prepped and ready for glue up. I suspect that I will finish this afternoon or tomorrow and the table and chairs can be delivered to my Sister-in-Law next week.  My lathe is set up as a standing work station and I am not a great stander anymore and so I don't spend to much time at the lathe in a day, dragging the work out longer.

  So what else have I done with my time? ( while sitting and resting my back)


  This is a small Warrington style hammer I bought very early on in my woodworking journey. I have moved it from place to place, driven 100's/1000's of fine nails with it and until last evening it showed its age.  As I was sanding one of the turned legs my eye fell upon my trusty wee hammer and its dirty, stained handle.  While on a break I sanded all the staining off and refinished the handle and the tool is now as good as new.  I remember the hammer costing more than a hardware store hammer but.....I feel it has paid for itself.

  I had various sand papers out and was working on my newest tool.


  We were recently in Portugal. The weather was great and the people are wonderful. I saw this gardening tool in a local hardware/garden supply store.  I don't know what it is called, I feel that it is for clearing tall grass and reeds and it was so cheap I couldn't resist. ($12.00). Once home I  cleaned off the greasy coating that kept it from rusting in storage and used some 600 grit sand paper to touch up the edges. The left hand curved side is all single bevel blade and it is wicked sharp.  On the right is a hatchet style double bevel blade that is meant for nastier hacking, I guess, it's not as sharp but is thicker and tougher.  Behind our house is an ever expanding weed bed of invasive reeds, I plan to put this tool to work before the growing season begin this year. 


  This reaper/slasher is made in Portugal and as you can see this is a #2 size.  I saw 2,4,6,8, size tools in the store.  It would take a practiced hand and a mighty arm to work with a # 8 let me tell you. 
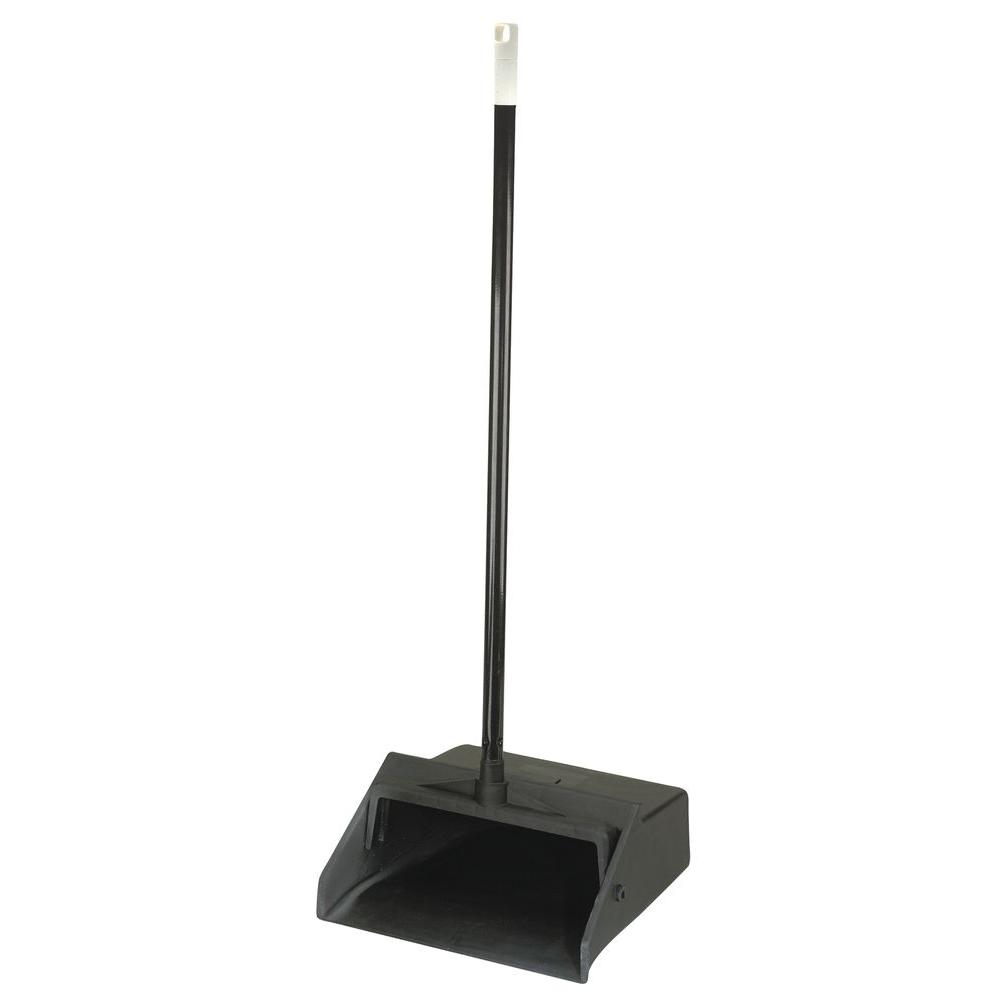
 Every shop needs a dust pan, Image result for dust pan
  

  I am too cheap to buy such things and so I made my own.  For a while I have had a dust pan with a ridged handle.  As I was messing around yesterday I made the handle swivel and so trap the dust as the pan is picked up.  The paint is drying and later to day it will be put to work cleaning up the shavings from the lathe.

 As another side line,

yellow Camellia, usually they are red, white and pink. 

this is what February look like in Ponta Delgada Portugal.


Monday, March 2, 2020

Marble Run and Black Cat


   On the week end my Grandson and I made a quick marble run from scraps in the workshop. He did the cutting to size on the band saw and the whole thing is glued together with hot glue.  He was clever in making the run in sections that went on stairs, it has lots of room for expansion.


 While her brother was making a marble run Clara   made and painted a black cat.


  Projects like this show the difference in age and stage between the two kids.  These also show the real value of having a home work shop.  Making things like this are a great opportunity to do fun things together. 

cheers Ianw