Monday, August 7, 2023

Working in the cool basement

   We've been having a hot and humid few days and so I happily retired to the cool workshop space in our basement.  After spending a few days working in our garage on my friend's patio benches. It was time to gather tools and bring them back down stairs.  There were three trips downstairs carrying clamps, drills, wrenches etc.

 Once I got everything down stairs I took the time to put all the tools away properly. I swept the floor. Then I  spent a hour or so cleaning tools.  Tool handles can get stained with paint and glue over time, when I haven't got a particular project I use the time to clean  and refinish  tools handles.  I also use this time to sharpen  blades and wax them against rust.  It is cool in the basement.  I have music playing and a comfortable stool to sit upon while I puttered away the afternoon. 

  After the housekeeping I took up a couple of quiet projects.  While cleaning I picked up a bit of wood and was inspired to make another spreader.


  I used a carving knife and small plane to shape the spreader then sanded it to 200 grit.  I like these Swedish style spreaders for peanut butter, jam etc. Making spreaders is a peaceful satisfying pass time.  


  I carved and painted this basswood lid years ago.  I finally made the box upon which the lid will sit.  The lid has laid around on my bench seemly forever and now, it will have a purpose.  I made the box from left over baltic birch. Since the box is off cuts I painted it to hide the blemishes. 
 
  I also made another pen nib holder.


  The pen nib holder is made from very dry cedar.  It weighs almost nothing so it is very comfortable to use. I use straight pens for pen&ink drawing. Again this was a project that killed time, and  used a bit of wood 

 We are planning to move this fall and I will have a new workshop space which will be a big project.  It is calming and enjoyable to make small useful things in the shop.

  Cheers ianw


Tuesday, July 25, 2023

Bench Hook for Holding things in Place.

   Newman specials wood work posted a Youtube 

 shorthttps://www.youtube.com/@NewmanSpecialsWoodwork/shorts on a clever type of bench hook.  There are other short videos on the page but the bench hook is one that caught my eye.


  My square, at this time does not have a track in which to run but that may well be next.  I like the idea of this bench hook for planing and certain types of assembly.  I made my hook/square from elm as it is strong and I have a bunch of short boards handy.  The thick cross piece is pine instead of elm.  Elm as well is being strong is heavy and when the thick rail was elm the jig needed to be held down or is would tip off the bench.

  In making the jig I cut a dado for the right angle piece first.  I then used glue and dowels to hold it in place.  My rule with jigs and fixtures is no metal fasteners when they can come into contact with blades of any type.  The angled cross piece is held in place by pocket screws but they are on the back, well out of the way.

At this time I will just clamp the jig to the bench.  This will let me see if it works as well as I think it shall.

cheers ianw

Monday, July 17, 2023

Where I Work

My first woodworking space was the furnace room in our previous house. There was a chest freezer, a water treatment set up, a furnace, a sump pump and a variety of shelves with everything for camping gear to gardening tools.  The space was not large or well lit.  Having said that, I was glad for the space and made some things that have stood the test of time.  I got my first scroll saw while in that shop.

Fifteen years ago we moved here.  The space is much larger even though I still share the space with the furnace. I brought from my old shop my work table/bench, if you search work table you can see various blogs on different aspects of building this work table.

I thought I would do a small review because I wanted to show work holding aspects of this  bench/table.


The top is 40 inches square and 1 1/2 inch thick plywood. The bench stands on two very stout legs and two heavy duty locking casters.  It is very heavy and so quite stable and the casters allow one side to be lifted and the bench to be pushed around.(with some effort).  It therefore gives me a slightly flexible work space. The structure is 3/4 plywood boxes with hardwood framing and supports. The bottom section is divided in half with 3/4 ply and the second section is turned 90 degrees from the lower one. This way there is no racking and I have two through storage sections on each level. The 1 1/2 top sits on two inch rails making the top replaceable without affecting the structure of the boxes. This is the second or third top. 

To make the bench useful I have added dog holes and Kreg Clamps. The dogs are 3/4 and I have a variety of commercial and homemade.  This lets me hold most work pieces for sawing, sanding etc.


On one corner is my "jaw horse" vise.  I don't know it the company that made my vise still exists, but there are a number of companies that make this sort of foot activated vise, usually they have their own legs. I like this one that attaches to the bench.  It can be removed without much trouble if needed.


When I am working of something smaller I can used this clamp table that aligns via dogs on the bench top.


I don't remember what I was doing that I wanted this separate work top, but I is now available for use.

When I was having particular troubles with my back I made a larger raised version to clamp onto the bench and raise my work height a further 8 inches.


This is high enough for me to sit on a shop stool and hold work close for fine repairs, or carving. I to stand without being too hunched over. Usually I clamp the raised section with C clamps.  I like C clamps, they are slow but strong.

For edge planing I set up a system to hold pipe clamps on the raised bench.


Since I have been working on, sanding, painting etc the boards for the patio bench the raised bench has been leaning in the corner of the shop.

Why my thoughts turned to my bench are two fold.  I saw an interested video about bench clamping and I am moving into another work shop soon. 

Next time I will share the video and talk about the shop.

cheers ianw


Sunday, July 9, 2023

Make a Leg

 Last blog I said I would share the method I used to make the legs for the recent table.  I made the legs with mostly hand tools.

  First I glued elm boards together to give me approximately 1 5/8 squares. Making sure the boards were flat and the glue joint was perfect probably  took more time than making each leg.


  I like elm, it is tough, a bit stringy and  has interesting grain patterns.  The leg is 13 inches long and 1 5/8 square.  I am planning to put a 1 3/8 tenon on one end.

  I drilled out a board to give me a jig for both marking and size testing.


  I've made tenons this size before so I kept the jig from making small tables and stools.

I used the hole to mark the end of the leg blank.


  I marked the tenon to be 1 1/2 inches, then cut into the blank's corners with a fine toothed saw .


  Using a chisel, draw knife and rasp I rounded the tenon until it fit tightly into the hole in the jig.  After the tenon was right I clamped the leg into the vise and planed off the four corners to give a rustic hexagon shape. 


  To do this job the tools I used were a saw, a plane, draw knife (just 'cause I've got one), a rasp and vise to hold the work in place. I used my favourite home made wood rasp.


  If you are ever someplace that is selling hacksaw blades by the bundle cheap, go for it. I can't remember what I paid for this bunch of blades but it was pocket change cheap, and I use it all the time.

  A decent drill with a bit of power will drill the holes in the top/seat and the legs can be made to be sturdy and attractive.  A lathe is nice to have, but not all shops have the space or budget, You can make acceptable legs without a lathe.

cheers ianw


Thursday, June 29, 2023

Live Edge Table

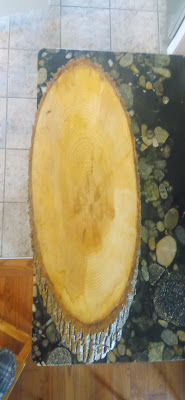
  At the beginning of June I started a couple of live edge projects. The bowl went pretty well and has found a home.  The other project was a much bigger slab, that I turned into a coffee table.


  The table is thirty inches round (more of less) and the emerald ash borer was under the bark the whole way round. The legs are elm, for contrast.  I also used elm because it has a history here similar to ash.  Dutch elm disease killed off thousands of elm trees in Ontario when I was a kid just like the ash borer situation now. 


  I sanded the end grain to 220 grit, sealed it and gave it five coats of water based poly.  Water based finishes are different.  You can see from this photo that it goes on milky, but once dry it is perfectly clear. The table gets delivered to its new home tomorrow.  I hope my cousin will be pleased.

  This time I did not turn the legs on my lathe.  I made them mostly with hand tools.  Next blog will be the process.  I like the results and it wasn't a big a task as you might think.  Once I made a jig for the drilling the legs holes the process was quite straight forward.


  cheers ianw


Wednesday, June 14, 2023

Quilt Rack


  Several years ago I made a quilt rack for out bedroom.  I think I made the rack before I owned a band saw or even a jig saw.  It was all straight lines and worked okay.  For years blankets and quilts were hung on this rack.  


  A while  I decided that the rack did not please my eye. I wanted to improve the line of the design.


  I used my jig saw to cut some of the wood away and give the rack a bit more interesting shapes. After cutting away the  wood I used my Bosch Colt router with a round over bit to add detail to the edges.


The rounded edge and contrasting colour made for a nice effect, I think.

  This project shows me how much my woodworking skills and tools has changed over the years.

cheers ianw


Wednesday, June 7, 2023

Live Edge Projects- finished

 Traditionally 'live edge' projects leave the bark on to add texture and interest to the table/bowl/ charcuterie board etc.  Recently I have made a couple of things following this thinking. My most recent projects made use of Ash wood.  In our area, (ontario) the emerald ash borer beetle has attacked and killed millions of board feet of mature ash trees.  There are worm holes in some of my latest projects, however, when the bark is stripped off  completely the result is interesting and a bit different.


  This is a 12 inch round of ash.  I removed most of the bark, actually most of it dried and fell off, I just helped it along.  The edge is a different colour and texture and this will be turned into a three legged stool/side table. It will sit beside a chair and hold a snack and drink or can be used for a causal seat when there is a crowd. 

  The next barkless project turned out to be amazing.  I had an oval shaped cut off and began carving the inside out to make a bowl.  ( see previous blog) Carving end grain ash is definately a power tool task.  I used my arbortech turbo plane to rough the bowl.  Next was time using grinding bits in a drill and smaller bits in a dremel too. I then used just about every kind and size of sander I own. The finish was mostly one inch sanding disks and hand work.  The inside is good, but the star of this project is when I pried all the bark off.


  The bowl is a 14 inch oval and the entire outside is this mass of worm channels.  I gave the bowl two coats of Minwax water based sealer and two coats of water based polycrylic. I am happy with rhe result, application is real easy and clean up is effortless.  I know I get a good finish more regularly than I did with oil based varnish and never have issues with runs.  

  The bowl is finished inside so will be for dry things, chips etc. only.

cheers ianw


Sunday, May 21, 2023

A Live Edge Bowl

  First a photograph showing the two tools from the last blog. The large sander is more than twice the weight of the 4 1/2 angle grinder.  However it spins slower and is not inclined to burn the wood.


   The current project is designed to feature the worm tunnels that were under the bark.  Since this round of ash is nearly three inches think I decided to make it to a bowl.


   The first thing I did was trace the shape onto a scrap piece of  plywood and screw the round onto the plywood. 


  This way I can clamp the project to the work table in the garage and use my arbortech  turbo plane tool to wear away the inside of the bowl


    This is actually the quick part of the job.  Once the bowl's insides are roughed out it will take some time to sand everything smooth.

  To finish the inside I will use every sort of sander in my shop, next post : met the sanders.

cheers, ianw


Sunday, May 14, 2023

Grinder and Sander - compared

  This morning I set out to do a blog comparing the 4 1/2 grinder with sanding disk to a 7 inch sander with a sanding disk. 

  Both are great tools, sadly I can't show you any pictures of my tools because the computer doesn't feel like letting me load photos today.  I am assured that I am the problem.  However, it could be a software problem, or a hardware problem with my camera: or a software problem or a hardware problem with my computer or.....a software problem or hardware problem with my router or something in the system, but it seems I lack  understanding and unreasonableness  for expecting  digital technology to be reliable.  This is why I like working with wood, no bull shit.

I found the 4 1/2 inch grinder spins so quickly that it is a trick not to get burn marks on the wood,  The big old seven inch disk sander removes lots of material, in a hurry but does leave swirl marks to be sanded away later.

7 inch
4 1/2 inch

  If you look at the various models of these tools available you will see a wide difference in pricing. As a rule, the more expensive tools run smoother, quieter and and run cooler. I expect that you would also get more hours of service life for more money, though I don't know that for a fact. I do not have the cheapest nor the most expensive. My two grinder/sanders are not used every day and as a hobby woodworker I do not use them for long stretches at a time. Consequently these tools of mine are 20+ years old and still going strong.

  If one were to finally die, I would replace it immediately.  Unlike digital technology these are  two tools I can count on.


cheers ianw


Thursday, May 4, 2023

Kerfing plane/saw

    Followers know I have a shop full of tools and yet something I like to do is make more tools.  When I make a tool it connects me to the roots of the craft and because am retired I can spend time navel gazing without worrying about a production deadline.  Actually I just turned 65 years old and had the joy of my prescription drugs plummeting in price, so retired and lucky too.

  Anyway I digress.  I have seem a variety of kerfing plane/saw plans on the net for years. In the past I was able to cut rebates  and dadoes on my router table or table saw just fine  actually,  very accurately and efficiently. Now I like to fool around with hand tool projects and so decided I wanted an accurate way to cut consistent rebates by hand. The solution is the purpose made plane/saw.

  My tool uses a saw blade rather than a plane blade.


    This saw blade is one of a set I bought from a old fashioned hardware store ages ago that has been sitting on a shelf because I knew that one day I would need long random saw blades. This set of blades came with a terrible short lived handle that was supposed to give you a selection of saws that took up little space in your tool box.  The loose blades were really only suitable for baking into a cake and sneaking into a frontier gaol. A few years ago I put a short blade onto a knife style handle for my wife to use as a bone saw (in the kitchen).


  I cut this blade in half with my angle grinder and a cutting disk.  Then I got semi-artistic and shaped the blade to fit better on the wooden handle. 


  The blade is screwed to a piece of 7/8 inch elm with the drilled out area for my thumb. I had the blade cut 1/2 lower than the bottom of the elm back board.

  Stage two was to attach a fence to the other side to create a stop/runner that you allow the blade to cut 1/2 inch in to the work piece.  That way I can cut out a dado/rebate that is 1/2 inch square by sawing until the blade bottoms out. 
 

   The fence is white oak, straight, stable and hard wearing.  I sealed the wood with orange shellac and in use I have found that I need to round the end of the handle since there is more pressure horizontally necessary than I anticipated.  Getting the cut started is similar to getting any rip cut started, a bit tricky.

  I have the other half of this blade left and two more shorter blades with finer teeth. I will certainly keep them, wrapped in oily paper and no doubt they will get used, someday.

cheers ianw


Monday, May 1, 2023

Basic Woodworking?! with sanders

   Sometimes making nice things is quite easy.  If you have really good raw materials and don't get crazy you can get a fine result with almost no skill.


  I was given a piece of ash and all it needed was  sanding and hemp oil to finish.

  I started with  disk sanding using my 4 1/2 angle grinder initially to flatten the slab and then belt sander time with 80 then 120 grit belts.  By the time I was done  the garage was filled with dust even though the door was open.

  Once I got the slab flat and mostly smooth I moved into the shop and used my random orbital sander to get a glass smooth finish.

  I put two coats of water based varnish on the bark and three coats of hemp oil on the face.  We now have a charcuterie board that is nearly three feet long.  Isn't that want every family needs?


cheers ianw


Tuesday, April 25, 2023

Oak

   It has been a while since I posted.  No real good reason, I guess I just needed a break there are now 1,178 published posts on a blog begun January 2011. Over the course of all those months and years many things have changed but one thing has remained constant.  Wood, I love the smell of it, the feel of it and the nearly endless number of possibilities for creation that wood presents.

  The other day while I was cleaning up stray tools in my shop I picked up a piece of wood that had been part of a shipping pallet.  The wood was rough sawn and had been slammed together with big nails to make a skid.  I had a piece about the size of a hard cover novel that was laying under the work bench and when I picked it up I meant to throw it in the burn pile. Something stopped me, the piece of wood was too heavy for its size to be some kind of scrap softwood. 

  The bit of wood turned out to be Oak.  I'm guessing the tree was cut down in the United States somewhere and turned into a skid.  Sad, as it was a really nice bit of wood.


eight inch oak spoon and shallow scoop.

  Both projects were time killers in the evening, and neither really had a fore ordained purpose, but...the wood was just so lovely that burning it would have been a waste.

  Oak is hard enough that these two projects were shaped with power tools, except the bowl of the spoon. * Oak sands beautifully and still maintains the feeling of the gentle ripples in the wood grain.  After shaping and sanding to 600 grit I soaked both pieces with hemp oil, giving it time to soak in before buffing it off.  The finish is slightly golden and silky to touch.  The other thing is my hemp oil is food safe and easy to re-apply down the road.  

cheers ianw

* I have found nothing better for carving a spoon bowl than a hook knife. 


Monday, March 20, 2023

Table Top Game

  My grand kids are board game players, encouraged by their Oma and Mother.  About half the time I play along, and almost never win.  The kids were here for a couple of days over March Break and a game idea showed up in my News Feed, so I decided to make it.

 I don't know what the game is called, it looks like a 'bar top' sort of game, of which there are many.  Mostly the bar room games involve some degree of skill and....some degree of betting to make increase interest.

  This game involves some skill and is moderately interesting without betting too.

all stained and nice to look at.

playable but not pretty.

  The object of the game is to rest the game at an angle on a table top and raise the marble up the board using the two strings to pull the hoop.  You need to steer the marble around the holes, or....it falls in and you dump it out the lower right hand corner, reset the hoop and try again.  To make it more challenging we added the necessity of pulling the marble up, moving across the top and then lowering the marble down. Up turned out to be easier up than down.

  It is a wood working project and so begins with a box.


  It is one of my favourite types of project. The wood is re-claimed. The front and back are cheap, cheap plywood that was a packing case from over seas.  The wood is such poor quality that it is filled with dirt and voids. It was just adequate to it original purpose so re-use is a bonus.  The sides are from old fence boards I picked up one day from the end of a drive way.

  As an aside the plywood was pretty warped so the glue needed nails to help.  I dug out a tool that I bought a long time ago when I had trim to install.  I bought this because I had a bunch of trim as grid work on a ceiling.  I didn't need an air nailer and compressor and hose and, and,and.  The electric nailer drives 1 inch brads, well enough. As a tool that I don't use often, I like that it doesn't need any care or attention for years at a time.  Interestingly I have used it lately a couple of times and now don't store it in the bottom drawer at the back of the shop any longer.


  I bought this long, long before cordless air nail guns were invented.


  The first effort wasn't difficult enough so, back to the shop, more holes and shazam, fun for everyone.

cheers, ianw


Friday, March 3, 2023

Apartment Tool Kit


Sometimes I forget that I didn't always have a workshop in the basement containing nearly every tools my heart desires.  For a few years I lived in apartments and rental properties where I bore few maintenance responsibilities. If sometihing broke, it wasn't my concern, I remember several times leaving a message with the property mananger as I left for work and returned to the problem solved later in the day.  There is something good to be said for that situation.  I was single and working longer days at the time and so ....it was nice to have broken doors and plugged plumbing dealt with by someone else.

  But,,,,

  there were still things that I wanted customised to suit my taste and personal items of furniture that sometimes need to be repaired.

 To fill that need I gathered my first tools together a piece at a time.

My first tools lived in a shoe box in a closet for years. What were the first tool necessities ?

1. a utility knife, with  replaceable blades.  The blades are good for cutting and scrapping and you can abuse them with a clear conscience.

2 a small claw hammer. buy something cleap and basic 10 or 12 ounces is big enough.

3  muiti-tip screw driver and a 6 inch adjustable wrench. Do Not buy cheap versions of either of these tools. Cheap wrenches, slip and can break dangerously.  Cheap screwdrivers have tips that are soft and fairly random in sizing.  Not all Philip's or Robertson tips are equal.

4. decent tape measure and a metre stick.  I bought a heavy duty 25 foot tape forty years ago and it is still the tape I take with me when I am limiting the number of tools I take with me.

5.  Various pliers. needle nose. linemens, water pump  and locking.  Also don't go cheap on these.  You will use them for the rest of your life and cheap pliers will slip, slide and end up having to be replaced while the skin on your knuckles slowly grows back.

6. hack saw, it will cut up junk including old bits of furniture and wood. It is not a surgical tool, but a versitile one. 

These are the tools that will hang pictures, fix bicycles, tighten loose legs, cut up junk, fix lamps, hang fixtures etc.etc etc. and enable various arts and crafts.

If you want to take the next step and move from fixing things to making things all these tools remain useful but... there is a universe of other good, bad, and special tools connected with DIY and making. 

Tuesday, February 21, 2023

Bunny Sized Cello

  My grand daughter began playing cello at school last September, and has made wonderful progress.  In just a few short months she is playing recognizable little tunes and seems to be enjoying her experience.  She also has a favourite stuffed toy that travels with her all the time.  The bunnie was her mother's in fact, and so is wise and well-travelled.
  As an Opa, I am sometimes inclined to flights of fancy for the grandkids. This time:


a bunny sized cello complete with bow.

  It turned out to be a bigger project than I originally thought.  I though I would go into the shop one evening and emerge shortly with a cello.  There turned out to be more shaping, sanding, gluing and staining than I had accounted for.


  I only had a plan in my head for this cello. I had never made one before so I cut out the body from soft wood and the neck from hard wood following a general idea more than a plan.  Initially I thought of making the cello hollow but decided not to make my life that complicated. This bunny sized cello is a toy, not a replica or model. 


  Before I glued the neck on I carved 'F' holes in the body and used dark stain to make then look more realistic.  I also cut slots into the head stock and made a bridge for the strings.


  Poor planning meant there was only room for three stings instead of four and the tuning pegs are pretty ugly, and don't work.  The bow has stretched string instead of horse hair. The pin on the bottom is a long bolt and the strings are stretchy string and the bridge is glued in place.  Not very cello like but it is for a bunny.

  It seemed to be well recieved by  Grand daughter and her bunny so it was worth it totally. 

cheers ianw